
- Create a new App Service Plan. If you have already created then skip this step. App service is like one container or a VM machine. In a single azure app service, you can host N no. of web apps. Based on load you can split your apps to separate app services if required. To create a new app service. First, you need to set a resource group name if you already have created it, can use the same or else can create new. Next, fill the app service name, Select OS as Linux. and then select a pricing plan based on your needs and create.
Note: Selecting Linux is not necessary you can use Windows also. But, if Linux supports it why not use it, Linux App services are cheaper than Windows-based app services.

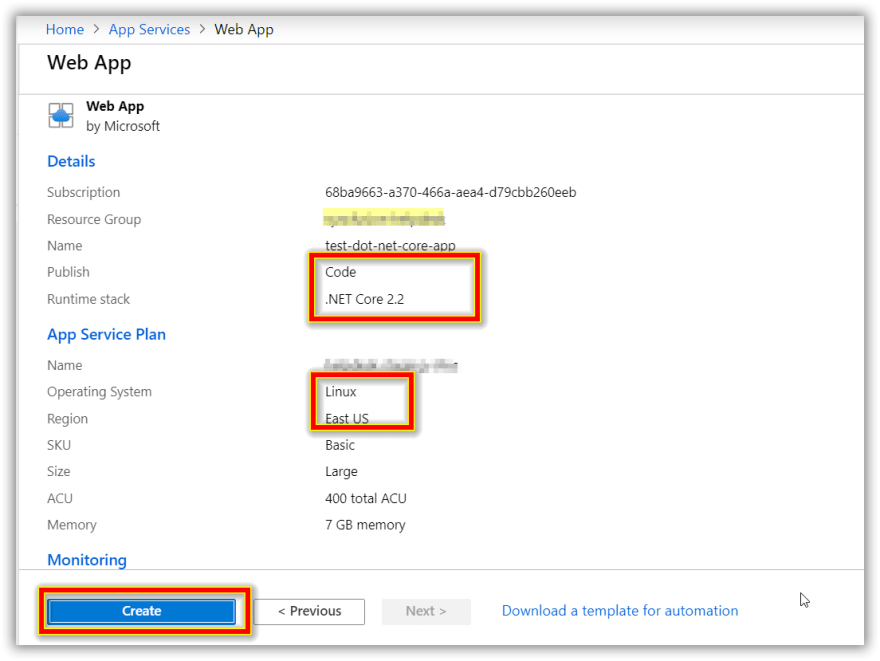
- Once the app service plan is created. Next, you need to create App Service. You can search and select app service. App service is nothing but your web app / API. Create a new app under your app service plan. Select run time .Net Core 2.2 at present .NET Core 3.3 is not listed Azure team is rolling out. But there is a workaround by which you can change to 3.0 later, explained below. Note Select the same app service name created in the previous step, else you will end up creating a new app service plan and will be charged. It will appear in the list once you select a region.
Note: Select the same app service name created in the previous step, else you will end up creating a new app service plan and will be charged. It will appear in the list once you select a region.

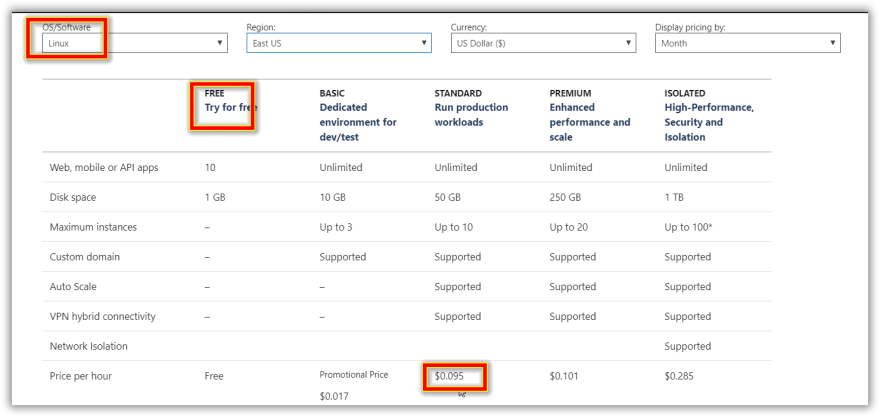
There is a free app service plan available for both Windows and Linux Azure app services
https://azure.microsoft.com/en-in/pricing/details/app-service/windows/
Linux
Windows

- After filling details a next screen will be shown. Review and create app service.
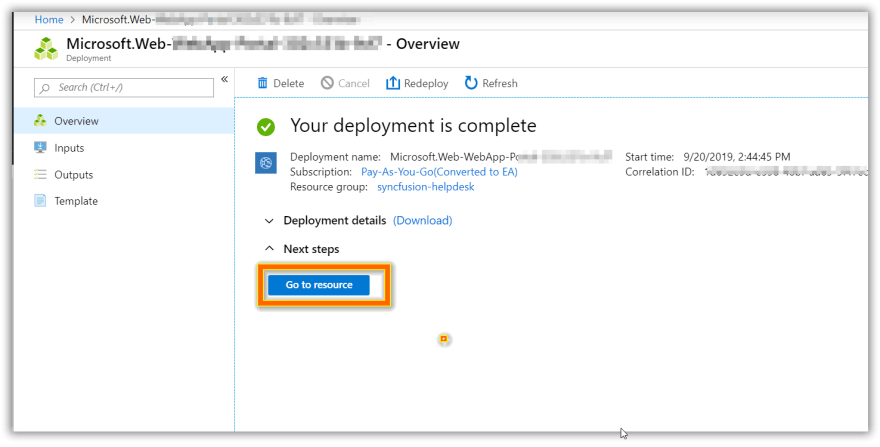
- In a few minutes, the app will be deployed. Click on Go to resource and you will be redirected to your newly created app.
- In your app service. Select Configuration tab -> General settings Change Version to .Net Core 3.0 which was not available in the previous step and save it.

- Next, enable security by going to TLS/SSL Settings — Binding Set HTTPS only — ON and save it.

- Next go to Configuration -> Application Settings Add some setting as shown below WEBSITE_DYNAMIC_CACHE — 0 WEBSITE_LOCAL_CACHE_OPTION- Never (For staging enable this else app will be cached and will not refresh on publishing) WEBSITE_WEBDEPLOY_USE_SCM — false (Set false else you will not able to use VS to publish directly)

- Next, download the publish profile. Now the configuration is Azure is done we can now publish directly site from Visual Studio which is explained below.

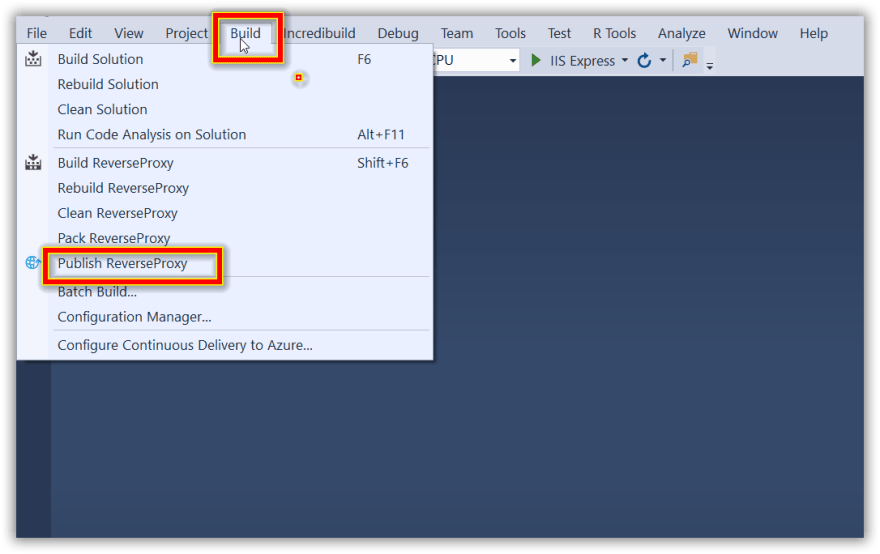
- Open your web app in Visual Studio — 2019. Select Build → Publish
- Next, the Publish screen will open. Click on import and browse the publish file which we download in step 8.
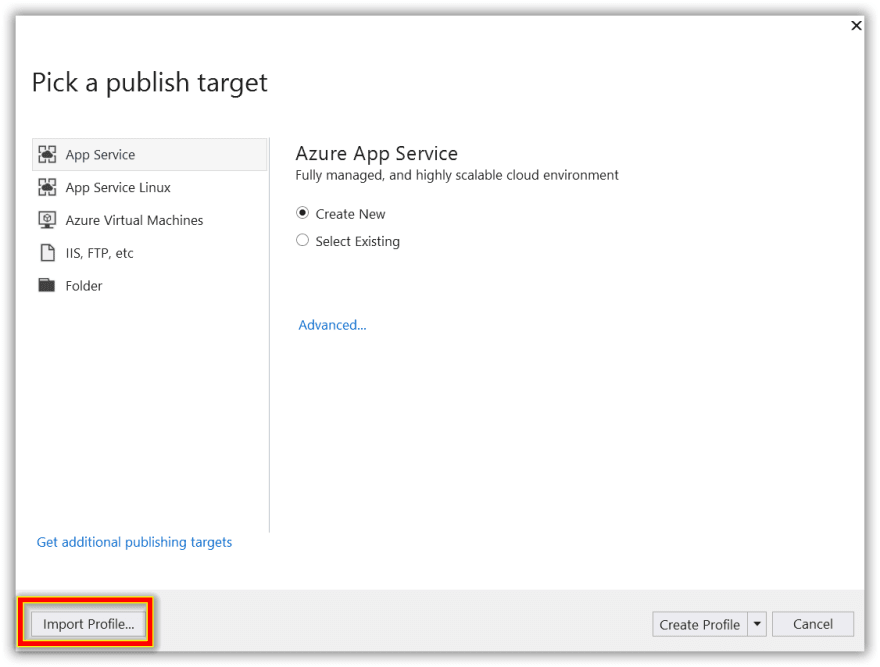
- On importing file two settings will be generated one for web deploy and other for FTP. You can select Web deploy. Finally, click Publish, the site will be published to Azure.

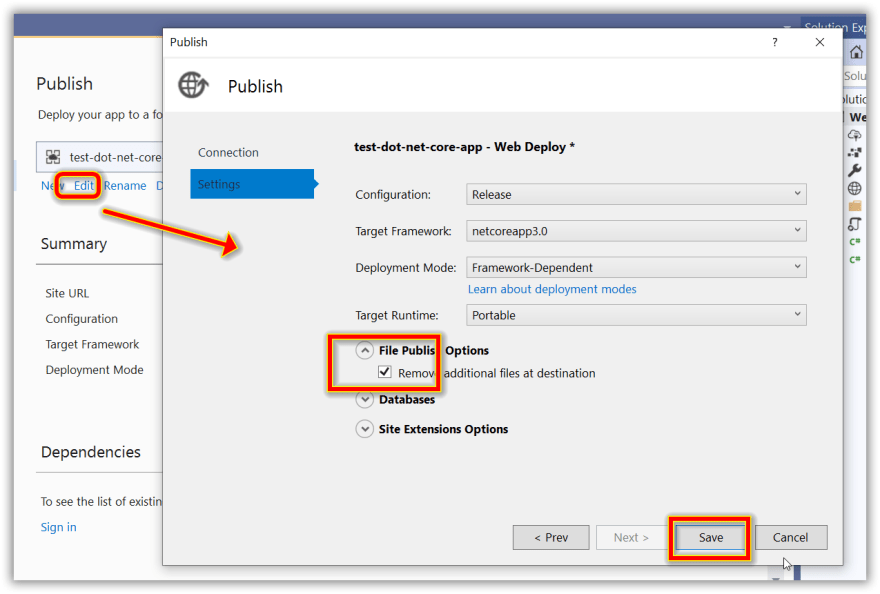
- Before publishing Click on edit and check option — Remove additional files at the destination. Else default azure site will show up in azure.
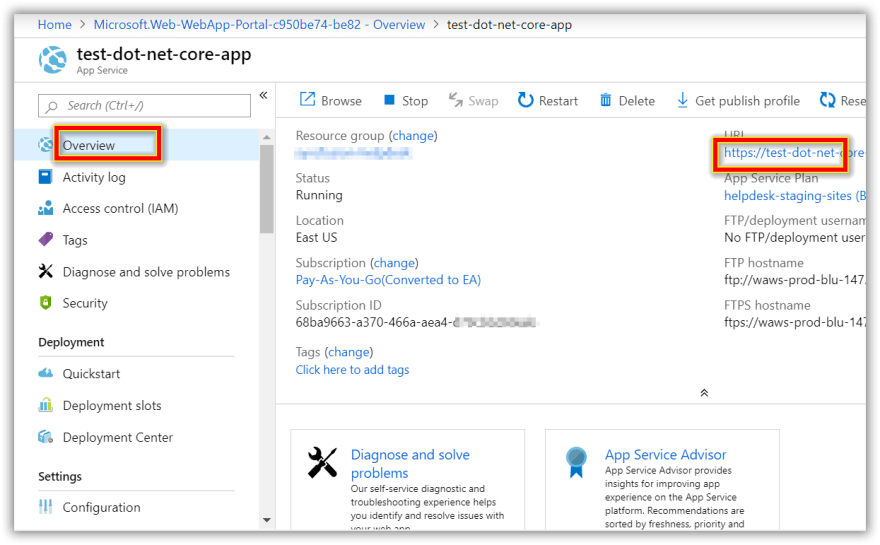
- Go to Azure and restart the app service. Sometime it won't auto-refresh on publishing. So we need to manually restart.

- Next, Click on the Site URL. Now the site is hosted.
Additional Note: You can also configure FTP for publishing, Custom domain can also be mapped in case you don't need default Azure site URL. Firewall can be configured, logging can be enabled. Azure also provides application insights, performance testing, etc.,
Azure also supports Staging and Production slots in the higher plan using that you can first publish in staging slot and can swap to production slot after testing within seconds with almost no downtime.
There is a traffic manager inbuilt using which Azure can load balance your site.
Detailed reference can refer here —
Pricing — https://azure.microsoft.com/en-in/pricing/details/app-service/windows/
Documentation — https://docs.microsoft.com/en-us/azure/app-service/
For more such interesting ASP.NET Core related blogs, resources visit my site https://sharetechlinks.com/

Top comments (0)