
Application migration is the process of moving software applications from one computing environment to another. This can include migrating applications from one data center to another, such as from a public to a private cloud, or from a company's on-premises server to a cloud provider's environment.
Here we will see how we can migrate our server form one AWS account in one region to another AWS account in some other region or in same region.
This is the server(source server) of Singapore region which we are going to migrate to Mumbai region of another AWS account.
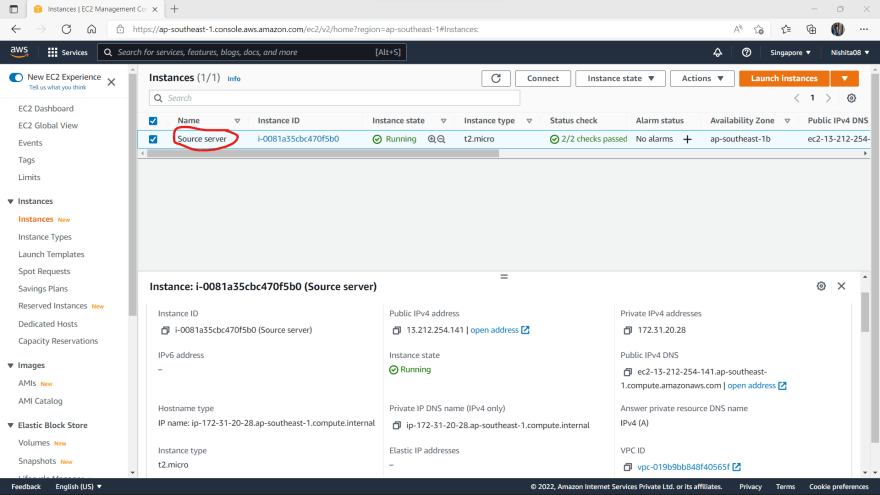
This is the sample web site(downloaded from free-css.com) which is hosted form the source server.

Now in your destination AWS account and go to "AWS Application Migration Service" and click on "Get started".

Then click on "Add servers"
First we need to select our application server type(i.e. Linux)
Then click on create IAM user

Once you created an IAM user by the name "mgn-agent-installer" then copy and past the Access key ID and Secret access key
in their respective place.
Now copy the " Download the installer using this command:" by clicking on the copy button and past it in the Xshell (paste in the source server).


Repeat the same process for step 5( Copy and input the command below into the command line on your source server)

Then go back to the "Source servers" and click on your "Source server name"

Then go to "Launch settings and click on "modify"(EC2 Launch Template)

Now keep things same as shown in the pictures below

The instance type must be same as of your source server, then you need to give a key pair for your destination instance and you also need to specify the subnet inside which you want to deploy the server.

Now assign a security group(allow http, https, ssh)
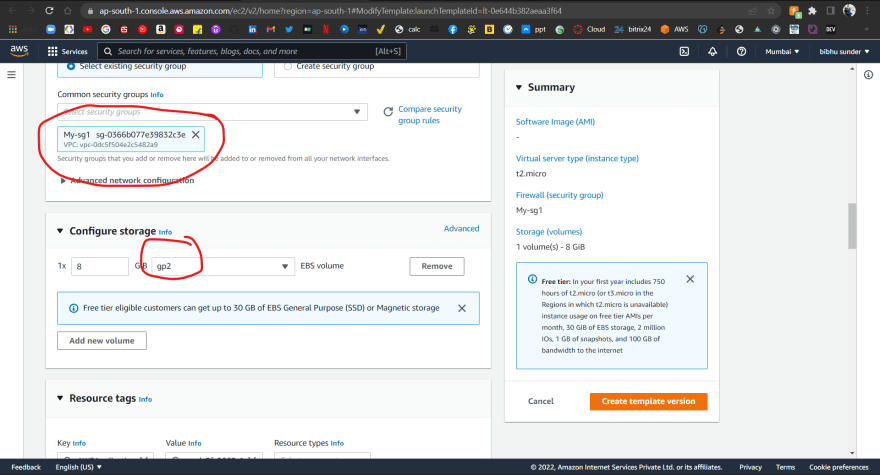


Then click on "Create template version"
Go to "Launch templates" select the template click on "Action" and click on "Set default version".

Now again go to your source server and then click on launch setting and then click on edit (General launch settings) and make "Instance type right sizing" OFF

Now wait until the "lifecycle" becomes "ready for testing"
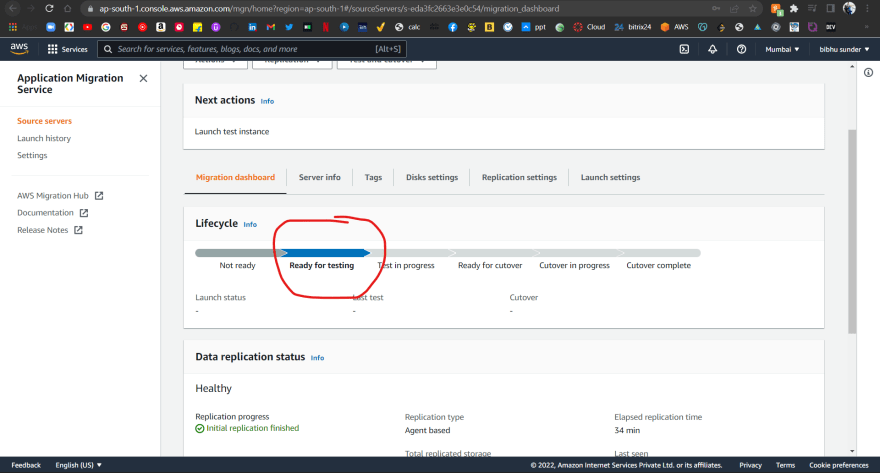
After it becomes ready for testing. Go to source servers and "launch test instances"

If you go to ec2 instances you can see that automatically some instances are created and terminated for testing purpose

wait until the instance(1.compute.internal) is created and status is checked(2/2 check pass)
Associate an elastic IP to it so that we can test weather the web page is successfully transferred to the server or not

Now if you past the elastic IP in the browser you can see webpage is up and running.

So, our testing process is completed.
The next step is to go to the source servers and make the server "ready for cutover"

Then launch cutover instance

Once this instance becomes ready associate the elastic IP to it.

The above server is the final migrated server.
Now go to Application migration and finalize cutover

Then mark as archived

This was the complete process of application migration.
Now you can delete and terminate all the other things except (compute.internal) this server and the allocated elastic IP to it.

Top comments (0)