Schema is an Active Directory component, that defines Active Directory database structure. The schema consists of Object Class and Object Attributes. In this article, we will discuss how to modify the Active Directory Schema attribute.
In the Active Directory schema, it is allowed to add custom attributes. In organizations, there are situations where this option is useful. It is most of the time related to application integration requirements with active directory infrastructure.
Schema
The schema is the blueprint for data storage in Active Directory. Each object in Active Directory is an instance of a class in the schema. A user object, for example, exists as an instance of the user class. Attributes define the pieces of information that a class, and thus an instance of that class, can hold. Syntaxes define the type of data that can be placed into an attribute. As an example, if an attribute is defined with a syntax of Boolean, it can store True or False as its value, or it can be null. A null value has an implementation-specific meaning; it could mean True or False depending on the application using the value.
X.500 and OID Namespace
Active Directory is based on LDAP, which was originally based on the X.500 standard created by the ISO (International Organization for Standardization) and ITU (International Telecommunications Union) organizations in 1988.
The X.500 standard specifies that individual object classes in an organization can be uniquely defined using a special identifying process. The process has to be able to take into account the fact that classes can inherit from one another, as well as the potential need for any organization in the world to define and export a class of their own design.
To that end, the X.500 standard defined an Object Identifier (OID) to uniquely identify every schema object. This OID is composed of two parts:
- The first part indicates the unique path to the branch holding the object in the X.500 tree-like structure.
- The second part uniquely indicates the object in that branch.
OID notation uses integers for each branch and object, as in the following example OID for an object:
1.3.6.1.4.1.3385.12.497
This uniquely references object 497 in branch 1.3.6.1.4.1.3385.12. The 1.3.6.1.4.1.3385.12 branch is contained in a branch whose OID is 1.3.6.1.4.1.3385, and so on.
Every object and attribute within Active Directory has a unique OID (Object Identifiers). Object Identifiers (OIDs) are unique numeric values (with dotted notations) issued by Microsoft and other issuing authorities to uniquely identify objects within Active Directory. When you plan to add a custom attribute, you have to ensure that the OID that you will use is unique, to avoid any possible conflict with any other object’s OID. Conflict of OID within Active Directory can result in replication issues or in the worst case, data loss.
Planning for Schema Update
Microsoft designed Active Directory to hold the most common objects and attributes we will require. However, organizations need an additional field to store custom attributes that are not available by default in Active Directory. Hence the need for Schema Extension arises.
Before we plan for Schema extension, we should consider the below points:
- Schema is common for the entire AD Forest, any change in Schema structure would reflect in the entire forest.
- Schema modification cannot be reverted; any new class or attribute that we create in the schema is a permanent addition. We can disable or redefine schema extensions, but we can never remove them completely.
- If there is an alternate solution available, we should always consider that. For example, we need a custom field called “Roll Number” in our Active Directory. By default, there is no attribute available called “Roll Number”, but there is an attribute called “Employee ID”. So we should consider if some existing attribute can solve the purpose and if yes we should go for that solution instead of extending schema.
- For a large enterprise, we should always involve all stakeholders before we extend the Schema. Also, it should be first deployed in a Test / Dev environment and should be observed for few weeks, before deploying in production.
- Active Directory database should be backed up before modifying Schema.
- Rather than directly adding a custom attribute in the existing class, we should always create an Auxiliary Class and add the attribute there. Then this Auxiliary Class can be linked to the class where the new attribute is required.
- We should always obtain a unique OID, using the script or directly from IANA. Also, we should carefully plan for OID branching. Improper OID branching can lead to a Replication Issue or in the worst case, data loss.
- The Schema can be extended only from that Domain Controller which is holding Schema Master FSMO Role. Also, it requires Schema Admin privilege to modify the Schema.
- During Schema extension, all Domain Controllers in the forest should be available and there should not be any Replication issue. This is because Active Directory wants to ensure that no other Domain Controller has seized the Schema Master FSMO role, and this Domain Controller (from where we are extending the Scheme is indeed the real Schema Master. So if we have any Domain Controller which is not available but still there in AD database, we may encounter a problem during Schema modification.
Please backup Active Directory Database before you proceed.
In order to create custom attributes:
There are three ways to modify the schema:
- Through the Active Directory Schema MMC snap-in,
- Using LDIF files
- Programmatically using ADSI or LDAP.
We will use the first method, using Active Directory Schema MMC snap-in
Step 1: Login to Schema Master Domain Controller, with Schema Admin privilege.
Step 2: Register Schema Management Snap-in.
The Schema Management MMC snap-in is not available from the Administrative Tools menu, like the other Active Directory snap-ins. To use it, we need to first register the Dynamic Link Library (DLL) file for the snap-in by typing the following command at the command prompt:
regsvr32.exe schmmgmt.dll

Click OK
Step 3: Open the Active Directory Schema MMC
Now, go to MMC and open Active Directory Schema.
Win + r > MMC > File > Add/Remove Snap-in > choose Active Directory Schema > Add > Ok
Step 4: Obtain Unique OID.
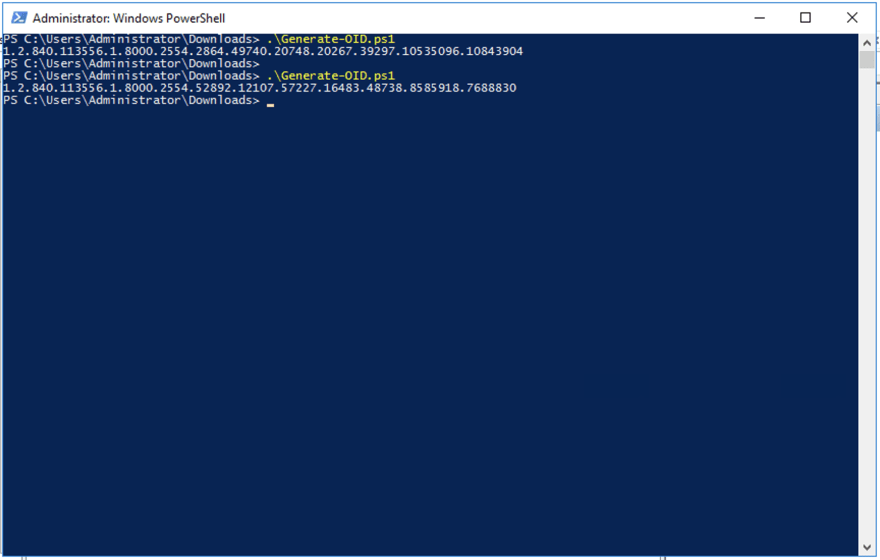
Each and every attribute in the active directory schema has a unique OID value. There is a script developed by Microsoft to generate these unique OID valves. It can be found here.
Download that script and execute it through Powershell.
This script Generates an object identifier (OID) using a GUID and the OID prefix 1.2.840.113556.1.8000.2554
When you run a "Generate-OID.ps1" PowerShell script you might get the message saying “Generate-OID.ps1 is not digitally signed. The script will not execute on the system.”
To fix it you have to run the command below to run Set-ExecutionPolicy and change the Execution Policy setting.
Set-ExecutionPolicy -Scope Process -ExecutionPolicy Bypass
This command sets the execution policy to bypass for only the current PowerShell session after the window is closed, the next PowerShell session will open running with the default execution policy. “Bypass” means nothing is blocked and no warnings, prompts, or messages will be displayed.
Step5: Add new attribute: In my case I’m adding 2 new attributes
secret_key=string
enable2FA=true/false
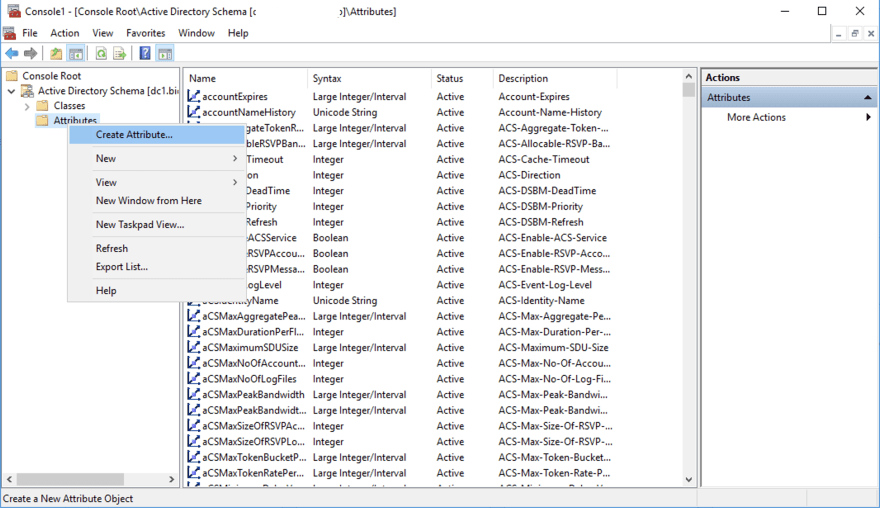
- Rick click on “Attributes” and click on “Create Attribute”. Click “Continue” on the warning message.
- Supply all the required values. Select the Syntax very carefully.
- If you would like to replicate this attribute to the Global Catalog, then select the option “Replicate this attribute to the Global Catalog”. This would make this attribute searchable from other domains in the same forest, but it would also put some additional load on the global catalog. So do not select this option unless it is not required.
- Finally, click “Apply” and “OK”.
Common Name – This is the name of the object. It is only allowed to use letters, numbers and hyphen for the CN.
LDAP Display Name – When object is referring in script, program or command line utility it need to call using the LDAP Display name instead of the Common Name. when you define the CN, it will automatically create the LDAP Display name.
X500 Object ID – Each and every attribute in active directory schema has unique OID value. There is script develop by Microsoft to generate these unique OID valves.
Syntax – It define the storage representation for the object. It is only allowed to use syntaxes defined by Microsoft. One attribute can only associate with one syntax. In below I listed few common used syntaxes in attributes.
| Syntax | Description |
|---|---|
| Boolean | True or False |
| Unicode String | A large string |
| Numeric String | String of digits |
| Integer | 32-bit Numeric value |
| Large Integer | 64-bit Numeric value |
| SID | Security Identifier Value |
| Distinguished Name | String value to uniquely identify object in AD |


As the next step, we need to add it to the user class. In order to do that go to classes container, double click on user class, and click on the attributes tab. In there by clicking the add button can browse and select the newly added attribute from the list.
Add newly created attributes "enable2FA" and "secretKey" to "User class".

Do the same for another attributes "sectetkey"
Now close the "Active Directory Users and Computers" and open again. when you look at the user account we can see the new attribute and we can add the new data to it.
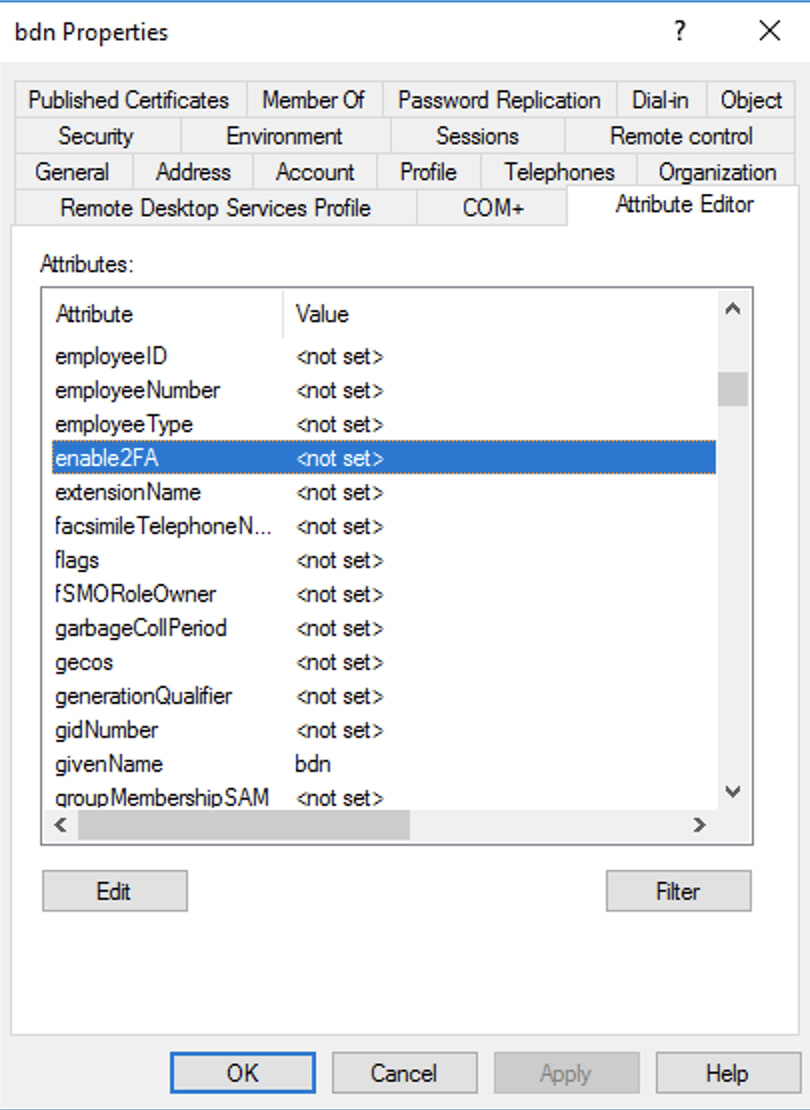
Also, check the second attribute.
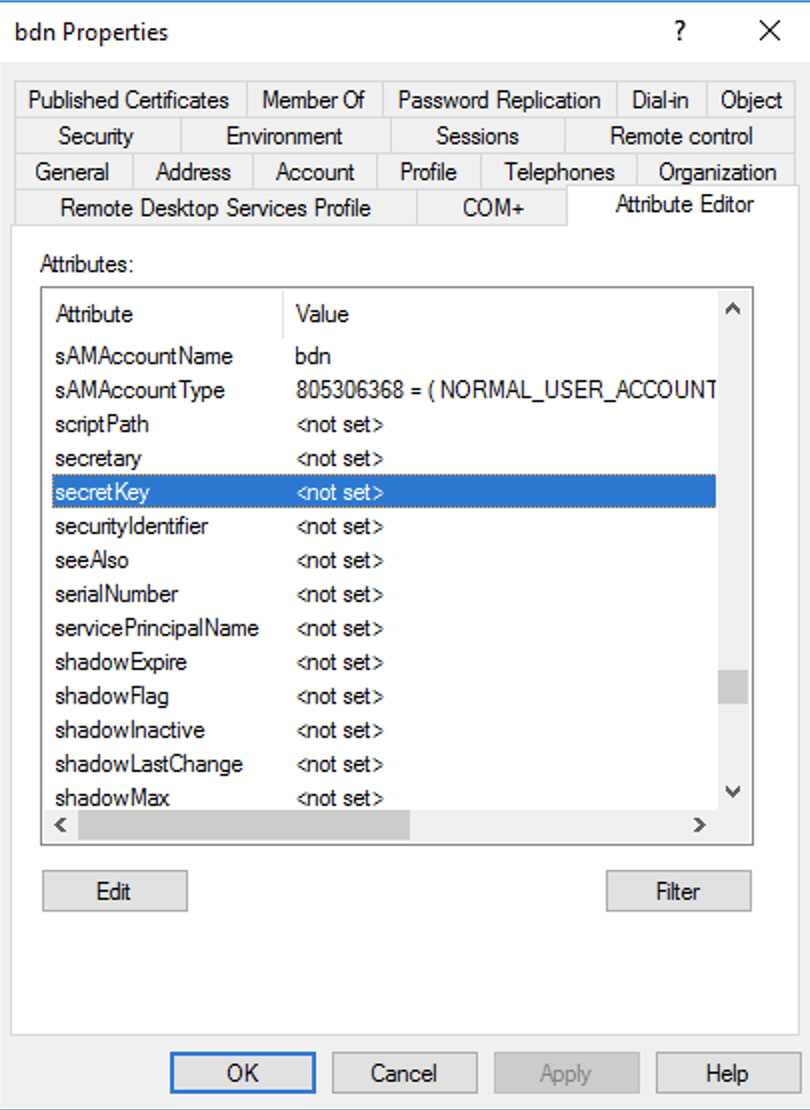
You can set values for those attributes and check through PowerShell whether that value is shown or not.
NOTE: If the value of your attribute is empty then that empty attribute will not be shown if you query through powershell or any application but if it has value then it will be reflected.
In PowerShell
Get-ADUser -Identity bdn -Properties *

Get-ADUser -Identity bdn -Properties secretkey,enable2FA
You have successfully added custom attributes to your Active Directory.
References:
- https://social.technet.microsoft.com/wiki/contents/articles/51121.active-directory-how-to-add-custom-attribute-to-schema.aspx
- https://www.oreilly.com/library/view/active-directory-4th/9780596155179/ch04.html
- https://www.rebeladmin.com/2017/11/step-step-guide-create-custom-active-directory-attributes/#:~:text=In%20order%20to%20create%20custom,dll%20from%20the%20Domain%20Controller
- https://caiomsouza.medium.com/fix-for-powershell-script-not-digitally-signed-69f0ed518715
- https://gallery.technet.microsoft.com/scriptcenter/Generate-an-Object-4c9be66a#content
- https://docs.microsoft.com/en-us/archive/blogs/isingh/adding-custom-attributes-in-active-directory

Oldest comments (0)