Web applications can grow in size and complexity over time, making the addition of new features difficult. Micro Frontend architecture helps with scaling and bundle size and allows multiple teams to develop and deploy different parts of the app. Webpack 5 offers the Module Federation Plugin that lets you create multiple separate builds without dependencies between each other so they can be developed and deployed individually.
Here is a quick intro to the Module Federation Plugin, followed by detailed step-by-step instructions on how to implement it in an actual application.
What is the Module Federation Plugin?
Introduced in Webpack 5, the Module Federation plugin gives developers a way to create multiple separate builds that form a single application. Any JavaScript application that is bundled with Webpack 5.0 or greater can dynamically load or share code and dependencies with any other at runtime.
Why Use Module Federation?
Better way to share code. Expose any code from any application that Webpack supports.
Environment-Independent. Use shared code in different environment web, Node.js etc.
Resolves Dependency Issues. Federated code defines their dependencies and if Webpack can’t find it in the scope, will download it.
Module Federation Configuration Options
Module Federation is configuration-based, so you need to understand the configuration options to expose the correct resources and files and get the needed core libraries and dependencies for your application. Here's the basic configuration:
import {Configuration, container} from 'webpack';

export const webpackConfig: Configuration = {
  plugins: [
    new container.ModuleFederationPlugin({
      name: '',
      shared: []
    })
  ]
};
export default webpackConfig;
Here are the key configuration options you need to know.
name
Name is the unique name for the exposed container. Module Federation uses the ContainerPlugin and when it is initialized, the name you entered will be used as the file name for the container’s relative path.
plugins: [
    new container.ModuleFederationPlugin({
      name: 'shell',
    })
  ]
};
library
Library options help determine how the exposed code will be stored and retrieved. The library property has its own set of configuration options that include name and type. Type is the type of library that can be a variable, module, etc. Name is the name of the library.
I recommend you use the var as the type which will allow you to access your container from the scope using the variable name. Learn More
filename
Filename is used to specify the file name for the output bundle that also serves as an entry point to the bundle.
plugins: [
  new container.ModuleFederationPlugin({
    filename: 'shell/remoteHome.js'
  })
]
remote
The remote option is a list of static remote modules that can be accessed by the local module. Remote can be an array or an object.
plugins: [
  new container.ModuleFederationPlugin({
   remotes: {
        ShellModule: 'ShellModule@http://localhost:4400/remoteHome.js'
        }
  })
]
The above configuration shows an object of remotes, where the key is the name of the exposed container ShellModuleand the value is the URL where the container will be loaded from. The property name is used as the request scope ShellModule@[appUrl].filename.js.
exposes
This is the path to the module or files exposed by the container; it can be an object or an array.
plugins: [
  new container.ModuleFederationPlugin({
  exposes: {
    HomeComponent: './projects/app1-home/src/app/home/home.component.ts',
    ShellModule: './projects/app1-home/src/app/shell/shell.module.ts'
   }
  })
]
With Module Federation you can share not just modules, but other file types. The above configuration shows how to expose two different files. The first HomeComponent exposes a single Angular Component file while the second ShellModule exposes a module.
shared
The shared option allows you to share your node libraries for which the exposed module depends on to run. In an Angular application, the core node libraries you want to share include @angular/core, @angular/common, and @angular/router.
plugins: [
  new container.ModuleFederationPlugin({
   shared: {
      '@angular/core': {eager: true, singleton: true},
      '@angular/common': {eager: true, singleton: true},
      '@angular/router': {eager: true, singleton: true},
      'place-my-order-assets': {eager: true, singleton: true},
    }
  })
]
The shared option uses the sharedPlugin which has its own set of configuration properties. This helps manage how libraries are shared in the shared scope.
Some important config options to know are :
eager: Allows Webpack to include the shared packages directly instead of fetching the library via an asynchronous request. When Eager is set as
true, all shared modules will be compiled with the exposed module.singleton: Allows only a single version of the shared module in the shared scope. This means at every instance, only one version of the package will be loaded on the page. If a scope already has a version of @angular/core, and the imported module uses a different version of @angular/core, Webpack will ignore the new version and use the version already present in the scope.
StrictVersion: Allows Webpack to reject the shared module if its version is not valid. This is useful when the required version is specified.
RequiredVersion: This option states the required version of the shared module. Learn more about the shared option on the Webpack official documentation.
Other Webpack configuration options to be aware of include:
Output: Enables you to set your public path and the unique name for the build. This is useful when you load multiple modules from different remotes. Learn More.
Experiments: The ‘experiments’ feature was also introduced in Webpack 5. It enables some Webpack experimental features like topLevelAwait etc. Learn More.
Optimization: The ‘optimization’ option adds more optimizing features to help make your all build size smaller. Learn More.
Here is a code snippet of the webpack config file with the above configuration:
import {Configuration, container} from 'webpack';

export const webpackConfig: Configuration = {
   output: {
    publicPath: 'http://localhost:4400/',
    uniqueName: 'shell',
  },
  experiments: {
    topLevelAwait: true,
  },
  optimization: {
    runtimeChunk: false,
  }
  // ....
}
Example of Building a Micro Frontend Architecture
The application you'll build has three Angular applications running on different servers with different ports. The idea is that you want to use specific features from each app on other builds. These three applications are bi-directional, which means that they share code with others and consume code from others. To implement this, you are going to use Module Federation to share code and consume shared code from the other builds.
Here's a diagram of what you're building:

This project has three individual Angular applications that share and consume code from each other's builds. This demo project is based on BITOVI’s Place My Order Application. I will split the app into three different applications: Home, Restaurant, and Order.

Here's how these three applications interact:
First Application (app1-home) exposes its HomeComponent.ts file and consumes RestaurantModule from app2-restaurant and OrderModule from app3-orders.
Second Application (app2-restaurant) exposes its RestaurantModule and consumes HomeComponent.ts from app1-home and OrderModule from app3-orders.
Third Application (app3-orders) exposes its OrderModule and OrderComponent.ts file and consumes HomeComponent.ts from app1-home and ResturantModule from app2-restaurant.
Step-by-step Implementation of Module Federation In Angular
Now you can set up Module Federation in the example Angular application.
Begin by cloning the Bitovi Place My Order Application, here and follow along. You can also grab the completed project from this repo.
There are six main procedures you'll need to follow. These are:
- Project Setup
- Update Angular configuration file // angular.json
- Split The Starter Project Into the Other projects
- Configure Webpack files webpack.config.ts
- Add a shared library to hold Module Federation Operations
- Dynamically Load Remote Containers
Step 1: Project Setup
- Clone the repo here and run: ```bash
npm install
- Navigate to the root directory of the cloned repository and run these angular CLI commands to add two new projects:
```bash


ng g application app2-restaurant
ng g application app3-orders
- Open the
angular.jsonfile. You will see three Angular applications.

- Create two new Webpack config files named
webpack.config.tsandwebpack.config.prod.tsat the root of each project directory.
First App: app1-home
touch webpack.config.ts, webpack.config.prod.ts
Second App: app2-restaurant
touch projects/app2-restaurant/webpack.config.ts, projects/app2-restaurant/webpack.config.prod.ts
Third App:app3-orders
touch projects/app3-orders/webpack.config.ts, projects/app3-orders/webpack.config.prod.ts
- Install @angular-builders/custom-webpack npm package. This is to enable you to extend your Webpack configuration and use your custom Webpack settings.
npm i -D @angular-builders/custom-webpack
- Open tailwind.config.js file and add the purge path for the new projects (for more information about tailwind, see blog post here):
/tailwind.config.js
module.exports = {
// ....
  purge: {
    enabled: true,
    content: [
      './src/**/*.{html,ts}',
      './projects/app2-restaurant/src/**/*.{html,ts}',
      './projects/app3-orders/src/**/*.{html,ts}'
    ]
  }
  // ...
};
Step 2: Update angular.json File
With the @angular-builders/custom-webpack package installed, you can edit your angular.json file to include the following updates for each project:
- Update the Architect targets for Browser and Serve to use your custom builder instead of Angular’s default builder.
- Use your custom Webpack configuration file webpack.config.ts and webpack.config.prod.ts.
- Share default styles across projects.
- Set a default port for each project.
Update Project app1-home:
View complete file angular.json

Update Project app2-restaurant:
View complete file angular.json

Update Project app3-orders:
View complete file angular.json

Step 3: Split files from the default project to the other project
- Move the restaurant folder from the directory
/module-federation-starter/src/app/pages/restaurantto app2 app2-restaurant directoryprojects/app2-restaurant/src/app/. Your folder structure should look like this:

- Update the
projects/app2-restaurant/src/app/app-routing.module.tsfile in app2 to include the route path for restaurants ```typescript
// ...
const routes: Routes = [
{
path: 'restaurants',
loadChildren: () => import('./restaurant/restaurant.module').then(m => m.RestaurantModule),
},
];
// ...
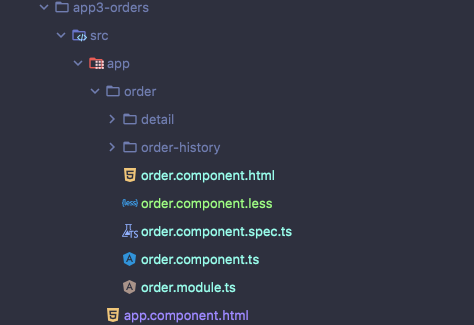
- Move the order folder from the default project `/module-federation-starter/src/app/pages/order` to app3-order directory `projects/app3-orders/src/app`. Your folder structure should look like this:
- Update the `projects/app3-orders/src/app/app-routing.module.ts` in app3 to include the order route:
```typescript
{
path: 'order',
loadChildren: () => import('./order/order.module').then(m => m.OrderModule),
},
- Finally, update the
src/app/app-routing.module.tsin the main project app1-home to: ```typescript
import { NgModule } from '@angular/core';
import { RouterModule, Routes } from '@angular/router';
const routes: Routes = [
{
path: '',
loadChildren: () => import('./pages/home/home.module').then(m => m.HomeModule),
}
];
@NgModule({
imports: [RouterModule.forRoot(routes, {
scrollPositionRestoration: "enabled"
})],
exports: [RouterModule]
})
export class AppRoutingModule { }
Now that you have successfully split your default app into three different applications, you should add serve scripts to your `package.json` file to be able to serve and build each application separately:
```json


// ......
"scripts": {
  "ng": "ng",
  "start:app1": "ng serve",
  "start:app2": "ng serve app2-restaurant",
  "start:app3": "ng serve app3-orders",
  "build:app1": "ng build",
  "build:app2": "ng build app2-restaurant"
  "build:app3": "ng build app3-orders"
  "watch": "ng build --watch --configuration development",
  "test": "ng test",
  "start:all": "npm run start:app1 & npm run start:app2 & npm run start:app3"
}
// ......
Step 4: Update Webpack Config File
Webpack 5 includes Types definitions, which means you can create your configuration using TypeScript and ensure it is strongly typed. Learn More.
Here is an image showing the difference between using TypeScript and JavaScript:

- Update config file
/webpack.config.tsin project app1-home:
import {Configuration, container} from 'webpack';
import dep from 'package.json';

export const webpackConfig: Configuration = {
  output: {
    publicPath: 'http://localhost:4203/',
    uniqueName: 'home',
  },
  experiments: {
    topLevelAwait: true,
  },
  optimization: {
    runtimeChunk: false,
  },
  plugins: [
    new container.ModuleFederationPlugin({
      name: 'home',
      library: {type: 'var', name: 'home'},
      filename: 'remoteHome.js',
      exposes: {
        HomeComponent: './src/app/pages/home/home.component.ts'
      },
      shared: {
        '@angular/core': {
          eager: true,
          singleton: true,
          strictVersion: true,
          requiredVersion: dep.dependencies['@angular/core']
        },
        '@angular/common': {
          eager: true,
          singleton: true,
          strictVersion: true,
          requiredVersion: dep.dependencies["@angular/common"]
        },
        '@angular/router': {
          eager: true,
          singleton: true,
          strictVersion: true,
          requiredVersion: dep.dependencies["@angular/router"],
          },
        'place-my-order-assets': {eager: true, singleton: true, strictVersion: true},
      }
    })
  ]
};
export default webpackConfig;
- Update the
/webpack.config.prod.tsto:
import webpackConfig from './webpack.config';
import {Configuration} from 'webpack';

export const prodWebpackConfig: Configuration = {

  ...webpackConfig,
  output: {
    publicPath: 'http://localhost:80/', // production server,
    uniqueName: 'home',
  },
  };
  export default prodWebpackConfig;
- Update config file
projects/app2-restauran/webpack.config.tsin project app2-restaurant
import {Configuration, container} from 'webpack';
import dep from 'package.json';

export const webpackConfig: Configuration = {
  output: {
    publicPath: 'http://localhost:4204/',
    uniqueName: 'restaurant',
  },
  experiments: {
    topLevelAwait: true,
  },
  optimization: {
    runtimeChunk: false,
  },
  plugins: [
    new container.ModuleFederationPlugin({
      name: 'restaurant',
      library: {type: 'var', name: 'restaurant',},
      filename: 'remoteRestaurant.js',
      exposes: {
        RestaurantModule: './projects/app2-restaurant/src/app/restaurant/restaurant.module.ts'
      },
      shared: {
        '@angular/core': {
        eager: true,
        singleton: true,
        strictVersion: true,
        requiredVersion: dep.dependencies["@angular/router"]
      },
      '@angular/common': {
        eager: true,
        singleton: true,
        strictVersion: true,
        requiredVersion: dep.dependencies["@angular/common"]
      },
      '@angular/router': {
        eager: true,
        singleton: true,
        strictVersion: true,
        requiredVersion: dep.dependencies["@angular/router"]
      },
      'place-my-order-assets': {eager: true, singleton: true},
     }
   })
  ]
};

export default webpackConfig;
- Update the projects
/app2-restaurant/webpack.config.prod.tsto:
import webpackConfig from './webpack.config';
import {Configuration} from 'webpack';

export const prodWebpackConfig: Configuration = {
  ...webpackConfig,
  output: {
    publicPath: 'http://localhost:81/', // production server,
    uniqueName: 'restaurant',
  },
};

export default prodWebpackConfig;
- Update config file
projects/app3-orders/webpack.config.tsin project app3-orders
import {Configuration, container} from 'webpack';
import dep from 'package.json';

export const webpackConfig: Configuration = {
  output: {
    publicPath: 'http://localhost:4205/',
    uniqueName: 'orders',
  },
  experiments: {
    topLevelAwait: true,
  },
  optimization: {
    runtimeChunk: false,
  },
  plugins: [
    new container.ModuleFederationPlugin({
      name: 'orders',
      library: {type: 'var', name: 'orders'},
      filename: 'remoteOrders.js',
      exposes: {
        OrderModule: './projects/app3-orders/src/app/order/order.module.ts',
        OrderComponent: './projects/app3-orders/src/app/order/order.component.ts'
      },
      shared: {
        '@angular/core': {
        eager: true,
        singleton: true,
        strictVersion: true,
        requiredVersion: dep.dependencies['@angular/core']
      },
      '@angular/common': {
        eager: true,
        singleton: true,
        strictVersion: true,
        requiredVersion: dep.dependencies['@angular/common']
      },
      '@angular/router': {
        eager: true,
        singleton: true,
        strictVersion: true,
        requiredVersion: dep.dependencies["@angular/router"]
      },
      'place-my-order-assets': {eager: true, singleton: true},
     }
   })
  ]
};

export default webpackConfig;
- Update the
projects/app3-orders/webpack.config.prod.tsto:
import webpackConfig from './webpack.config';
import {Configuration} from 'webpack';

export const prodWebpackConfig: Configuration = {
  ...webpackConfig,
  output: {
    publicPath: 'http://localhost:82/', // production server,
    uniqueName: 'orders',
  },
};

export default prodWebpackConfig;
Step 5: Add a Shared Library to Hold Module Federation Operation
Take a look at the above Webpack configuration files for each project. Each project exposes code that will be consumed by others. In this section, you are going to create a shared library where you will add the logic to dynamically load federated modules when needed.
- Create Shared Library: Angular Libraries are most useful when you want to perform the same operation in multiple Angular projects. Learn More.
In your case, you want to share your code for dynamically loading federated modules. To create an Angular Library, run this command in the root of the workspace:
ng g library utils
This will generate a new project in the project folder called utils.
- Move
src/app/core/headerfiles to the Shared Library. Because you broke your app into three different apps that would run independently you should share the app header among all three apps so you do not have to duplicate the header component in all the applications. Navigate to projects/utils/src/lib/utils.component.tsand update it to:
import {Component, OnInit} from '@angular/core';

@Component({
  selector: 'app-header',
  template: `
    <header>
      <nav class="bg-picton-blue sticky top-0 z-50 w-full dark:bg-gray-700 mb-4 py-1">
        <div class="max-w-7xl mx-auto px-2 sm:px-6 lg:px-8">
          <div class="relative flex items-center sm:justify-start justify-center header-height-50">
            <svg
              class="flex sm:hidden cursor-pointer justify-start stroke-current text-white hover:text-nav-hover-blue h-6 w-6"
              style="max-width: 20px; margin-left: 20px"
              (click)="showMobileMenu = !showMobileMenu"
              xmlns="http://www.w3.org/2000/svg" fill="none"
              viewBox="0 0 24 24" stroke="currentColor" aria-hidden="true">
            <path stroke-linecap="round" stroke-linejoin="round" stroke-width="2" d="M4 6h16M4 12h16M4 18h16"/>
          </svg>
          <div class="flex items-center flex-wrap justify-center pl-3 sm:items-stretch sm:justify-start">
            <div class="flex-shrink-0 flex items-center">
              <span [routerLink]="'/home'" class="text-white text-lg cursor-pointer"> Place-my-order.com</span>
            </div>
            <div class="hidden sm:block sm:ml-6 ">
              <div class="flex space-x-4">
                <a routerLink="/" routerLinkActive="bg-nav-menu-active"
                  class="border hover:bg-nav-hover-blue hover:text-white cursor-pointer border-white-100 text-white px-3 py-2 rounded-md text-sm font-medium">Home</a>

                <a routerLink="/restaurants" routerLinkActive="bg-nav-menu-active"
                  class="border border-white-100  text-white hover:bg-nav-hover-blue  hover:text-white px-3 py-2 rounded-md text-sm font-medium">Restaurant</a>

                <a routerLink="/order/order-history" routerLinkActive="bg-nav-menu-active"
                  class="border border-white-100 text-white hover:bg-nav-hover-blue  hover:text-white px-3 py-2 rounded-md text-sm font-medium">Order History</a>
              </div>
            </div>

          </div>
        </div>
      </div>

      <!--Mobile Menu-->
        <div class="sm:hidden" id="mobile-menu" [hidden]="!showMobileMenu">
          <div class="px-2 pt-2 pb-3 space-y-1">
            <!-- Current: "bg-gray-900 text-white", Default: "text-gray-300 hover:bg-gray-700 hover:text-white" -->         <a routerLink="/home" routerLinkActive="bg-nav-menu-active"
              class="text-white block px-3 py-2 rounded-md text-base font-medium" aria-current="page">Home</a>

            <a routerLink="/restaurants" routerLinkActive="bg-nav-menu-active"
              class="text-gray-300 hover:bg-gray-700 hover:text-white block px-3 py-2 rounded-md text-base font-medium">Restaurant</a>

            <a routerLink="/order/order-history" routerLinkActive="bg-nav-menu-active"
              class="text-gray-300 hover:bg-gray-700 hover:text-white block px-3 py-2 rounded-md text-base font-medium">Order History</a>
          </div>
        </div>
      </nav>
    </header>

  `,
  styles: []
  })
  export class UtilsComponent implements OnInit {
    showMobileMenu = false;

    constructor() {
    }

    ngOnInit(): void {
    }
}
Step 6: Dynamically Load Remote Containers
Dynamically loading containers ensures that you only load containers when needed, usually when you hit a specific route. It is extremely useful when you don’t want to load all the code for the containers when the app loads.
To implement this, create a new file called
mfe-utils.tsin the shared librarylibfolder, and add the following in the file:
projects/utils/src/lib/mfe.utils.tsDeclare Webpack Variables Type:
/* Webpack types */
type Factory = () => any;

interface Container {
  init(shareScope: any): void;
  get(module: string): Factory;
}

declare const __webpack_init_sharing__: (shareScope: string) => Promise<void>;
declare const __webpack_share_scopes__: { default: any };

/* MFE*/
export enum FileType {
  Component = 'Component',
  Module = 'Module',
  Css = 'CSS',
  Html = 'Html'
}

export interface LoadRemoteFileOptions {
  remoteEntry: string;
  remoteName: string;
  exposedFile: string;
  exposeFileType: FileType;
}
Also in this file you'll see:
Factory: Factory function that returns the requested module from the container.
Container: An interface with get and init methods.
webpack_init_sharing: This is a Webpack default variable that initializes the shared scope and adds all the known provided modules from the local build or the remote container build.
webpack_share_scopes: This is also a default Webpack variable, which initializes the exposed module or the container.
Now you will create a class MfeUtil and add a function into it.
- Add a function to Load Remote Entry. This function will get the remote's code and append it to the body of the document. It takes a single string parameter and returns a promise. The promise resolves when the remote script is successfully loaded on the body of the application. Learn More.
private fileMap: Record<string, boolean> = {};

private loadRemoteEntry = async (remoteEntry: string): Promise<void> => {
    return new Promise<void>((resolve, reject) =>
      if (this.fileMap[remoteEntry]) {
      resolve();
      return;
    }

    const script = document.createElement("script");
    script.src = remoteEntry;

    script.onerror = (error: string | Event) => {
      console.error(error, 'unable to load remote entry');
      reject();
    }

    script.onload = () => {
      this.fileMap[remoteEntry] = true;
      resolve(); // window is the global namespace
    };

    document.body.append(script);
 });
}
- Add Function to Find Expose Module. This function will get the exposed module from the scope. It will first initialize the shared scope using the default name
"default". This name can be changed. Learn More.
This function will then retrieve the particular container from the window, initialize the container, and finally retrieve the exposed module or file and return a factory with the retrieved module. Learn More
findExposedModule = async <T>(uniqueName: string, exposedFile: string): Promise<T | undefined> => {
  let Module: T | undefined;
  // Initializes the shared scope. Fills it with known provided modules from this build and all remotes
  await __webpack_init_sharing__('default');
  const container: Container = (window as any)[uniqueName]; // or get the container somewhere else
  // Initialize the container, it may provide shared modules
  await container.init(__webpack_share_scopes__.default);
  const factory = await container.get(exposedFile);
  Module = factory();
  return Module
}
- Add a function to Load Remote File. This function takes in the loadRemoteFile parameter and returns a promise with the exposed file. This is a public function that you will use in the app routes.
public loadRemoteFile = async (loadRemoteModuleOptions: LoadRemoteFileOptions): Promise<any> => {
  await this.loadRemoteEntry(loadRemoteModuleOptions.remoteEntry);
  return await this.findExposedModule<any>(
    loadRemoteModuleOptions.remoteName,
    loadRemoteModuleOptions.exposedFile
  );
}
The final file will look like this
type Factory = () => any;

interface Container {
  init(shareScope: string): void;

  get(module: string): Factory;
}

declare const __webpack_init_sharing__: (shareScope: string) => Promise<void>;
declare const __webpack_share_scopes__: { default: string };

export enum FileType {
  Component = 'Component',
  Module = 'Module',
  Css = 'CSS',
  Html = 'Html'
}

export interface LoadRemoteFileOptions {
  remoteEntry: string;
  remoteName: string;
  exposedFile: string;
  exposeFileType: FileType;
}

export class MfeUtil {

  // holds list of loaded script
  private fileMap: Record<string, boolean> = {};

  findExposedModule = async <T>(uniqueName: string, exposedFile: string): Promise<T | undefined> => {
    let Module: T | undefined;
    // Initializes the shared scope. Fills it with known provided modules from this build and all remotes
    await __webpack_init_sharing__('default');
    const container: Container = (window as any)[uniqueName]; // or get the container somewhere else
    // Initialize the container, it may provide shared modules
    await container.init(__webpack_share_scopes__.default);
    const factory = await container.get(exposedFile);
    Module = factory();
    return Module
  }

  public loadRemoteFile = async (loadRemoteModuleOptions: LoadRemoteFileOptions): Promise<any> => {
    await this.loadRemoteEntry(loadRemoteModuleOptions.remoteEntry);
    return await this.findExposedModule<any>(
      loadRemoteModuleOptions.remoteName,
      loadRemoteModuleOptions.exposedFile
    );
  }

  private loadRemoteEntry = async (remoteEntry: string): Promise<void> => {
    return new Promise<void>((resolve, reject) => {
      if (this.fileMap[remoteEntry]) {
        resolve();
        return;
      }

      const script = document.createElement("script");
      script.src = remoteEntry;

      script.onerror = (error: string | Event) => {
        console.error(error, 'unable to load remote entry');
        reject();
      }

      script.onload = () => {
        this.fileMap[remoteEntry] = true;
        resolve(); // window is the global namespace
      };

      document.body.append(script);
    });
  }
}
Now that you have finished the logic for getting the container dynamically, you need to export your mfe-utils.ts in the public-api.ts file.
- Open the projects
/utils/src/public-api.tsand add the following : ```typescript
// ....
export * from './lib/mfe-util'
Finally, update your `package.json` file to include a build script for the new lib:
```json


/package.json
"scripts": {
  // .....
  "build:util-lib": "ng build utils",
  // .....
},
- Run the build. This will compile the library that can now be used in your projects. Any time a change is made to this library, you will need to rebuild the library.
Use Shared Library in Project
We’ve covered a lot so far. All of the necessary components needed to start implementing Module Federation are now complete. You can begin putting each component together so you can share and consume federated code in your projects.
- Start by adding the shared library to your app module on all of your projects.
Project 1
app1-homesrc/app/app.module.ts
Project 2 app2-restaurant projects/app2-restaurant/src/app/app.module.ts
Project 3 app3-orders projects/app3-orders/src/app/app.module.ts
@NgModule({
  imports: [
  // ...
    UtilsModule,
  ],
  // ...
})
- Update
app.component.htmlto use the Shared Header. Project 1app1-homesrc/app/app.component.html
Project 2 app2-restaurant projects/app2-restaurant/src/app/app.component.html
Project 3 app3-orders projects/app3-orders/src/app/app.component.html
<app-header></app-header>
<router-outlet></router-outlet>
- Update the Routes to use the federated module and components:
Project 1 app1-home
Update the file src/app/app-routing.module.ts
import {NgModule} from '@angular/core';
import {RouterModule, Routes} from '@angular/router';
import {FileType, MfeUtil} from "utils";

export const mef = new MfeUtil();

const routes: Routes = [
  {
    path: '',
    loadChildren: () => import('./home/home.module').then(m => m.HomeModule),
  },
  {
    path: 'restaurants',
    loadChildren: () => mef.loadRemoteFile({
      remoteName: "restaurant",
      remoteEntry: `http://localhost:4204/remoteRestaurant.js`,
      exposedFile: "RestaurantModule",
      exposeFileType: FileType.Module
    }).then((m) => m.RestaurantModule),
  },
  {
    path: 'order',
    loadChildren: () => mef.loadRemoteFile({
      remoteName: "orders",
      remoteEntry: `http://localhost:4205/remoteOrders.js`,
      exposedFile: "OrderModule",
      exposeFileType: FileType.Module
    }).then((m) => m.OrderModule),
  },
];

@NgModule({
  imports: [RouterModule.forRoot(routes, {
    scrollPositionRestoration: "enabled"
  })],
  exports: [RouterModule]
})
export class AppRoutingModule {
}
Project 2 app2-restaurant
In this project, you are going to load some components asynchronously from the container in your route. To achieve this, you have to use Webpack’s experimental feature called topLevelAwait. In order to use any Webpack experimental feature, you need to do the following:
- Enable
topLevelAwaitprop in yourwebpack.config.tsfile, which you've already done. See above for steps. - Update tsconfig.json to include
/tsconfig.json
{
  // .....
  "compilerOptions": {
    // .....
    "target": "es2017",
    "module": "esnext",
    // .....
    "resolveJsonModule": true,
    "esModuleInterop": true
  },
  // ....
}
With these changes, you are now set to load components in your route asynchronously.
Update the file projects/app2-restaurant/src/app/app-routing.module.ts
import {NgModule} from '@angular/core';
import {RouterModule, Routes} from '@angular/router';
import {FileType, MfeUtil} from "utils";

export const mfe = new MfeUtil();

const routes: Routes = [
  {
    path: 'restaurants',
    loadChildren: () => import('./restaurant/restaurant.module').then(m => m.RestaurantModule),
  },
  {
    path: '',
    component: await mfe.loadRemoteFile({
      remoteName: 'home',
      remoteEntry: `http://localhost:4203/remoteHome.js`,
      exposedFile: "HomeComponent",
      exposeFileType: FileType.Component,
    }).then((m) => m.HomeComponent),
  },
  {
    path: 'order',
    loadChildren: () => mfe.loadRemoteFile({
      remoteName: "orders",
      remoteEntry: `http://localhost:4205/remoteOrders.js`,
      exposedFile: "OrderModule",
      exposeFileType: FileType.Module
    }).then((m) => m.OrderModule),
  }
];

@NgModule({
  imports: [RouterModule.forRoot(routes)],
  exports: [RouterModule]
})
export class AppRoutingModule {
}
Update the projects /app2-restaurant/src/app/restaurant/restaurant.module.ts
So far you might have noticed that you have been loading and consuming your federated code in the application routes. You can also consume federated code directly in a component. For your order form component you are going to dynamically create it with the code shared from app3-orders OrderComponent. Here are the steps needed to achieve this:
- Create a shell component to hold the federated code in
app2-restaurant
ng g c restaurant/mfeOrderComponent --project=app2-restaurant
- Dynamically load the code from the container: Navigate to the newly generated files and update to load remote file in the
ngOnInitfunctionprojects/app2-restaurant/src/app/restaurant/mfe-order-component/mfe-order-component.component.ts
async ngOnInit() {
  const OrderComponent = await mfe.loadRemoteFile({
    remoteName: "orders",
    remoteEntry: `http://localhost:4205/remoteOrders.js`,
    exposedFile: "OrderComponent",
    exposeFileType: FileType.Component,
  }).then((m) => m.OrderComponent);
}
Use retrieved code to dynamically create the component: Import the ViewContainerRef and ComponentFactoryResolver from '@angular/core' then add the following code to the constructor.
order-component/mfe-order-component.component.ts
//......
constructor(private viewCRef: ViewContainerRef,
  private componentFR : ComponentFactoryResolver) { }
//......
Update the ngOnInit function to this:
order-component/mfe-order-component.component.ts
async ngOnInit() {
  const OrderComponent = await mfe.loadRemoteFile({
    remoteName: "orders",
    remoteEntry: `http://localhost:4205/remoteOrders.js`,
    exposedFile: "OrderComponent",
    exposeFileType: FileType.Component,
  }).then((m) => m.OrderComponent);

  this.viewCRef.createComponent(
    this.componentFR.resolveComponentFactory(OrderComponent)
  );
}
Your dynamically created component is ready to be used anywhere in the app.
Finally update projects/app2-restaurant/src/app/restaurant/restaurant.module.ts to include the new component.
projects/app2-restaurant/src/app/restaurant/restaurant.module.ts
import {NgModule} from '@angular/core';
import {CommonModule} from '@angular/common';
import {RestaurantComponent} from './restaurant.component';
import {RouterModule, Routes} from "@angular/router";
import {RestaurantDetailComponent} from './detail/detail.component';
import {FileType} from "utils";
import {mfe} from "../app-routing.module";

  const routes: Routes = [
    {
      path: '',
      component: RestaurantComponent
    },
    {
      path: ':slug',
      component: RestaurantDetailComponent
    },
    {
      path: ':slug/order',
      component: MfeOrderComponent
    }
  ];

  @NgModule({
  declarations: [
    RestaurantComponent,
    RestaurantDetailComponent
  ],
  imports: [
    CommonModule,
    RouterModule.forChild(routes)
  ]
})
export class RestaurantModule {
}
Project 3 app3-orders
Update the projects/app3-orders/src/app/app-routing.module.ts
import {NgModule} from '@angular/core';

import {RouterModule, Routes} from '@angular/router';

import {FileType, MfeUtil} from "utils";

export const mfe = new MfeUtil();

const routes: Routes = [

  {

    path: '',

    component: await new MfeUtil().loadRemoteFile({

      remoteName: "home",

      remoteEntry: http://localhost:4203/remoteHome.js,

      exposedFile: "HomeComponent",

      exposeFileType: FileType.Component,

    }).then((m) => m.HomeComponent),

  },

  {

    path: 'restaurants',

    loadChildren: () => new MfeUtil().loadRemoteFile({

      remoteName: "restaurant",

      remoteEntry: http://localhost:4204/remoteRestaurant.js,

      exposedFile: "RestaurantModule",

      exposeFileType: FileType.Module

    }).then((m) => m.RestaurantModule),

  },

  {

    path: 'order',

    loadChildren: () => import('./order/order.module').then(m => m.OrderModule),

  },

];

@NgModule({

  imports: [RouterModule.forRoot(routes)],

  exports: [RouterModule]

})

export class AppRoutingModule {

}
Start the application
Finally, run the script start:all to start all the projects and view all of the different apps running.
Project 1: https://module-federation-app1.web.app
Project 2: https://module-federation-app2.web.app
Project 3: https://module-federation-app3.web.app

Conclusion
Micro Frontend architecture can be useful in enterprise applications where you need to develop and support a frontend application with independent teams.You can convert both old and new applications to implement Micro Frontend Architecture. You've seen how to create a real-world use case using Webpack's Module Federation. Now check out these additional resources to help you implement your own Micro Frontend architecture:

Latest comments (5)
Hello.
I get this error when running:
npm run start:app1
Schema validation failed with the following errors:
Data path "" must have required property 'outputPath'.
Any idea ?
WHy so complicated ? Lol.
A sample project with 2 apps: One default cra app, second with counter app is enough to demonstrate the idea.
I'm lost at the complexity of the article while the tooling is simple. What's wrong here ?
I am trying to consume an MFE using webpack 5, module federation with angular 13. However when I run the application I am getting below error.
Uncaught SyntaxError: Unexpected token ':'
Error occurring with the below code in webpack.config
new ModuleFederationPlugin({
name: "shell",
filename: "remoteEntry.js",
remotes: {
MfeAccount: "account-mfexyz.com/remoteEntry.js"
},
})
To me everything looks good, but still application not able to access remote MFE, and throwing error. Uncaught SyntaxError: Unexpected token ':'
Please assist.
Can this be implemented for older version of Angular? What is the minimum version of Angular which can be supported by Webpack 5 Module Federation?
Hi @johnchapter, Angular rolled out webpack5 support (which introduced Module Federation) with Angular 11, so I suggest you target Angular version 11+.