
Life during quarantine has been boring without being able to hang out with friends or buy boba. Everyone is looking for new ways to have some fun at home. I recently read a post about creating a memory game using Vanilla JavaScript by Marina Ferreira, and found the techniques she used very interesting. So I decided to create another popular game — Charades — using similar techniques and adding more features; in this tutorial, we will dive a little deeper into JavaScript methods than the original. We will use HTML and CSS to help us build the basic interface of the pages, and we need JavaScript to add functions to the elements of the game. Let's build our own Charades game while learning HTML/CSS and JavaScript!
Live Demo: Charades!
Download Starter Code
Before we start, you can find all the code here: Charades_Game_in_JavaScript Repo.
You can download the folder "starter" directly, or you can also start from scratch by creating 5 HTML files, 3 CSS files, and 4 JavaScript files in one single folder.
Don't get scared by the amount of files to create! Two of the HTML files are just the starting and ending page, which are very simple, and their corresponding CSS and JavaScript files have a lot in common!
All of the HTML files have the same starting template:
<!DOCTYPE html>
<html lang="en">
<head>
  <meta charset="UTF-8">

  <title>Charades</title>

  <link rel="stylesheet" href="{{YOUR_CSS_NAME}}">
</head>
<body>

  <script src="{{YOURJAVASCRIPTNAME}}"></script>
</body>
</html>
All CSS files also have the same template to start, as we are simply setting the background color and layout here:
* {
    padding: 0;
    margin: 0;
    box-sizing: border-box;
  }

  body {
    height: 100vh;
    display: flex;
    background: #f8e5a6;
  }
Pro tip: I like to use Visual Studio Code to write all my code, since it color-codes the code and makes it easier to read. You should try it out if you don't know where to start!
Now that we have all our files created, we can move on to the first step — creating the starting and ending page!

Starting Page and Ending Page
Starting Page
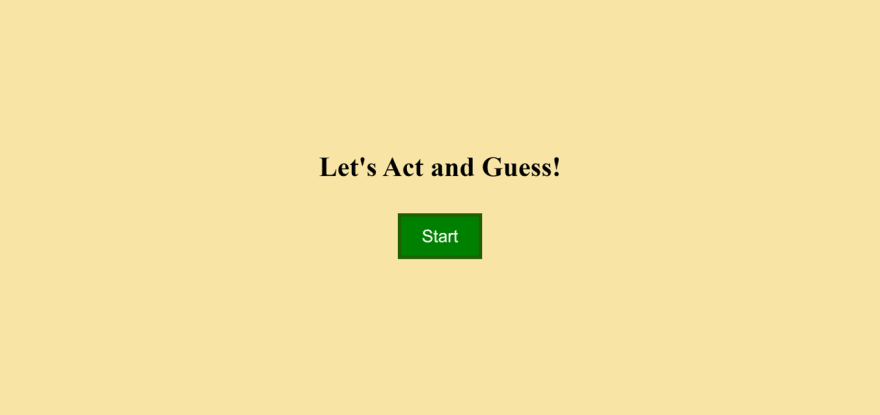
In the starting page, we want to insert a button so the player can click on it to start the game. To create a button, use the <button></button> tag in HTML.
You can play around with the design of the button in the corresponding CSS file "styles.css." Now let's focus on adding the effect when the button is clicked.
in HTML:
First, the tag <button> can have an "onclick" event, which calls the function start():

To make the button work, we need to write the function in JavaScript.
in JavaScript:
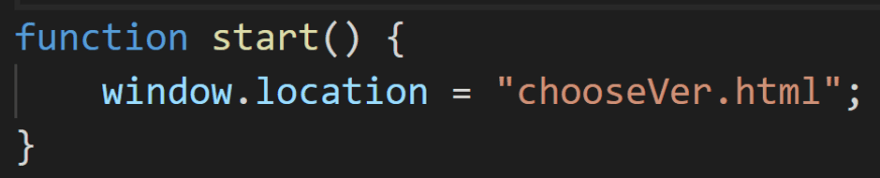
We want to go to the next page of the game when the start button is clicked.
Our function start() {} would only have one line to jump to the next HTML page using window.location.
in CSS:
Here is an example design of the start button, but you can customize yours by playing around with the features.

Tip: Linking Two HTML Files
As we jump from the starting page to the next page, we switch into another HTML file. In order to make this happen, we need to add another line of code in our HTML file.
Use the tag <a href="{{YOUR_NEXT_HTML_NAME}}"></a> under the <head> tag in your starting page's HTML. Now check out the page — the start button should be working!

Ending Page
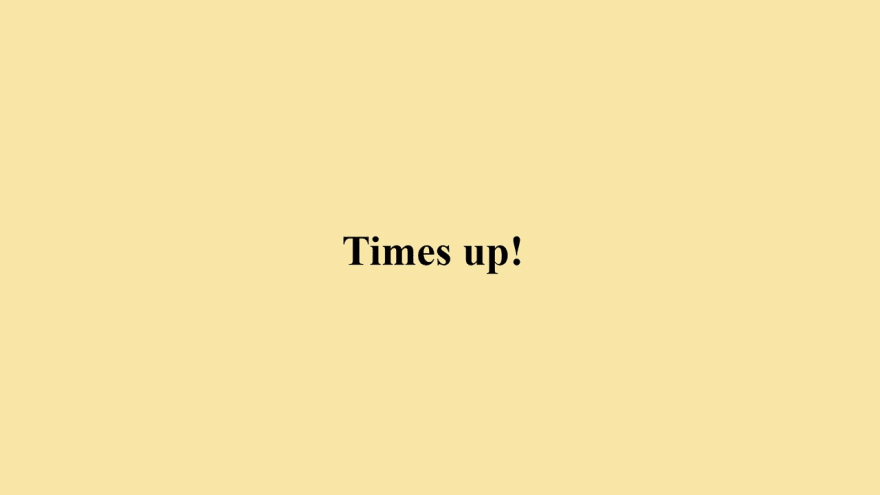
In the live demo, we see that the ending page is just a page with one single line of words to show a finishing message.
To do this, we can simply write in the HTML file.
A simple header shows the message, but we want it to be wrapped by a section so the text is centered.
<body>
    <section>
        <h1>Times up!</h1>
    </section>
</body>
Since this is a very simple page, we don't need a script file to add functions to it. Instead of using a separate CSS file to style the contents, we can simply add style="..." in each tag to customize the style.
Choosing the Game Rules
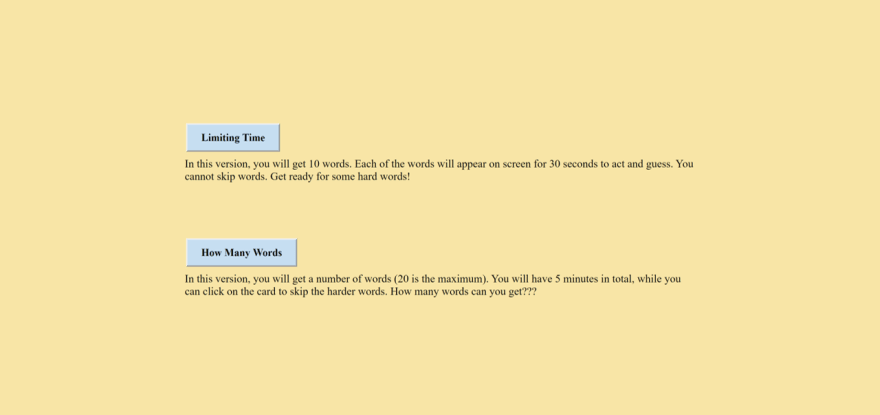
The start button redirects us to the second page where we can choose the version of the game we want to play. One is called "Limiting Time," where you get 30 seconds per card for a set number of words, and the other is "How Many Words," where you get 5 minutes total and you skip through cards as fast as you want to.
Want to play the game right now? Skip this page! Jump directly to the "Creating Animated Word Cards" section about your preferred version!
in HTML:
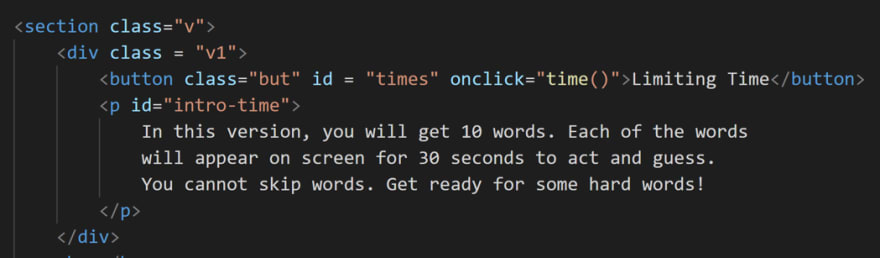
On this page, we want to have two buttons which redirect to two different HTML pages. The buttons are created in the same way as the start button on the starting page. We add a <p></p> tag to create the text box under each button.
Create two <div> tags with class names "v1" and "v2" for the two buttons under the <section> tag first. These containers will allow us to set the positions of the buttons and the text box in CSS later.
Use <br></br> tags if you want to create blank lines.
in CSS:
We can design our button in the corresponding "chooseVer.css" file. To set the style of the entire class, use . in front of the class name, or use # to reference by the ID name. You could also set styles for everything under a tag by directly putting p {...} for the text, for example.
There are many ways to center a text box or a container. Here I set margain-top, margain-bottom, margain-left, and margain-right to auto, and aligned the text of the bigger containers to the center.

in JavaScript:
This process is similar to the starting page, but now we will have two separate functions that correspond to each of the buttons (invoked by onclick) to redirect to different pages.
The function time() {} will take us to "card_time.html", and the function word() {} will take us to "card_word.html".
Challenge: Adding a Countdown Before Redirecting
Not ready for the game to start right away? Let's create a 5-second countdown timer before it starts!
There are many ways to add the timer before redirecting. For example, you can add another HTML file, in which you would create a simple countdown timer, and then redirect to the corresponding page (this is a little hard). You can also add the timer either in the same page as the choosing buttons or separately in the two card files. Here, we will try the most straightforward way by adding the timer in the "chooseVer.html" page and countdown before redirecting.
The timer will be created under the <span></span> tag in the HTML file.

The timer will be exactly the same in both versions of the game. Let's start by adding it to the "Limiting Time" version first.
Part 1: Hide And Show
It is important to notice that in the beginning, before the player makes a choice, the countdown should not be shown on the page, so we need to "hide" the timer at first. Then, after one of the buttons is clicked, the countdown will "show".
Inspired by the original post, we include the "hide" and "show" properties in the CSS file.
in CSS:
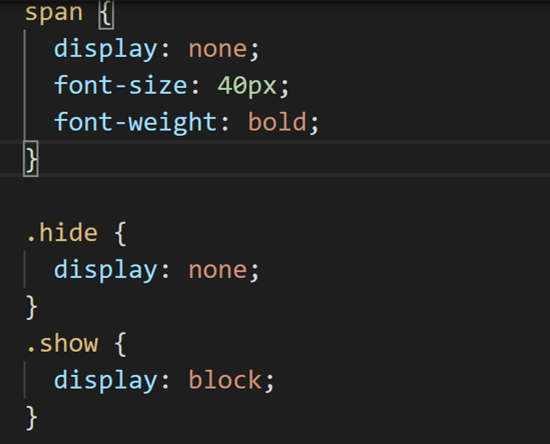
You can set the style of the timer by its tag name. Make sure you include display: none; so that it is not shown in the beginning.
The none indicates it is not showing, and block indicates it is showing.
in JavaScript:
When the button is clicked, we want the buttons and the text to disappear, and the countdown timer to show up. Therefore, inside functions time() and word(), we need to hide the text and the buttons.
Here we will show how to do this in the time() function. This is implemented in the exact same way in word().
- Hide Text:
To select the text boxes, we set a variable
var element = document.getElementById("intro-words");. Then, we modify the style of this element into"hide"by using.classList.toggle(). Do the same for the"intro-time"text box.

- Hide Buttons:
Since there are two buttons under the
butclass, we need to select them withconst button = document.querySelectorAll('.but');, then access each of them by usingforEach(but => but...);The buttons have a style property called visibility, so we set it to "hidden".

- Show Counter:
Same as hiding the text boxes, we select the timer element by its ID
"go", and use.classList.toggleto set it to"show".
Part 2: Timer
Now we can implement the timer.
The idea is that the timer will take in the textContent of our "go" element, and show the modified textContent every one second. We update the textContent by keeping a counter and decrementing it every second.
in JavaScript:
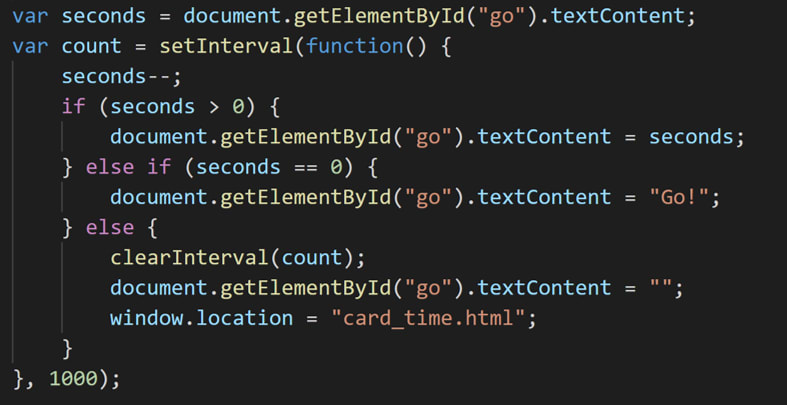
We first create a variable seconds to hold the value in the textContent of our "go" element, which is 5.

Then, we use the setInterval() function to let the timer count down at each second (=1000 milliseconds), and update the variable seconds by using the decrementing operator seconds--;. Then update the textContent with the decremented seconds or whatever words you want (like "Ready?" "Go!").
We use an if-else if-else loop to separate conditions on the seconds. The seconds go into the else statement after 5 iterations, and we use clearInterval(count); to jump to the corresponding page.
Now try out the new feature for your "Limiting Time" version!
Part 3: Copy to Both Functions
in JavaScript:
Simply copy and paste all the code we added in the function time() in parts 1 and 2 into the function word(). Remember to change the redirecting page into "card_word.html"!
Now, try clicking both of the buttons!
Creating Animated Word Cards
Now for the exciting part — creating flipping cards with words on them!
Let's start with creating the elements in HTML.
in HTML:
The HTML of both versions of how you play the game are exactly the same, besides the different JavaScript they include.
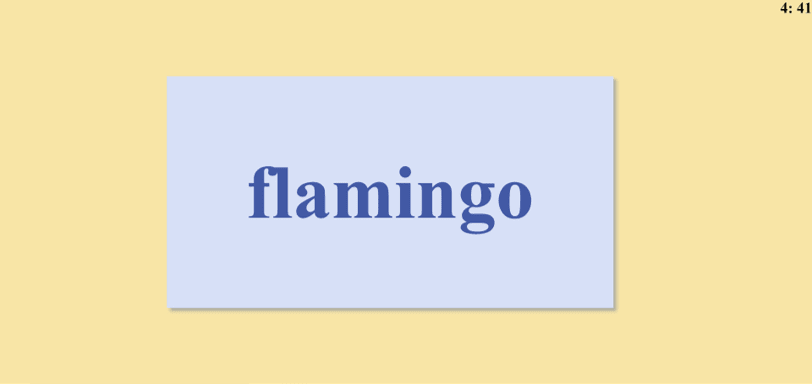
There will be a simple <div> tag holding the card which has a front-face, and a back-face. I adapted a procedure from the original blog to create the flipping card. I also added a timer to give a reference to the players.
<div class="cards" id="words">
    <p class="front-face" id="word2">dog</p>
    <p class="back-face" id="word1">pig</p>
</div>
<span id="timer"></span>
in CSS:
Since both versions have the same HTML elements, we do not need to create separate CSS files for each design (but you can if you want the cards to look different).
Besides the design of cards, there are some important features to add to make the card flips. I mainly adapted these CSS codes from the original blog post, because the flipping effects are very fluid and attractive. However, instead of flipping them vertically, I flipped them horizontally, so we have transform: rotateX(180deg);.
You can find my full CSS code here.
Note: This is a little tricky. Since I used the same CSS codes from the original blog, the back-face is shown in the beginning as the first word, so I named it id="word1". I'll refer to all the words as word1, word2, etc. to make it more clear.
"Limiting Time" Version
In this version, we want to use a timer to keep track of the time that each card has been shown, and flip the card when 30 seconds is up. The total game will last for 5 minutes. Play this with your friends to see how many words you can guess right in 5 minutes!
To do this, we can write a function function flipWord() {...} which flips the word, and then starts the timer. When 30 seconds is up, call flipWord() again and reset the textContent of whichever word was hidden, which will now be the next word shown. The first word when the game starts is the back-face of the card, and the next word is the front-face of the same card. However, after the first flip, if we flip the card again, the back-face shows up again. So we want the next word to be on the back-face of the card before we do the flip. Let's break this process up and implement it in JavaScript.
in JavaScript:
- The First Flip:
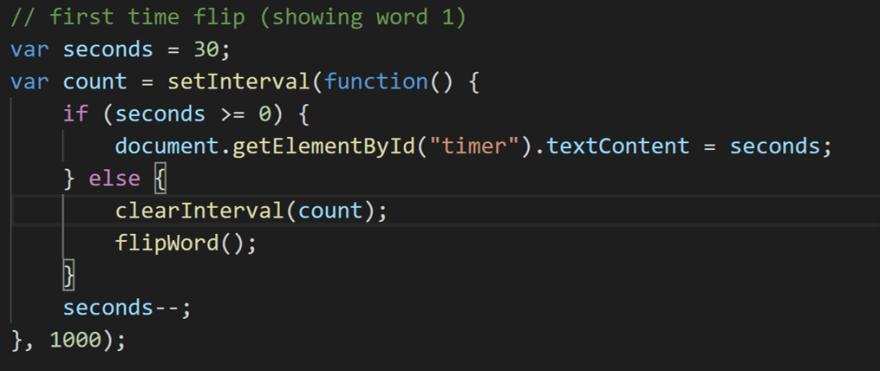
The first flip is different from the rest, because
word2is already there and we do not need to reset any words. So we use the samesetInterval()function from our previous timer and callflipWord()instead of jumping to the next window. Set the time to 30 seconds.
Check out the timer implementation in part 2 of the "Challenge: Adding a Countdown Before Redirecting" section under "Choosing the Game Rules" if you skipped that part.
-
flipCard()Function: When we callflipCard(), we want to set the style corresponding to the "flip" we declared in the CSS file. This is similar to the "Hide and Show" strategy we used in the previous section. So we would simply have one line here:document.getElementById("words").classList.toggle('flip');
Go back and check out part 1 if you skipped it!
- Keep Flipping Cards and Resetting Words:
After the first flip, a new 30 second countdown should start, so we add the same timer again in the
flipWord()function aftertoggle('flip);'. Now we are seeingword2on the screen, andword1is being hidden in the back. This is the time to changeword1secretly! How do we do that?
Here we want to keep the single HTML file and add a counter to keep track of the new word.
Declare a counter var word-num = 1; outside of the function. It starts at 1 because we already flipped the first card. Then, the counter is incremented by 1 each time a word is guessed. In this way, we can keep track of how many words we have been guessed.
The function should look like this:

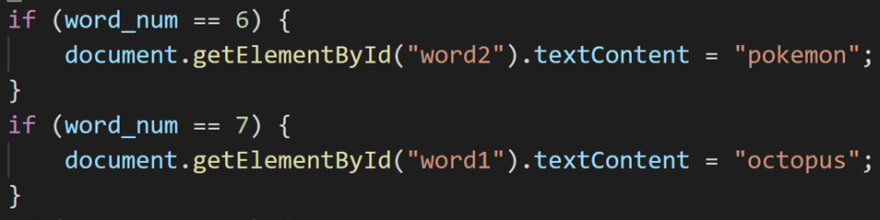
Now we reset the word each time by using if statements to check the word_num conditions. Remember that resetting words means changing the textContent of word1. Also be careful to note which word we are changing at each word_num, word1 or word2.
Here is an example of how to set the 6th and 7th word.
- Finish Flipping:
After 10 words have been shown, we jump to the
endpage.htmlwhenword_num == 11.
Congratulations! Now we are done with the "Limiting Time" version. Try it out!
"How Many Words" Version
In this version, we want to flip the card whenever the player clicks on it. We set a timer of 5 minutes, which is how long the game lasts, and you count how many words you get right!
To do this, we first need to have a function flipWord() to flip the card when we click on the card. This is a little different from the button clicking process, which we will look into shortly. We also want to recursively call flipWord() and reset the next word.
in JavaScript:
- Clicking to Flip:
This is a little different from clicking the button, because we are clicking an element with the tag
<p>, which does not have anonclickfeature to add. So we need to add it ourselves. As shown in the original Memory Game, we useaddEventlistener()to tackle with this clicking.

Now when we click on the card, the flipWord() function is called.
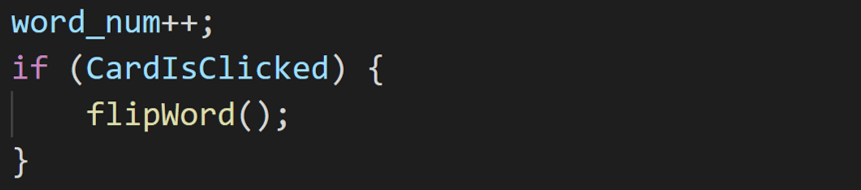
flipWord()Function:
Similar to the "Limiting Time" version, the function will have a line ofdocument.getElementById("words").classList.toggle('flip');, an incrementation ofword_num, and a call toflipWord()again.Resetting Word:
We still have a similar strategy of resetting words by checkingword_num, and changing the corresponding word'stextContent. However, how do we know when to flip the card again? We know that we should flip the card whenever the card is clicked, and we usedaddEventListener()to indicate the first time to flip the card, so what about the recursive method?
Here we create another functionclicked()and a Boolean variableCardIsClickedto indicate if the card is clicked. This strategy to check the clicked card is also introduced in the original Memory Game, but we will be using it differently.

We know that CardIsClicked = true if we click on the card, so the flipWord() function should be called recursively if CardIsClicked == true.
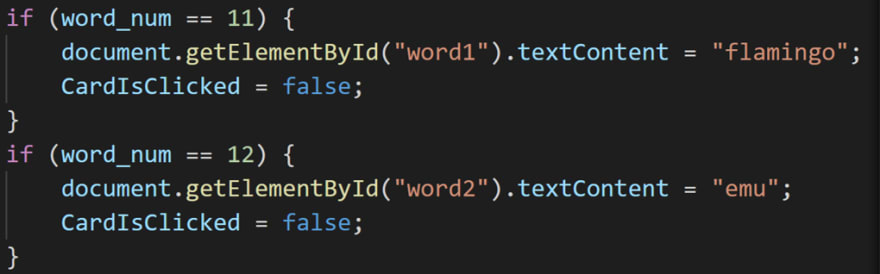
We can reset the words in the exact same way as in the "Limiting Time" version by checking the word_num conditions. However, after every reset, we want to make CardIsClicked = false, because we want to keep showing it until the next click.
I made this version with more words since you can skip unwanted words, but the words and numbers are all up to you!
So now the resetting should look something like this:
We are almost finished! This version should already be working pretty well, but it will only go to the end page when you click through all the words. But remember that we have a time limit! Let's create another timer.
- Timer
setTimeOut(): This time, we are not updating the time whenever the card is flipped, but rather using one clock to track the time. We still use the samesetInterval()function as in all the other timers we've been created. However, this time we have both minutes and seconds, and we can print out the message a little clearer.

You can add window.location = "endpage.html" in this else loop, but I want to introduce another technique to redirect the page. That is the setTimeOut() function.

While the setTimeOut() is very useful if you do not want to show the countdown and redirect right after a certain amount of time, setInterval() shows the countdown. These two strategies are both fairly straightforward.
Now we are done implementing the "How Many Words" clicking version! Time to check out the full game. Refer to the finished code in the repo if you get a different output.
Conclusion
Congratulations again on following through this tutorial and creating your own Charades game! Now you can customize it and play with your families and friends.
Advanced Challenges: Potential Improvements to the Game
While this is a fairly easy and straightforward example of making a Charades game using HTML, CSS and JavaScript, there are some more advanced features we could implement in these game pages.
- Would you be able to combine the two versions, where you can click on the card to skip or you finish before 30 seconds and want to move on, but you still want to keep a timed 30 seconds on each card?
- Would it be possible to generate words and assign them to each card when flipping?
- Would there be a way to let us input the words (either being asked on the webpage or write them as a list in the files) and randomly assign them to the cards, where it would not show up in the original order we input the words in?
Try answering these questions for a challenge!
I hope you had fun learning HTML/CSS and JavaScript. You can use the skills you learned in this tutorial to keep building upon this game or try making a new one!

Top comments (0)