
Galaxy Wearable Store (GWS) is the app store for Galaxy wearable devices of Samsung. GWS is strongly region-dependent, just like other aspects of the device (you have to do some software hacking for a device purchased in one region to use Samsung Pay in another region). Being able to run with non-Samsung devices means that it cannot rely on the region-of-sale on the phone (and for some reason they didn’t choose to use the region of the device), GWS decided to use the region of your SIM card on the device to determine the store location.
This would lead to 2 consequences:
- You won’t have access to the store when you don’t have SIM card on your phone;
- You will lose your access of previous purchases if you swap for a SIM card in another country (they will come back if you swap back your SIM card).
So, for whichever reason you might want to switch store location for your Samsung wearables, if you have an Android phone that can run Xposed (or any of its fork) here’s a way to do it.
Steps
First of all, you should at least have installed Xposed (EdXposed, Virtual Xposed, Taichi, etc. should also work). If you have payment services like Samsung Pay and Google Pay on your phone, take care of them and don’t let them know that you have Xposed installed.
For the trick to work, we are going to use XPrivacyLua module and its Pro companion app (free). Install them, enable and restart.
Then open the app, look for the Galaxy Wearable app, and the plugin for your device, tick their checkboxes.

In each of the 2 apps, expand them and tick Read Telephony Data row.

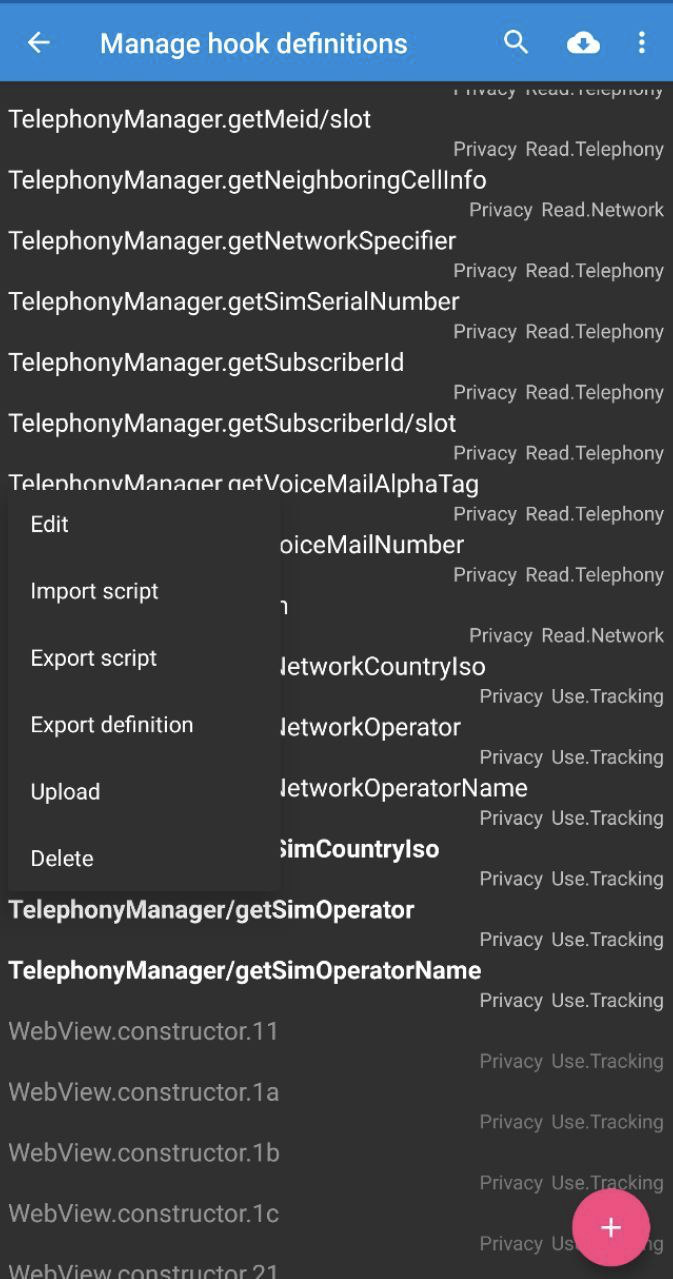
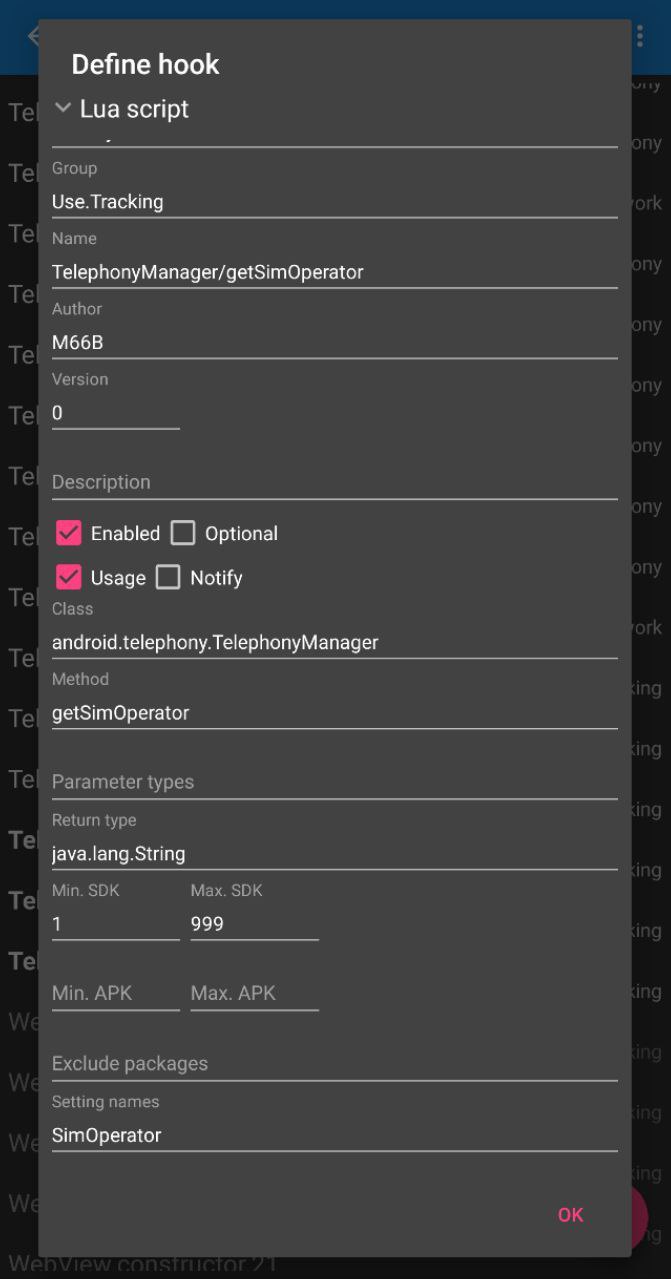
Go to Manage hook definitions in the menu of the companion app, tap on TelephonyManager/getSimOperator, then Edit. Scroll to the end where you see the box Settings names, enter SimOperator.
Save the following code on your phone as a file named TelephonyManager_getSimOperatorName.lua.
-- This file modified from XPrivacyLua source code.
-- Licensed under GPLv3 or later.

-- Copyright 2017-2019 Marcel Bokhorst (M66B)
-- Modified by Eana Hufwe, 2020.

function after(hook, param)
    local result = param:getResult()
    if result == nil then
        return false
    end

    local fake = param:getSetting("SimOperator")
    param:setResult(fake)
    return true, result, fake
end
In the same Manage hook definitions screen, tap TelephonyManager/getSimOperator then Import script. Look for the file you just save in, and select it.
Then go back to the home screen of the companion app, you should see a new box says SimOperator in the list. You can put in the MCC-MNC code of your desired operator in your chosen region here. The MCC-MNC code should be a 5 to 6 digit number. For example, one code combination for AT&T could be 310 for MCC and 510 for MNC, then you should put 310510 in this box to switch to that region.

When you’re done, tap Save, and force restart all Galaxy Wearable-related apps.
Note: If you are already using XPrivacy and enabled Read telephony data hook for other apps, all these apps will get the SIM operator you set just now. If you don’t want this to happen, you need to do these settings per-app, which requires you to pay for XPrivacyLua Pro.
P.S.: What do the shapes in XPrivacyLua’s logo mean? It looks kinda like the tail half of fish to me.
The post Switch Galaxy Wearable Store Location using XPrivacyLua appeared first on 1A23 Blog.

Top comments (0)