
If you are looking for an easy solution to dealing with reliable authentication then you have come to the right place. Passport is a set of authentication middleware for your Node.js server that allows you to use authentication from widely popular and secure companies such as Facebook, Google, Twitter, GitHub, and so many more. This ultimately takes a lot of work off your hands from having to deal with the security of storing user data and takes away the hassle of creating a new account for users.
Pre Flight Checks
First things first, get your file-base set up, a basic front end, a database, and your Node.js server set up. For that I recommend using Express since it is really easy to set up. I also recommend setting up a separate file to deal with your authentication routes since the authentication process will be fairly isolated. If you want to follow along with me I will be using the passport-google-oauth20 strategy for passport. And finally be sure you go get yourself credentials for authentication from whatever service you chose. Here is the one for google that I am using.
Takeoff
Ok first step, require passport in your main server file, along with cookie-parser. That will make dealing with cookies a breeze. Alright now we are going to leave that for a minute to go set up our strategy in a separate file. Here's the requirements you want for this file:

Here we are bringing in our User model from our database setup because in our strategy setup is where we tell it what to do with the profile information it retrieved from google or the whatever other strategy you choose. Next we are going to use our strategy in Passport by using, you guessed it, passport.use() like so:
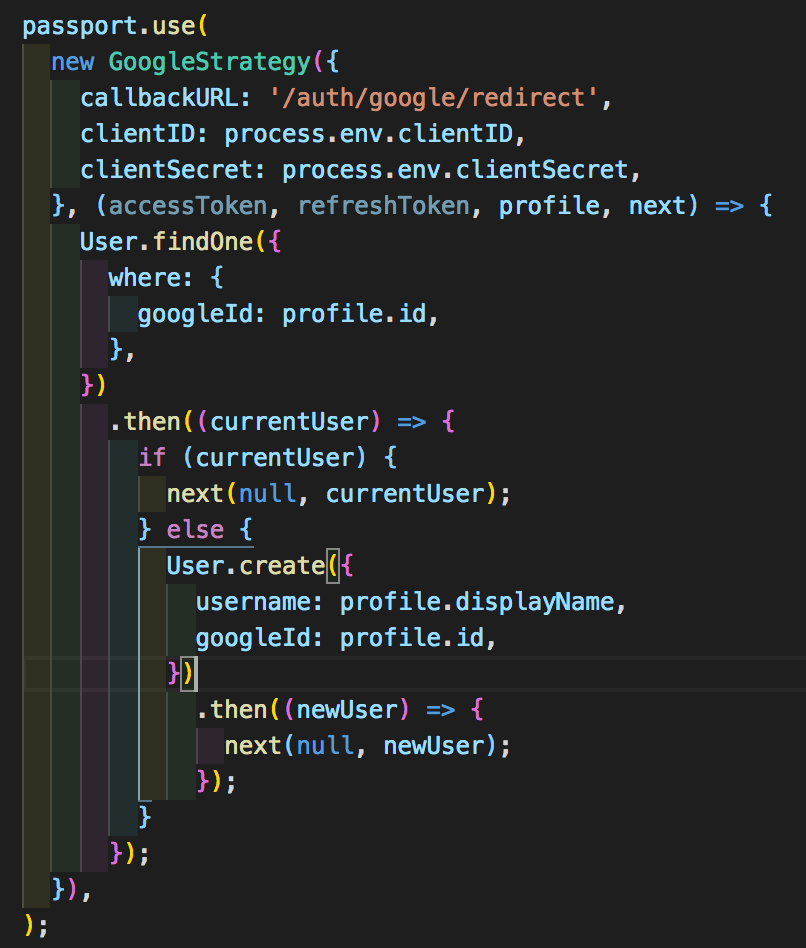
The first argument the strategy takes is an object with the endpoint you want the login to redirect the user to, and the clientID and clientSecret that you got from google (or other service). The second argument is a function for what to do with the info the authentication sends back. We are going to ignore the accessToken and refreshToken parameters of that function for now as they aren't necessary for a basic authentication. The next step is to verify if the user that logged in is already in your own database and if not to create one using the profile info you got back from them logging in. and finally the last step for it is to make sure you call the next function with the user that logged in as the second argument since we are dealing with middleware after all.
The Journey
Take your time, enjoy the learning. Journey before destination
Landing
Alright, time to go back to our main server file. Here we are going to set up two things, first our cookieSession like so: 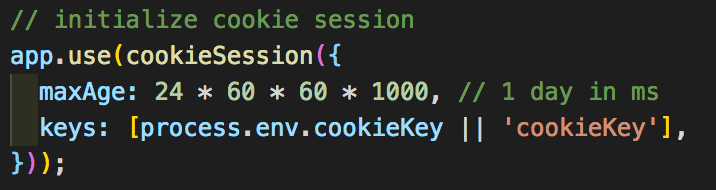
this lets us store a session identifier as a cookie to send back to the client. And second thing we need to do is initialize our passport to be able to serialize and deserialize the user data from the request like so: 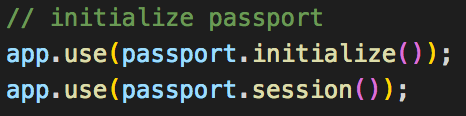
For this to fully work we need to add one last thing back in our file where we set up our strategy and that's the actual serialization and deserialization of the data we get like so: 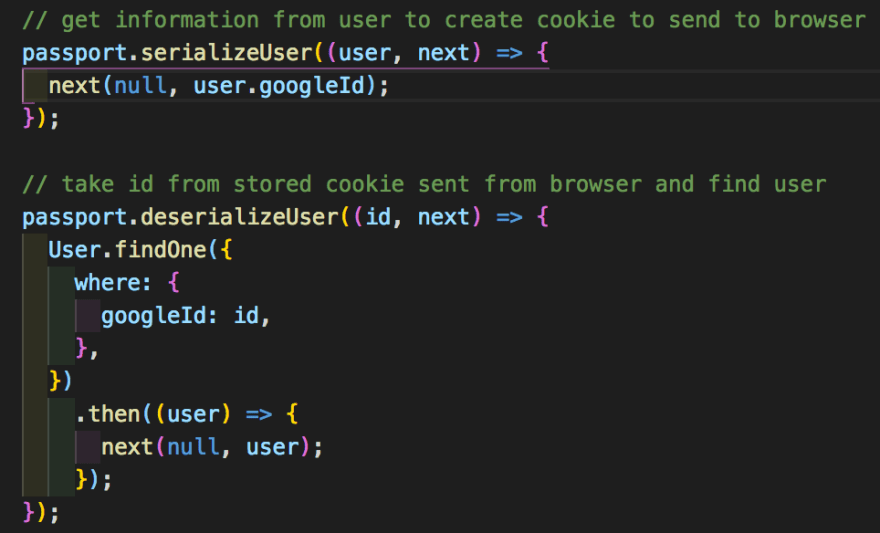
serializeUser is fairly simple, it takes in the user and we just call next with the specific identifier we want to serialize from the user, and deserializeUser takes in the id and does the reverse process so we want to search our database for the user with the matching identifier.
And finally at the end of our journey we need to set up our some useful routes to deal with the authentication like so: 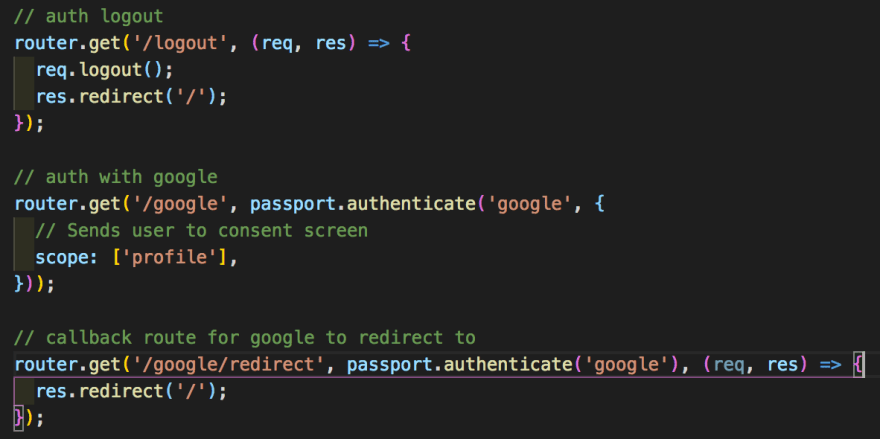
We have a /logout endpoint that needs to call req.logout, a function put on the request by passport that removes the req.user property, functionally logging out the user. We have our main login route that I have set to the /google endpoint and all it needs to do is run the passport.authenticate() middleware specifying which strategy to use, in my case that is google, and I have an object as well with the scope key, this determines the scope of what you can access from logging in and is provider specific so you will have to look at the strategy's documentation.
Tada
Whew all done. There you have a basic setup for authentication. Now go have fun going even more in depth with your strategy of choice with passport with all the documentation on their awesome website!


Top comments (0)