
Hello everyone! As you have seen web3 is very popular right now. Clerk has recently released metamask authentication. So let's take a look at how to implement it in our app!
What is Clerk?
Clerk is one of the best ways to add authentication to a Next.js or a react application. It gives us things that are a pain to handle on our own like user management and multiple sessions.
Why use Clerk?
- Easy to work with
- Customizable
- 2-step verification
- New device notifications
- Single sign-on
- Passwordless sign-in
- Multi-sessions
Setup
Setting up our Next.js app
Creating a new Next.js app
npx create-next-app next-clerk-demo
Installing Clerk
npm i @clerk/clerk-react # npm
yarn add @clerk/clerk-react # yarn
Setting up Clerk
Go to Clerk, sign up/in, then create a new app. Select "Sign in with Metamask" as the Authentication strategy-
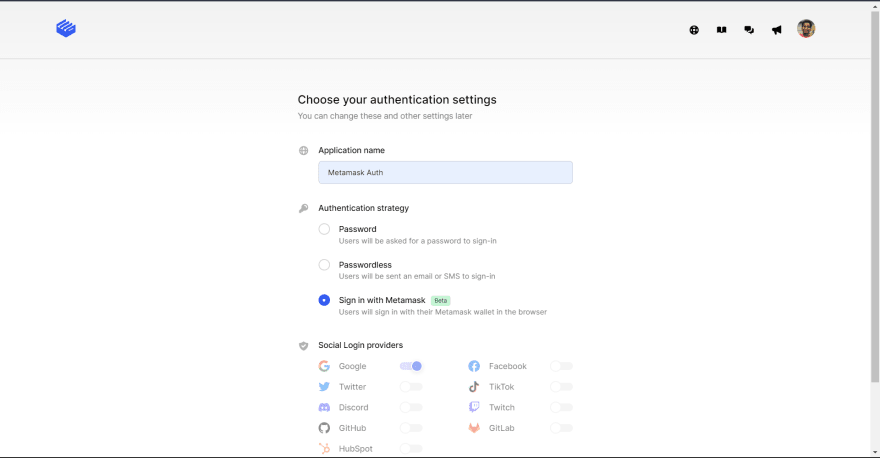
If you now go to "API Keys" in the sidebar, you will be able to see your frontend API key. Copy it as we are going to need it soon.

Integrating Clerk into Next.js
Configuring Clerk
Inside _app.js wrap the in a ClerkProvider-
<ClerkProvider
  frontendApi={clerkFrontendApi}
  navigate={(to) => router.push(to)}
>
  <Component {...pageProps} />
</ClerkProvider>
Get router from useRouter-
const router = useRouter();
Import useRouter and ClerkProvider-
import { ClerkProvider } from "@clerk/clerk-react";
import { useRouter } from "next/router";
As you can see we also need the clerkFrontendApi, so create a new variable-
const clerkFrontendApi = process.env.NEXT_PUBLIC_CLERK_FRONTEND_API;
We are going to use env variables for the API key, so create a new file .env.local, and add NEXT_PUBLIC_CLERK_FRONTEND_API-
NEXT_PUBLIC_CLERK_FRONTEND_API=YOUR_API_KEY
Paste in the API key that you got from the clerk dashboard. You also going to restart the dev server-
npm run dev # npm

yarn dev # yarn
Creating the sign-in button
Inside index.js add the following-
<SignedOut>
  <SignInWithMetamaskButton>Sign in with Metamask</SignInWithMetamaskButton>
</SignedOut>
You also need to import the following-
import {
  SignedIn,
  SignedOut,
  SignInWithMetamaskButton,
} from "@clerk/clerk-react";
Now, if you go to http://localhost:3000/, you will be able to see a sign-in button!
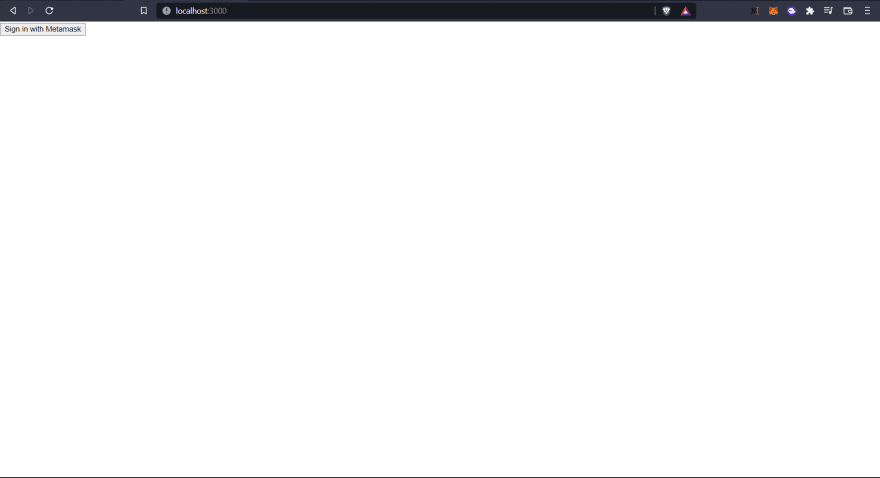
If you try clicking on it, it works 🥳.
Showing UserProfile and address if the user is logged in
Show a User component if the user is SignedIn-
<SignedIn>
  <User />
</SignedIn>
Create a new component in the components folder as User.js and add the following-
import { UserButton, useUser } from "@clerk/clerk-react";

const User = () => {
  const user = useUser();

  console.log(user);
  return (
    <div>
      <UserButton />
      <p>{user.web3Wallets[0].web3Wallet}</p>
    </div>
  );
};

export default User;
Clerk provides a useUser hook which allows us to access the user's details like the wallet address.
If you now login into the app then, it would show you a profile picture and your address-
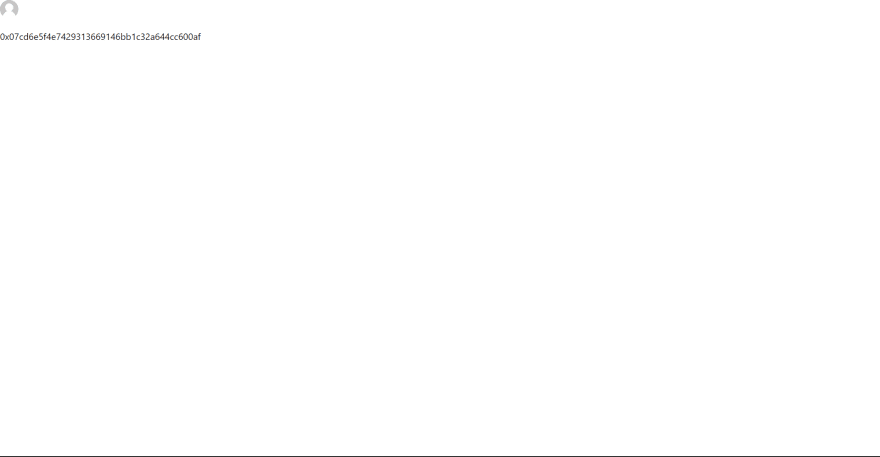
If you click on the user profile, it will show you a popup. You can click on manage account to add details like name, email, profile picture, etc.
Keeping the user's on our site
When you clicked on manage account, you might have noticed that the URL was completely different and was not looking good. So let's see how to keep users on our site itself!
Create the sign in, sign up, and the user page
Inside the pages folder we will create 3 folders named
- sign-in
- sign-up
- user
Inside all the folders we will create a file named [[…index]].js
Here is the code for all the files-
sign-in/ [[…index]].js
import { SignIn } from "@clerk/clerk-react";

export default function SignInPage() {
  return <SignIn path="/sign-in" routing="path" />;
}
sign-up/ [[…index]].js
import { SignUp } from "@clerk/clerk-react";

export default function SignUpPage() {
  return <SignUp path="/sign-up" routing="path" />;
}
user/ [[…index]].js
import { UserProfile } from "@clerk/clerk-react";

export default function UserProfilePage() {
  return <UserProfile path="/user" routing="path" />;
}
Now, go to the clerk dashboard, and click on paths in the sidebar. Now edit the URLs with the following-
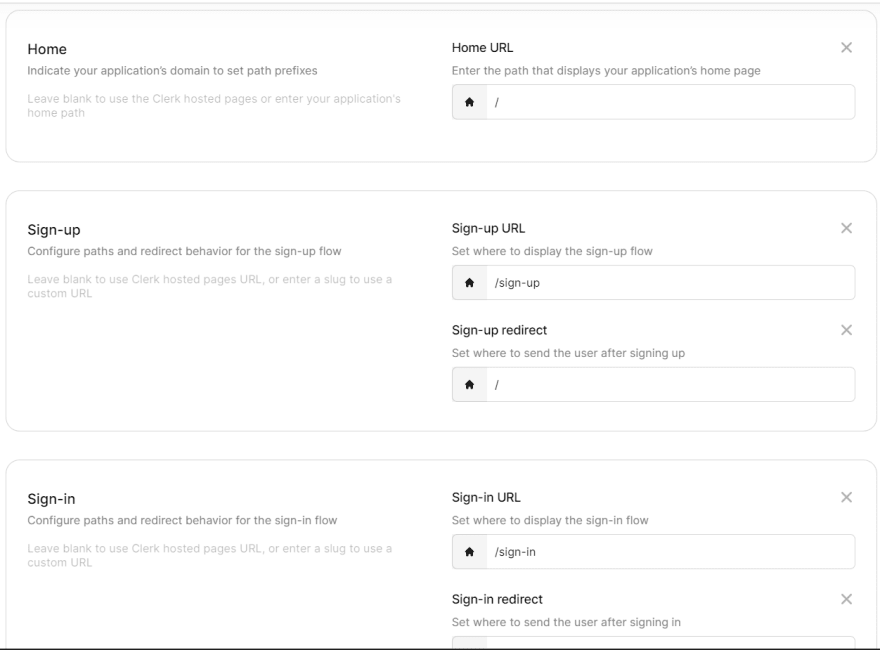
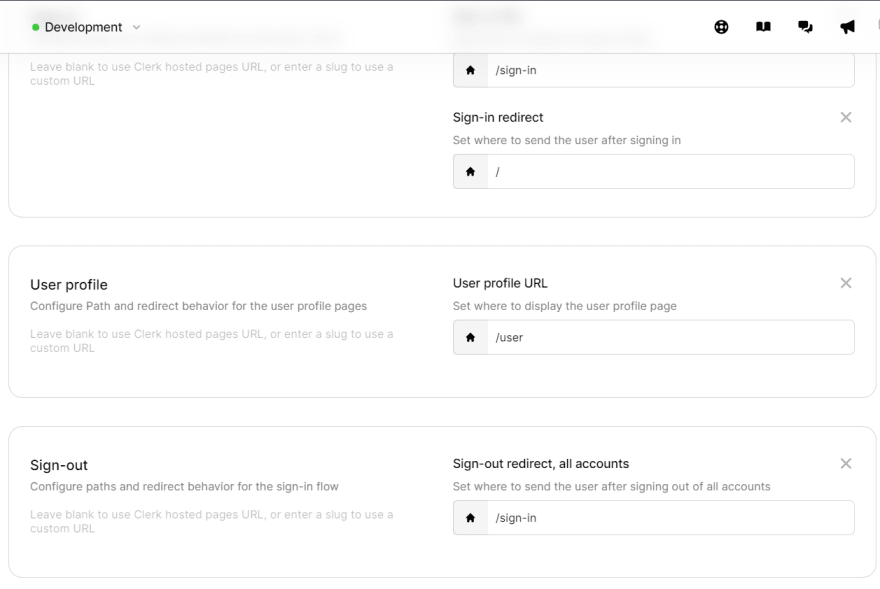
If you now try signing in, signing up, or viewing your profile then the user will be on the website itself (localhost in development).

Top comments (0)