
The second and final part of this quick tutorial will include some quick changes in terms of design - reconfiguring and repositioning of UI elements.
Before we get started, if you haven't yet, please be sure to check out Part 1 of this tutorial where we build majority of the code and functionality of this simple watch app.
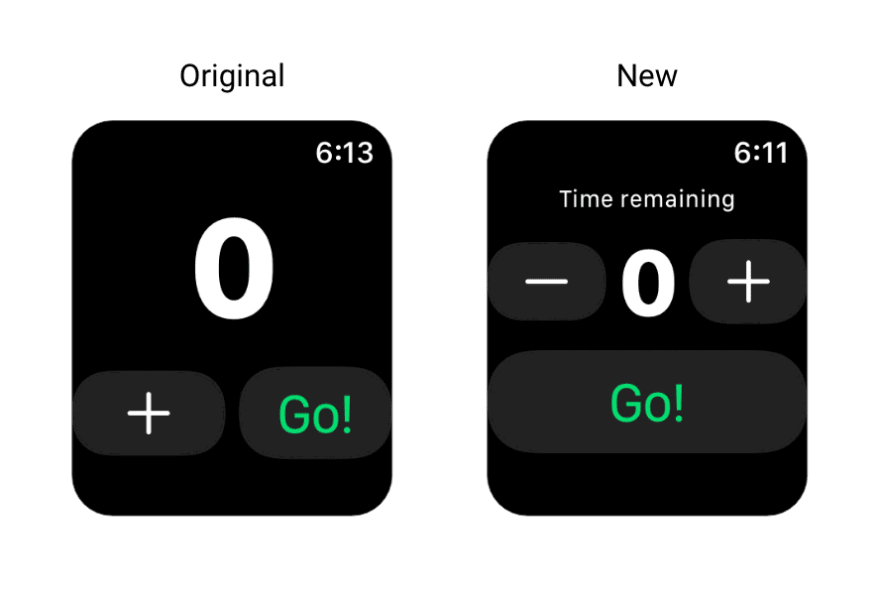
Step 1: Reconfigure the positioning of the buttons
Let's move the "Go" button outside of the HStack so it will take up most of the horizontal screen real estate at the bottom. We will also move the Text element which displays the time remaining inside the HStack. The text count and the increment button will now be side-by-side
Step 2: Add a decrement button
At the top of the HStack, we will add another button. This button will allow the user to easily decrease their set time.
Button {
    count = count - 1
    } label: {
         Image(systemName: "minus")
             .font(.system(size:34))
    }
We would also need to ensure that the user will be unable to set any number under 0. If the count is equal to or less than 0 (it is a negative number), we will manually change the count back to 0.
HStack(alignment: .center, spacing: 8){

    // Decrement button
    Button {
       count = count - 1
    } label: {
       Image(systemName: "minus")
         .font(.system(size:34))
    }

     // Time remaining text
     Text("\(count)")
        .font(.system(size:40))
        .fontWeight(.bold)

     // Increment button
     Button {
         count = count + 1
     } label: {
         Image(systemName: "plus")
             .font(.system(size:34))
         }
     }
Within the HStack, there should now be 3 elements - an increment button, the text count, a decrement button.
Step 3: Add a title
At the very top of the VStack, we will add a title that will say "Time remaining" to make a clear context for the user.
Text("Time remaining")
   .font(.system(size:15))
   .fontWeight(.bold)
Step 4: Play around with spacing
The final step includes playing around with the VStack or HStack as well as font sizing until you are satisfied. I decreased my VStack and HStack spacing from 8 to 6 points, as well as decreased my text count element font size down from 90 to 40 points to ensure all of the UI elements will remain visible on the screen.
The Final Code
If you followed along, your code should look similar to this:
import SwiftUI
import Combine

struct ContentView: View {

    @State private var count = 0
    @State private var timer: Timer?

    var body: some View {
        VStack(alignment: .center, spacing: 8){

            Text("Time remaining")
                .font(.system(size:15))
                .fontWeight(.bold)

            HStack(alignment: .center, spacing: 8){

                // Decrement button
                Button {
                    count = count - 1

                    if count <= 0 {
                        count = 0
                    }

                } label: {
                    Image(systemName: "minus")
                        .font(.system(size:34))
                }

                // Time remaining text
                Text("\(count)")
                    .font(.system(size:40))
                    .fontWeight(.bold)

                // Increment button
                Button {
                    count = count + 1
                } label: {
                    Image(systemName: "plus")
                        .font(.system(size:34))
                }

            }
            Button {
                timer = Timer.scheduledTimer(withTimeInterval: 1.0, repeats: true) {time in
                    if count > 0 {
                        count -= 1
                    }else {
                      timer?.invalidate()
                    }
                }

            }label: {
                Text("Go!")
                    .font(.system(size:34))
                    .foregroundColor(.green)

            }
        }
    }
}

struct ContentView_Previews: PreviewProvider {
    static var previews: some View {
        ContentView()
    }
}
And that's it for this simple app tutorial. Thanks for keeping up with me! Catch you next time 👋.

Top comments (1)
Some comments may only be visible to logged-in visitors. Sign in to view all comments.