
Hi, Readers 👋 ,
So In this blog, I will be writing about creating the test app( Which can be created by Default no coding required 💁). Also, I will try to run that app in my Android phone and for iOS, we'll be using the Emulator (Can't afford to buy an iPhone 😔).
Creating Test Flutter App
So let's start the process. So there are 2 ways to create new Flutter project One through the terminal using the flutter commands. The second one will be using the Android studio.
flutter create <Project name>
flutter run
flutter create test_app
Creating project test_app...
  test_app/ios/Runner.xcworkspace/contents.xcworkspacedata (created)
  test_app/ios/Runner.xcworkspace/xcshareddata/IDEWorkspaceChecks.plist (created)
  test_app/ios/Runner.xcworkspace/xcshareddata/WorkspaceSettings.xcsettings (created)
  test_app/ios/Runner/Info.plist (created)
  test_app/ios/Runner/Assets.xcassets/LaunchImage.imageset/LaunchImage@2x.png (created)
  test_app/ios/Runner/Assets.xcassets/LaunchImage.imageset/LaunchImage@3x.png (created)
  test_app/ios/Runner/Assets.xcassets/LaunchImage.imageset/README.md (created)
  test_app/ios/Runner/Assets.xcassets/LaunchImage.imageset/Contents.json (created)
  test_app/ios/Runner/Assets.xcassets/LaunchImage.imageset/LaunchImage.png (created)
  test_app/ios/Runner/Assets.xcassets/AppIcon.appiconset/Icon-App-76x76@2x.png (created)
  test_app/ios/Runner/Assets.xcassets/AppIcon.appiconset/Icon-App-29x29@1x.png (created)
  test_app/ios/Runner/Assets.xcassets/AppIcon.appiconset/Icon-App-40x40@1x.png (created)
  test_app/ios/Runner/Assets.xcassets/AppIcon.appiconset/Icon-App-20x20@1x.png (created)
  test_app/ios/Runner/Assets.xcassets/AppIcon.appiconset/Icon-App-1024x1024@1x.png (created)
  test_app/ios/Runner/Assets.xcassets/AppIcon.appiconset/Icon-App-83.5x83.5@2x.png (created)
  test_app/ios/Runner/Assets.xcassets/AppIcon.appiconset/Icon-App-20x20@3x.png (created)
  test_app/ios/Runner/Assets.xcassets/AppIcon.appiconset/Contents.json (created)
  test_app/ios/Runner/Assets.xcassets/AppIcon.appiconset/Icon-App-20x20@2x.png (created)
  test_app/ios/Runner/Assets.xcassets/AppIcon.appiconset/Icon-App-29x29@3x.png (created)
  test_app/ios/Runner/Assets.xcassets/AppIcon.appiconset/Icon-App-40x40@2x.png (created)
  test_app/ios/Runner/Assets.xcassets/AppIcon.appiconset/Icon-App-60x60@3x.png (created)
  test_app/ios/Runner/Assets.xcassets/AppIcon.appiconset/Icon-App-60x60@2x.png (created)
  test_app/ios/Runner/Assets.xcassets/AppIcon.appiconset/Icon-App-76x76@1x.png (created)
  test_app/ios/Runner/Assets.xcassets/AppIcon.appiconset/Icon-App-40x40@3x.png (created)
  test_app/ios/Runner/Assets.xcassets/AppIcon.appiconset/Icon-App-29x29@2x.png (created)
  test_app/ios/Runner/Base.lproj/LaunchScreen.storyboard (created)
  test_app/ios/Runner/Base.lproj/Main.storyboard (created)
  test_app/ios/Runner.xcodeproj/project.xcworkspace/contents.xcworkspacedata (created)
  test_app/ios/Runner.xcodeproj/project.xcworkspace/xcshareddata/IDEWorkspaceChecks.plist (created)
  test_app/ios/Runner.xcodeproj/project.xcworkspace/xcshareddata/WorkspaceSettings.xcsettings (created)
  test_app/ios/Runner.xcodeproj/xcshareddata/xcschemes/Runner.xcscheme (created)
  test_app/ios/Flutter/Debug.xcconfig (created)
  test_app/ios/Flutter/Release.xcconfig (created)
  test_app/ios/Flutter/AppFrameworkInfo.plist (created)
  test_app/ios/.gitignore (created)
  test_app/test/widget_test.dart (created)
  test_app/test_app.iml (created)
  test_app/.gitignore (created)
  test_app/.metadata (created)
  test_app/android/app/src/profile/AndroidManifest.xml (created)
  test_app/android/app/src/main/res/mipmap-mdpi/ic_launcher.png (created)
  test_app/android/app/src/main/res/mipmap-hdpi/ic_launcher.png (created)
  test_app/android/app/src/main/res/drawable/launch_background.xml (created)
  test_app/android/app/src/main/res/mipmap-xxxhdpi/ic_launcher.png (created)
  test_app/android/app/src/main/res/mipmap-xxhdpi/ic_launcher.png (created)
  test_app/android/app/src/main/res/values/styles.xml (created)
  test_app/android/app/src/main/res/mipmap-xhdpi/ic_launcher.png (created)
  test_app/android/app/src/main/AndroidManifest.xml (created)
  test_app/android/app/src/debug/AndroidManifest.xml (created)
  test_app/android/gradle/wrapper/gradle-wrapper.properties (created)
  test_app/android/gradle.properties (created)
  test_app/android/.gitignore (created)
  test_app/android/settings.gradle (created)
  test_app/android/app/build.gradle (created)
  test_app/android/app/src/main/kotlin/com/example/test_app/MainActivity.kt (created)
  test_app/android/build.gradle (created)
  test_app/android/test_app_android.iml (created)
  test_app/pubspec.yaml (created)
  test_app/README.md (created)
  test_app/ios/Runner/Runner-Bridging-Header.h (created)
  test_app/ios/Runner/AppDelegate.swift (created)
  test_app/ios/Runner.xcodeproj/project.pbxproj (created)
  test_app/lib/main.dart (created)
  test_app/.idea/runConfigurations/main_dart.xml (created)
  test_app/.idea/libraries/Dart_SDK.xml (created)
  test_app/.idea/libraries/KotlinJavaRuntime.xml (created)
  test_app/.idea/modules.xml (created)
  test_app/.idea/workspace.xml (created)
Running "flutter pub get" in test_app...                           14.9s
Wrote 71 files.

All done!
[✓] Flutter: is fully installed. (Channel stable, 1.22.4, on Mac OS X 10.15.7 19H15 darwin-x64, locale en-IN)
[✓] Android toolchain - develop for Android devices: is fully installed. (Android SDK version 30.0.2)
[✓] Xcode - develop for iOS and macOS: is fully installed. (Xcode 12.2)
[✓] Android Studio: is fully installed. (version 4.0)
[!] IntelliJ IDEA Ultimate Edition: is partially installed; more components are available. (version 2020.2.4)
[✓] VS Code: is fully installed. (version 1.49.0)
[✓] Connected device: is fully installed. (1 available)

Run "flutter doctor" for information about installing additional components.

In order to run your application, type:

  $ cd test_app
  $ flutter run

Your application code is in test_app/lib/main.dart.
As you can see the whole process is so faster it got completed in less than 30s 😳.
also as you see the flutter create command also run the flutter doctor command to check for the issue if there any we will prompt then only.
flutter create command will create a default app in the directory and flutter run install the app in the device connected.
Another method we'll be using the Android studio as IDE for the process. As the prerequisite, we have already installed the Flutter plugin in the Android studio. So we'll skip ahead of that 😎.
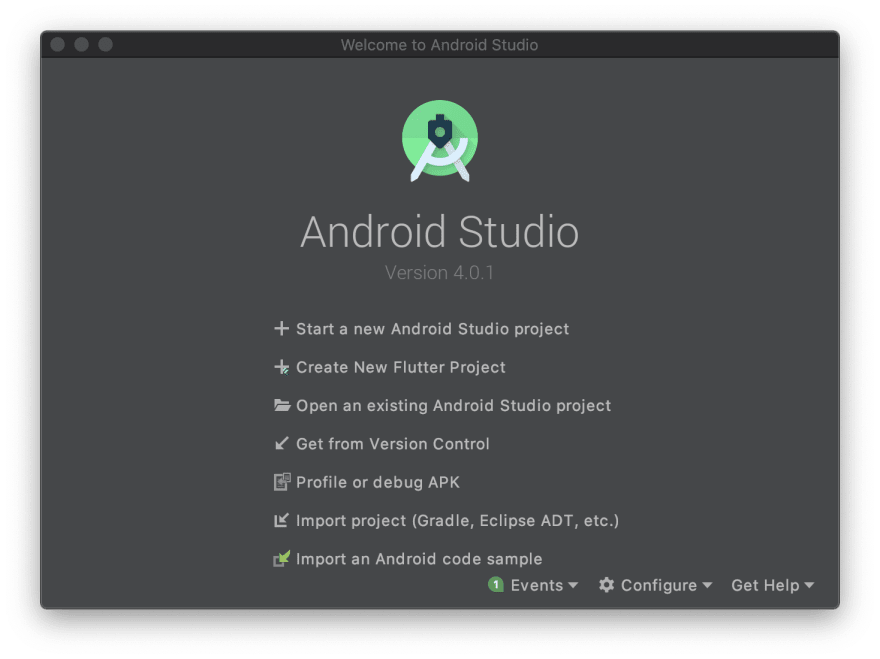
Let's open the Android studio so we'll be prompted with Welcome page with the option to create Android project or Flutter project so we'll be picking the Create new Flutter project option (I know it's obvious 😅).
Next, we will be prompted to select Flutter options as such as create a new app, new plugin or new Package. As we are creating a new app we will pick the New Application option. (again the obvious thing 😅)

Next provide the configuration options for the flutter project such as Project name, SDK path and Project location. Set those options depending on your setup.Also select Install SDK… if the text field is blank.
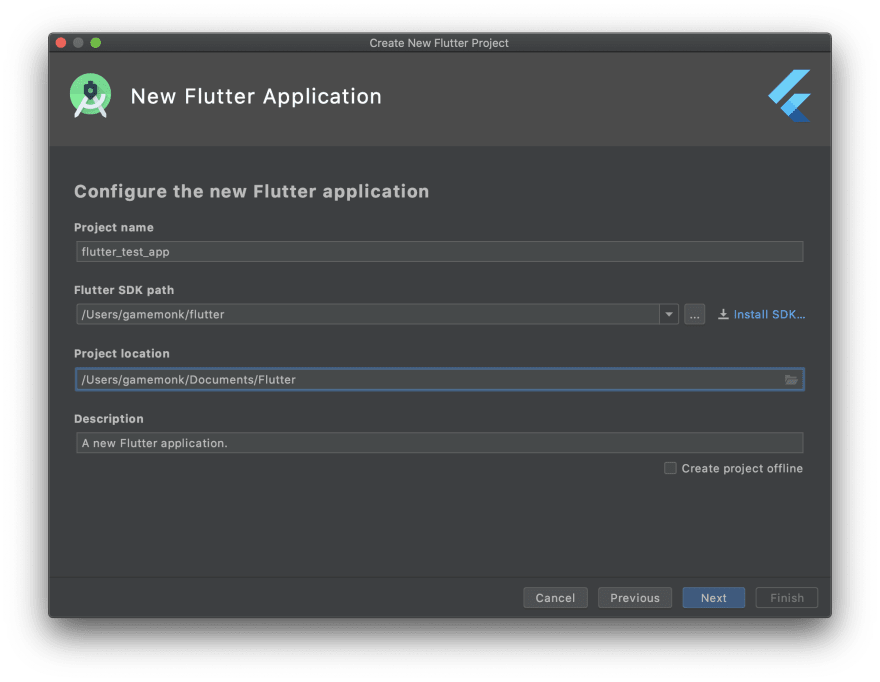
Next, we'll be setting up the package name we'll leave it as it is Click on Finish button.

Once you click finish button it will take some time to create a new project and the new project will be created once loading completes.
Running the Test App
If you want to run the install and run the app using the terminal which is a whole lot faster then we just have to connect a device or start a simulator to run a device to use the app.
flutter run
Launching lib/main.dart on iPhone 12 Pro Max in debug mode...

Running Xcode build...
 └─Compiling, linking and signing...                        10.8s
Xcode build done.                                           26.1s
Waiting for iPhone 12 Pro Max to report its views...                 4ms
Syncing files to device iPhone 12 Pro Max...                       425ms

Flutter run key commands.
r Hot reload. 🔥🔥🔥
R Hot restart.
h Repeat this help message.
d Detach (terminate "flutter run" but leave application running).
c Clear the screen
q Quit (terminate the application on the device).
An Observatory debugger and profiler on iPhone 12 Pro Max is available at: http://127.0.0.1:52504/m9UpOKl9zB0=/


Application finished.
Once this process is completed in the device application will be installed and opened in debug mode. But if we have multiple devices connected then we will get the options like this.
flutter run
Multiple devices found:
sdk gphone x86 (mobile)    • emulator-5554                        • android-x86 • Android 11 (API 30) (emulator)
iPhone 12 Pro Max (mobile) • 8645B626-112E-4171-ABD3-CFA076EAD027 • ios         • com.apple.CoreSimulator.SimRuntime.iOS-14-2 (simulator)
[0]: sdk gphone x86 (emulator-5554)
[1]: iPhone 12 Pro Max (8645B626-112E-4171-ABD3-CFA076EAD027)
Please choose one (To quit, press "q/Q"):
Depending on your choice the application will be installed on the chosen device. So for this let's try installing it on the Android device.
Using hardware rendering with device sdk gphone x86. If you notice graphics artifacts, consider enabling software rendering with "--enable-software-rendering".
Launching lib/main.dart on sdk gphone x86 in debug mode...
Running Gradle task 'assembleDebug'...
Running Gradle task 'assembleDebug'... Done                        32.2s
✓ Built build/app/outputs/flutter-apk/app-debug.apk.
Installing build/app/outputs/flutter-apk/app.apk...                 1.0s
Waiting for sdk gphone x86 to report its views...                    7ms
Syncing files to device sdk gphone x86...                          216ms

Flutter run key commands.
r Hot reload. 🔥🔥🔥
R Hot restart.
h Repeat this help message.
d Detach (terminate "flutter run" but leave application running).
c Clear the screen
q Quit (terminate the application on the device).
An Observatory debugger and profiler on sdk gphone x86 is available at: http://127.0.0.1:53493/qg61OJBnuII=/
Once this process is completed then the app will be installed inside the android device.
Now let's see how to do the same with using the Android studio.😉

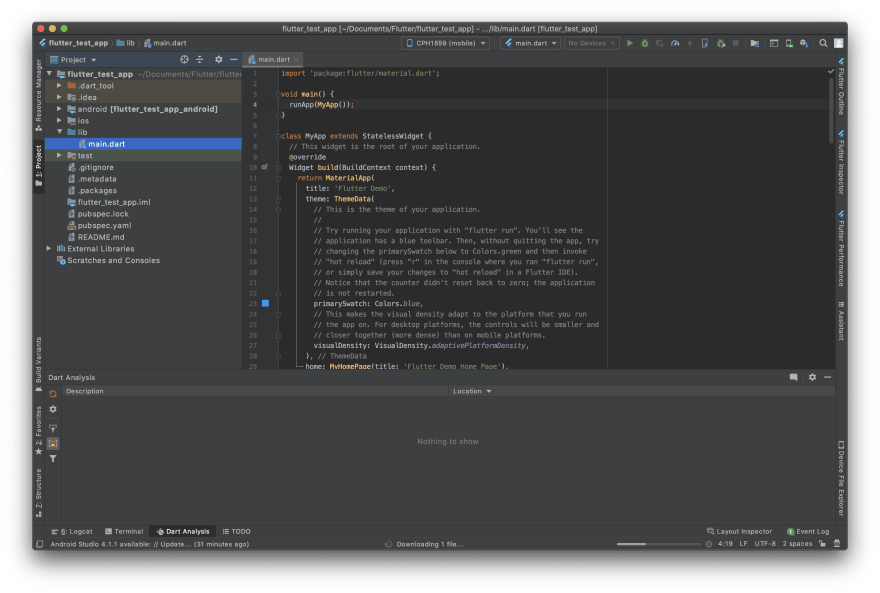
As you can see we have several options at the top bar so we'll discuss the options available. From the left side first, we have the navigation path of the Page opened in the editor next we have Devices connected. Even after connecting the android device, you may not see the Device in connected device for the device to get listed first we have to Activate Developer Mode and USB debugging options in the phone then the devices will be displayed in connected devices (As you can see I have connected my Android device to run the app).
Next, we have Config selector which is configuration setup for the application (I don't have much info on it as of now I will add more once I learn about it 😣)
Next is the Run button upon clicking the but the app will get installed in the device and opens the app in the device.
Next, is the Debug button which is same as the Run button but the app will be opened in debug mode which will help us in Debugging the error in the app.
Next, We have Hot reload button ( Lightning icon one ⚡️) which will be used to implement changes as soon as there are some changes made to the codebase.
Well, these are the important options available. Rest we'll go through when we will be using those buttons.
So let's run the app inside the iPhone 12 Pro Max (Obviously using the simulator already told you can't afford iPhone 😣). So just start the simulator using the Xcode and set the device as iPhone 12 Pro Max(since I have opened it in the simulator) then click on the Run button then the rest will be taken care off by Android studio it will install the app in the device and open that app in debug mode (For the first run it will take time for me it was around 90 secs it may differ). ( As of now android is not working for me I will continue once that start working)

The app will look like this and the only function offered by the app will be when the user clicks on the plus sign it will increase the count displayed in the centre.
Now let's check how can we run the app inside the android phone. So I have just downloaded the Pixel 2 phone inside Android Virtual Device Manager with Android Q OS.

Next, let's run the app in the virtual device. Pick the virtual device as a target device to run the app which will take quite a long time for the first time ( For it was more than 10 mins not sure why though 🧐).

Thank you
If you are reading till here you might get the same results then the work is done let's congratulate our selves over our work done. If you like this blog or it helped you in anyway then I will consider the work well done. Again quite a long blog with more than 13 min read 😅 not sure anyone is going to read the whole blog still I will thank him if he decides to read the whole blog.😎
If you are able to complete the above process then consider you are ready to start with the flutter app development. In the next blog, I will write about the folders and file generated and required for the flutter app.
अलविदा 🙏

Top comments (1)
Scarlet App.net, a cutting-edge platform that is transforming digital communication, provides users with an easy and safe way to communicate with others. Scarlet App blends ease and privacy, adapting to modern communication needs, with its user-friendly interface and novel features.