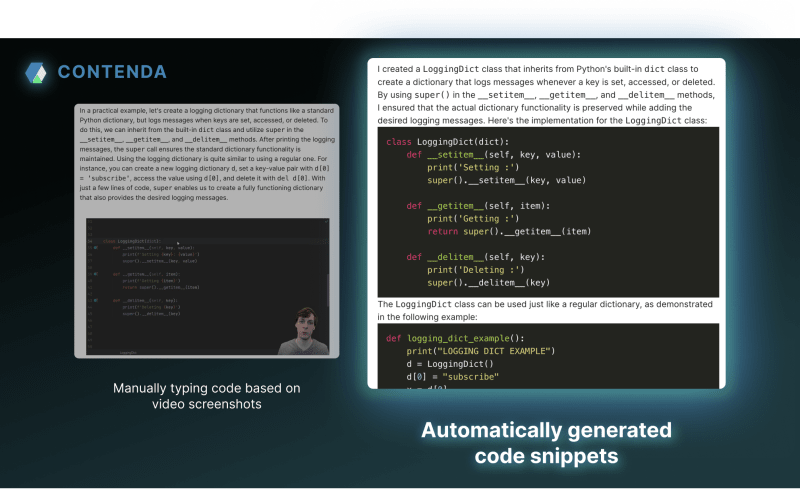
If you’ve ever had to pause a video to copy a code snippet, then you know true pain. We love video tutorials as much as the next person, but sometimes we just want to copy/paste our way to the next step. That’s why we made an automatic code snippet detection model:
And we’re excited to announce that we’ve improved our original Alpha model and are releasing a new Beta model that has 10x’ed our previous model in more ways than one.
So how does it work?
When you submit a video to Contenda, one of the many fun things that happens is an OCR pipeline. In the simplest terms, imagine if each frame in a video went through this process:
- What does the text on the screen say? Lemme write that down real quick.
- Was that thing code? If yes, I bookmark this.
- Comparing it to the blog, which pieces of code are the most relevant for understanding?
- Insert those bad boys into the final blog output.
Comparing the Alpha and Beta results
We love when you try stuff and break it because that’s how we learn and improve! A common problem that was brought to our attention with Alpha was that it would sometimes talk around the code snippet without actually providing the code immediately afterwards.
Alpha:
In this section, we will add the
opacityproperty to our animation and make some adjustments to theh3element. Let’s begin by adding the opacity property:
- Duplicate the existing keyframes and change the property to
opacity.- Set the opacity value at 0% to 0 (no unit).
- At 50%, set the opacity value to 0.2.
- Finally, at 100%, set the opacity value to 1.
Now, let’s work on the
h3element…
With our new model, we’re able to much more consistently get the code snippet inserted after the explanation.
Beta:
In this tutorial, we’ll add opacity to our keyframe animation. First, we need to duplicate the keyframe for the “heading” animation and modify the opacity values. At the 0% mark, set the opacity to 0, which means the element will be completely transparent. Then, at the 50% mark, set the opacity to 0.2, making the element slightly visible. Finally, at the 100% mark, set the opacity to 1, making the element fully visible. Here’s the updated CSS code for the “heading” animation with the opacity changes:
@keyframes heading {
0% {
opacity: 0;
}
50% {
opacity: 0.2;
}
100% {
opacity: 1;
}
}
…
Our Beta model has more code snippets (though if I’m being honest, it’s not exactly 10x as much) while also having less redundant code! It also showed to be effective in decreasing hallucinations. And we will be continuously improving on the code snippet experience, so keep your eyes peeled for future updates and maybe, a potential 100X code snippet release.
That’s it!
This feature is LIVE both through the API and the frontend editor. If you’d like to learn more, please feel free to reach out to our team on Discord or sign up for our email list.
We can’t wait to see what you make!

Top comments (0)