
For this tutorial, I suggest some basic knowledge in using express and NodeJS.
I also suggest having using postman and MongoDB compass.
Connecting
When creating a new node CRUD application that uses mongodb, it is important to test your endpoints by using live data. But, when you need your application to be connected quickly to the database, you don't want to spend your time waiting on a new cluster to be deployed. Also, if you are using a paid plan for your projects, and you want to test your application before setting the project up, this will be good for simple data storage.
Make sure that MongoDB is installed
The first thing we need to do, is to make sure that MongoDB is installed on our machine. If we enter the command
mongod --version
we should see the version of MongoDB server we have.
mongo -version
Will allow you to check the shell version.
If you get errors when entering these commands in your command line, you may need to configure or install mongoDB on your machine.
Using MongoDB compass
This is a MongoDB GUI that allows you to admin your Database projects locally, you could do this using atlas, but using this GUI is great to quickly connect to and admin your clusters.
You can download it here MongoDV Compass
Create a new node project
If you already have MongoDB installed, you can proceed to create a new node project.
In your command line, create a new directory
here we can call it, localConn
mkdir localconn
and cd into it
cd localconn
In that new directory, run the command
npm init -y
This will allow you create a new node project with the default names.
We can open the directory in our code editor and make a new file called server.js
Install dependencies
In our command line, we need to install the dependencies needed for the database and node server to work
For this simple demo, we can install express and mongoose
express allows us to host our server,
and mongoose allows us to easily interact with MongoDB
Setup the project
We first need to import our dependencies
const express = require('express');
const mongoose = require('mongoose');
Next, we need to initialize the express server with
const app = express()
Then we need a variable with the port number that we want the app to listen on
const port = 3001
We then need the server to actually listen on the port
we add at the end of the server.js file
app.listen(port, () => {
  console.log(`Server started on port ${port}`);
});
Test the server
We can start the server with
npm start
We will need to restart the server after making changes.
Create a model to use
We need some data to add to our Mongo Database, for this demo we can use a simple User object.
We just need to make a new file called User.js and create the User model.
const mongoose = require("mongoose");

const userSchema = mongoose.Schema({
  name: {
    type: String,
  },
  age: {
    type: Number,
  },
});

module.exports = mongoose.model("User", userSchema);
Then we need to import the model into the server file.
The module import should now look like this.
const User = require('./User')
const express = require('express')
const mogoose = require('mongoose')
const app = express();
const port = 3001;
We then need to enable the ability for the server to use JSON objects
app.use(express.json())
Connect the to local MongoDB
Now we just have to connect to the DataBase
mongoose
  .connect("mongodb://localhost:27017/demoApp", {
    useNewUrlParser: true,
    useUnifiedTopology: true,
  })
  .then(() => {
    console.log("connected via mongodb");
  })
  .catch((err) => console.log(err));
Here we are using the .then() syntax because the connection returns a promise.
With this, we are able to connect the DB with the name 'demoApp'.
Create a route to make a new User doc
Now to make a new user and add it to the database,
we can make a new post route.
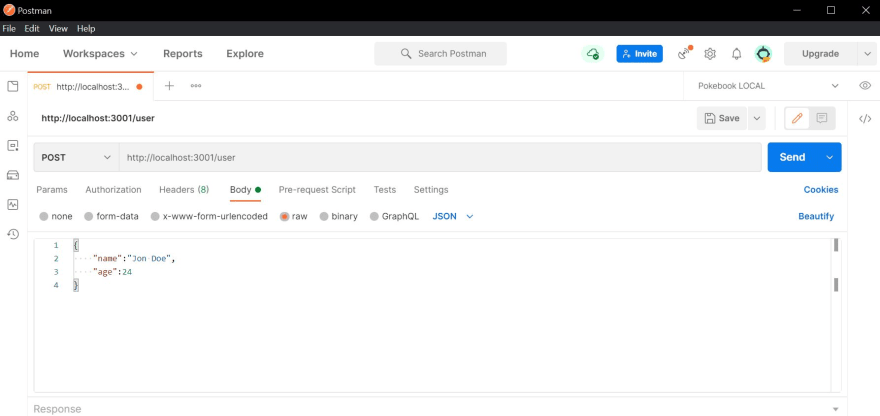
app.post("/user", async (req, res) => {
  const { name, age } = req.body;
  try {
    const newUser = new User({
      name,
      age,
    });

    newUser.save();
    res.json(newUser);
  } catch (error) {
    res.status(500).json(error);
  }
});
This pulls the name and body fields from the req.body object.
We then make a new user with the name and age, and save it to the db.
We can then start the server
npm start
We can then actually create the new user, using postman we can send the information
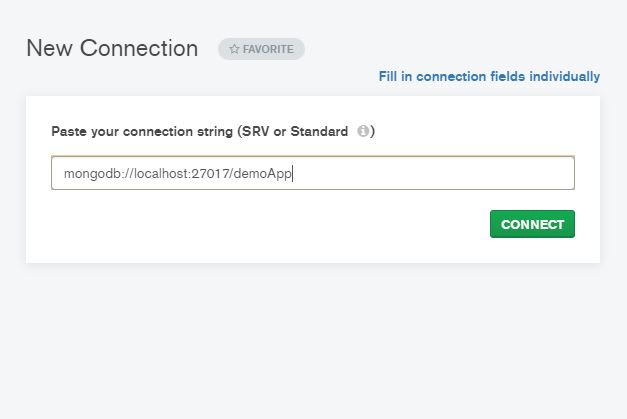
Connect to compass
To check on our Database we can connect to the compass app. We can take the connection string that we used to connect the mongodb and enter it into the compass connection field.
mongodb://localhost:27017/demoApp
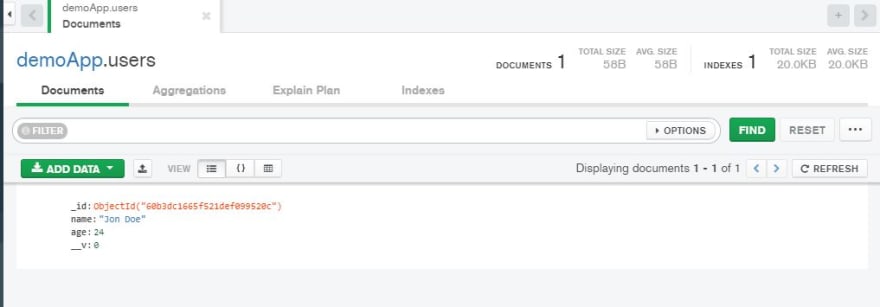
Check the DB
You should see your new DB under the name demoApp, once you click that you should now have a new user collection in the DB. Once you enter that, you can see the new User.
Conclusion
With this you can see that creating and testing a new DB can be quick and easy, with a small bit of setup you can test a full CRUD application.
Here is what the final code should look like
Server.js
const User = require("./User");
const express = require("express");
const mongoose = require("mongoose");
const app = express();
const port = 3001;

app.use(express.json());

mongoose
  .connect("mongodb://localhost:27017/demoApp", {
    useNewUrlParser: true,
    useCreateIndex: true,
    useUnifiedTopology: true,
  })
  .then(() => {
    console.log("connected via mongodb");
  })
  .catch((err) => console.log(err));

app.get("/", (req, res) => {
  res.send("server running");
});

app.post("/user", async (req, res) => {
  const { name, age } = req.body;
  try {
    const newUser = new User({
      name,
      age,
    });

    newUser.save();
    res.json(newUser);
  } catch (error) {
    res.status(500).json(error);
  }
});

app.listen(port, () => {
  console.log(`Server started on port ${port}`);
});
User.js
const mongoose = require("mongoose");

const userSchema = mongoose.Schema({
  name: {
    type: String,
  },
  age: {
    type: Number,
  },
});

module.exports = mongoose.model("User", userSchema);

Top comments (0)