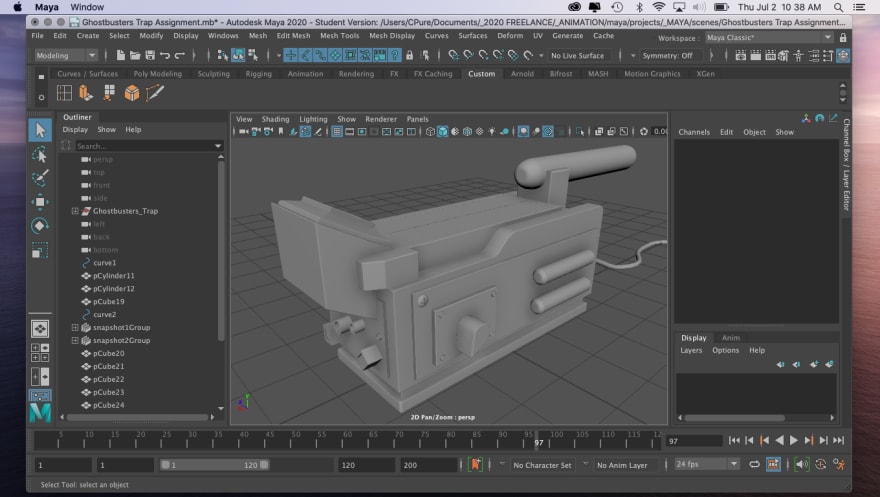
This past Sunday I started learning Maya! I was very excited to dive in and have successfully finished my first project; a ghostbusters trap!
The course I’m taking is called Maya for Beginners: Guide to 3D Animation in Maya | Udemy
User Interface
The interface is without a doubt the most intimidating one I have worked with. There are so many toolbars and options packed into this one program it is overwhelming to take it all in. One thing that I liked is that the instructor of this course, Lucas Ridley, explained most tools just have several ways of accessing them. The tools that we focused on mostly were the modeling components - obviously - but we also “hacked” some tools in the animation toolbar to help us with some of our modeling elements.
3 Click Mouse
I have not used a 3 click mouse, like an old school one, since maybe grade school so it did take some getting use to. At first I was very clumsy but after the first day it became a lot easier to navigate! I owe all of the credit to playing computer games and video games. It feels like a first person shooter quite honestly!
Modeling
I was never into sculpture as an artist medium but I REALLY enjoy 3D modeling! The course opens up with us learning how to create ‘hard surfaces.’ It is exactly what you think; very geometric shape builds with very little organic shapes that you would see in say creating a character build.
As mentioned before we built a ghostbusters trap. The hardest part of the build was definitely the cord for me. I really struggled with getting the vertices to create a smooth enough curve to not have random edges that would create kinks in the cord. I must have rewatched that part of the lesson at least ten times. It took me a whole day to get something I actually liked.
The problem solving aspect comes in when we started to manipulate and bevel these objects. Main issues we ran into were inconsistent shadowing and broken vertices. Again Ridley did explain some of the ways to attack and correct these issues but the main focus was just getting use to the program and learning to build using the poly modeling tools.
The Class
So far I really like the instruction of the class. There is a lot of problem solving and learning how to use the tools most efficiently and most importantly to our advantage. The videos are not entirely going to “hand hold” you through every step of the process. This allows you as the student to play around and solve ways to create the other parts of the model.
At first I was annoyed that when I started the next video that there was more features added to the model but I began to love the freedom of being able to create and practice what I had learned in previous lessons.
Completing this model took 15 lessons. In total, there are 136 so I am barely breaking the surface into this powerhouse. The course includes pretty much everything - modeling, rigging, animation, lighting, visual effects etc.
I have recently learned that there is a position called assistant technical director in animation. I was an assistant technical director in theater but it seems it’s a bit different for each field. In this position you are liaison between programmers and animators. As many of you know my goal is to merge my passions of code and animation and felt this is a great goal to strive towards. Since the language used is python, this will also be on my list of things to learn and most importantly enjoy!
Over the next few weeks, month, you will see my portfolio as well as my blog posts start to change into more specifics of animation and code. I hope you will find these posts helpful and enjoyable!
Below are wip screenshots of my build.


Top comments (0)