
Firebase is a platform that provides the infrastructure needed to build apps fast. In the previous mini-course we built a mobile and web app with Flutter and MongoDB. In this full course we will build a messaging app with Firebase Authentication and Flutter.
We begin by setting up a Flutter project from scratch and building the general look and feel of our messaging UI. We then create a Firebase project while setting up and configuring our Android and Web applications. We will set up Firebase Authentication with the google_sign_in package and Cloud Firestore for storing our chat messages. We will learn how to set up the correct security rules to ensure only authenticated users are allowed to write data to our collection.
Set up Flutter project
Before creating a Flutter project we need to enable Flutter Web support since we will also be running this app in the Web browser. Run the following commands to enable Flutter Web support:
$ flutter channel beta # checkout the beta channel
$ flutter upgrade
$ flutter config --enable-web

With Flutter Web enabled you can proceed to create your Flutter project:
$ flutter create my_messaging_app
After that process is complete open the directory in your editor of choice, whether Visual Studio Code or Android Studio as the recommended editors for Flutter development.
Ensure you have the relevant extensions installed for your editors. In the case of Visual Studio Code you need the Dart Code extensions. For Android Studio search for “Flutter” in the plugins repository under Configure > Plugins.
Run the Flutter project
Launch any of the device simulators using the steps in Visual Studio Code below. This assumes you have the listed simulators already set up using AVD Manager in Android Studio or any other means. Make sure that the simulator you select has Play Store support enabled.
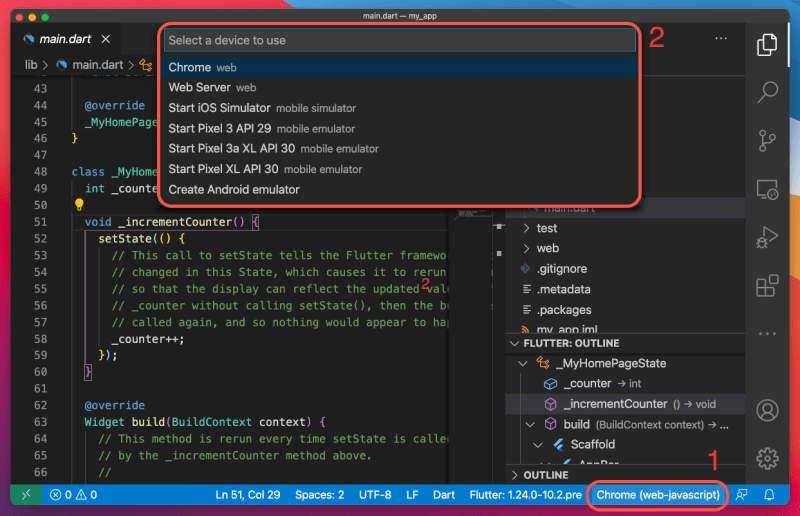
You can run a Flutter project by typing the flutter run command in the Terminal and hitting Enter. Alternatively you can use the editor controls to run your Flutter app.
Build UI for Firebase Authentication
Open lib/main.dart and refactor the MyApp StatelessWidget like so:
class MyApp extends StatelessWidget {
  @override
  Widget build(BuildContext context) {
    return MaterialApp(
      title: 'The Chat Crew', // <== Change this line
      debugShowCheckedModeBanner: false, // <== Add this line
      theme: ThemeData(
        primarySwatch: Colors.purple, // <== Change this line
      ),
      home: MyHomePage(title: 'The Chat Crew'), // <== Change this line
    );
  }
}

Refactor the _MyHomePageState class by removing the _incrementCounter() method and _counter field.
class _MyHomePageState extends State<MyHomePage> {
  // Remove commented out lines
  // int _counter = 0;
  // void _incrementCounter() {
  // setState(() {
  //   _counter++;
  // });
  // }
  @override Widget build(BuildContext context) { ... }
}
In the build() method remove the floatingActionButton: section of the Scaffold() widget and the two Text() widgets rendered in the Column() children. In fact you should have the code below once you've taken out the unnecessary bits:
class _MyHomePageState extends State<MyHomePage> {
  @override Widget build(BuildContext context) {
    return Scaffold(
      appBar: AppBar(
        title: Text(widget.title),
        centerTitle: true, // <== Added this line
      ),
      backgroundColor: Color(0xffdee2d6), // <== Added this line
      body: Column(
        mainAxisAlignment: MainAxisAlignment.center,
        children: <Widget>[],
      ),
    );
  }
}

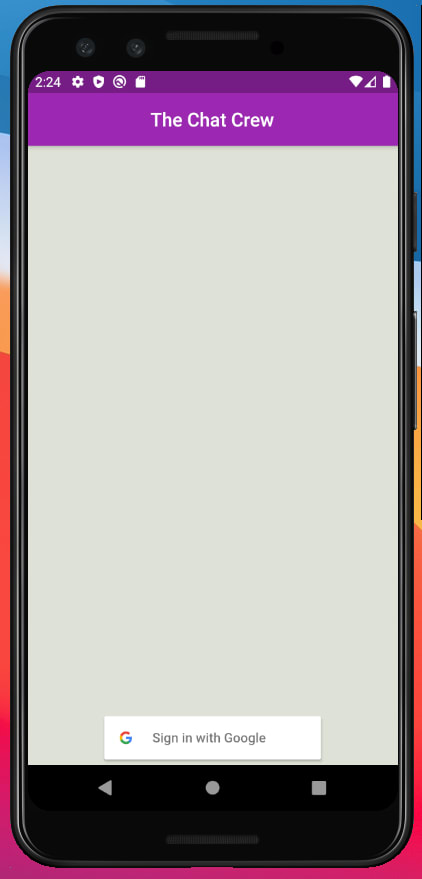
The section below the app bar of the app consists of a message wall to display chat messages and the bottom area which will show either the sign in button or the message form.
The message wall will be rendered in an Expanded() widget since that takes up most of the screen real estate.
body: Column(
  mainAxisAlignment: MainAxisAlignment.center,
  children: <Widget>[
    Expanded(
      child: Container(),
    ),
  ],
),
To display the Sign in button, install the flutter_signin_button package:
import 'package:flutter_signin_button/flutter_signin_button.dart';
 ..
body: Column(
  mainAxisAlignment: MainAxisAlignment.center,
  children: <Widget>[
    Expanded(
      child: Container(),
    ),
// Add the widget below
    Container(
      padding: const EdgeInsets.all(5),
      child: SignInButton(
        Buttons.Google,
        padding: const EdgeInsets.all(5),
        onPressed: () {},
      ),
    ),
  ],
),
Stop the whole app and start again in order to load the image assets required to display the Google logo on the sign in button.
Watch the full course for details on completing the sign in and sign out flows.
Sharing is caring 🤗
If you enjoyed reading this post, please share this through your social media channels. Also check out and subscribe to my YouTube channel (hit the bell icon too) for full-stack development tutorials on Dart and Flutter.
Subscribe to the newsletter for my free 35-page Get started with Dart eBook and to be notified when new content is released.
Like, share and follow me for more content on Dart.
Originally published at https://creativebracket.com

Top comments (2)
your content is brilliant Jermaine, thanks for sharing
Thanks Mister!