Preview deployments are a way to spin temporary environments from branches or pull requests. They're used to allow teammates and product managers to visually review your work before changes are merged, without relying on code only.
3 ways to get preview deployments
To use preview deployments in your development workflow, you have 3 solutions:
- your hosting provider has preview deployments sorted out (e.g. Heroku / Vercel / Render / Scalingo). Easy to setup, but you get vendor lock-in, and some providers are costly.
- you find a 3rd-party SaaS to provide the service for you. Setup can be complicated if they use custom definition files, it's costly, and your code is now at risk in another provider's infrastructure.
- you build or use a solution that doesn't rely on 3rd-parties. This could be a GitHub Action, Jenkins pipeline, semi-automated script etc.
Building a custom solution is costly in terms of development and maintenance, so today I want to talk about PullPreview, a GitHub Action which makes preview deployments very easy to setup.
PullPreview
PullPreview is an open-source GitHub Action which has the following features:
- works with any app that can be booted with Docker Compose (i.e. all).
- can be triggered by applying a label on a pull request.
- deploys code directly from GitHub onto AWS (Lightsail).
- servers are started in your own AWS account.
- SSH access to the servers.
- you can use your own custom domain if you want.
- environments are persistent across deployments.
- fully integrated into GitHub UI, no need to go through another app.
Let's get started
Add AWS credentials to your repo
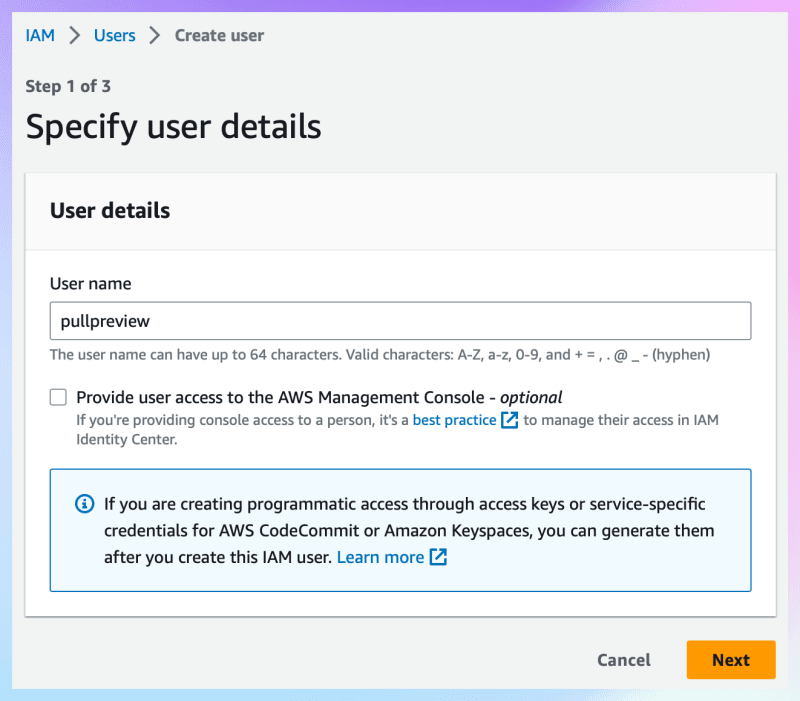
PullPreview requires AWS credentials to deploy servers, so let's create a new user.
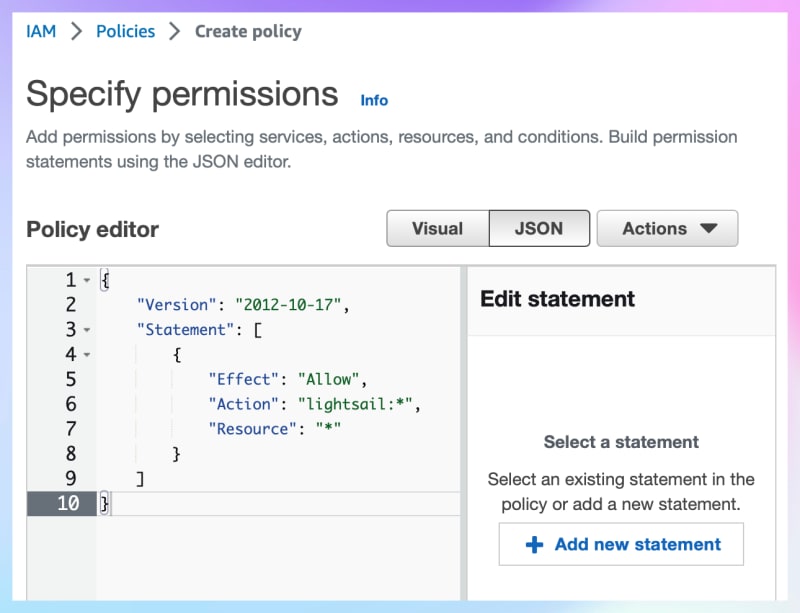
For some obscure reason AWS doesn't provide a default policy for Lightsail, so you will need to create a new Policy for this user, with the following content:
{
    "Version": "2012-10-17",
    "Statement": [
        {
            "Effect": "Allow",
            "Action": "lightsail:*",
            "Resource": "*"
        }
    ]
}
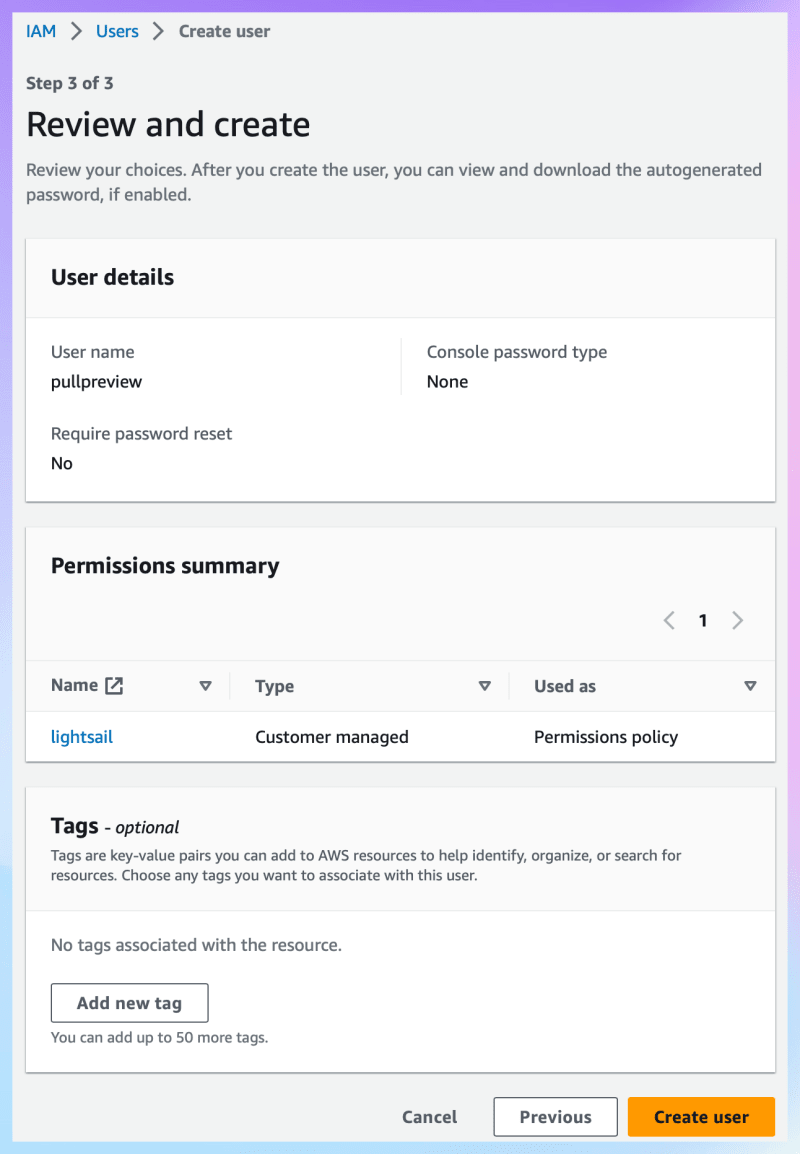
Then attach the newly created policy and create the user:
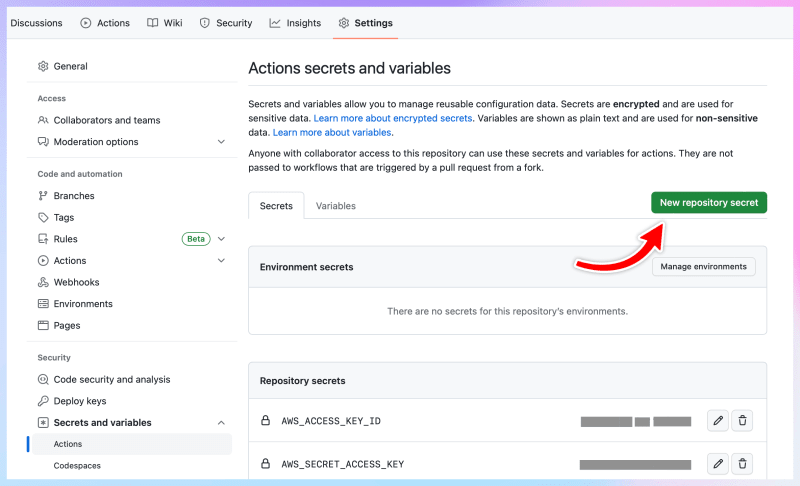
Final step is to retrieve an access key and secret access key for that new user, and declare those keys into your repository settings on GitHub, as new Repository Secrets.
Label, workflow file, and example Docker Compose app
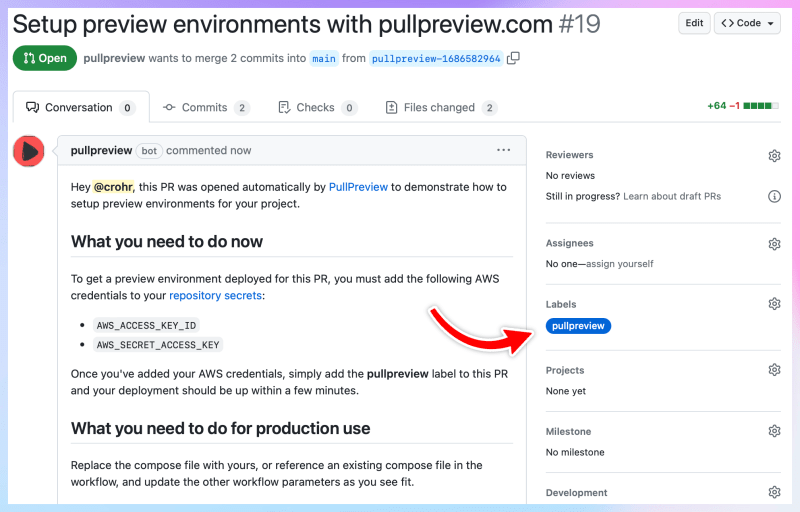
The PullPreview action will be triggered only for pull requests that have a specific label applied. By default the label name is pullpreview, so let's create it in your GitHub repository. Use any color you like.
Now, create a new branch, and add the following files:
(1) the pullpreview workflow file:
# .github/workflows/pullpreview.yml
name: PullPreview
on:
  pull_request:
    types: [labeled, unlabeled, synchronize, closed, reopened]

jobs:
  deploy:
    permissions:
      contents: read # to fetch code (actions/checkout)
      deployments: write # to delete deployments
      pull-requests: write # to remove labels
      statuses: write # to create commit status
    name: deploy
    runs-on: ubuntu-latest
    timeout-minutes: 30
    steps:
    - uses: actions/checkout@v2
    - uses: pullpreview/action@v5
      # see https://github.com/pullpreview/action/wiki/Inputs
      with:
        admins: your-github-username
        compose_files: docker-compose.pullpreview.yml
        ports: 80,443
        default_port: 443
      env:
        AWS_ACCESS_KEY_ID: "${{ secrets.AWS_ACCESS_KEY_ID }}"
        AWS_SECRET_ACCESS_KEY: "${{ secrets.AWS_SECRET_ACCESS_KEY }}"
        AWS_REGION: "us-east-1"
(2) an example docker-compose file, with SSL support:
# docker-compose.pullpreview.yml
services:
  # easily set up SSL termination
  proxy:
    image: caddy:2
    restart: unless-stopped
    command: "caddy reverse-proxy --from '${PULLPREVIEW_URL}' --to web:4567"
    depends_on:
      - web
    ports:
      - "80:80"
      - "443:443"
    volumes:
      - "/data"

  # simple ruby web server for demo purposes, which connects to a postgres DB
  web:
    restart: unless-stopped
    depends_on:
      - db
    build:
      context: .
      dockerfile_inline: |
        FROM ruby:3.2
        RUN gem install sinatra pg puma
        CMD ruby -rsinatra -rpg -rpuma \
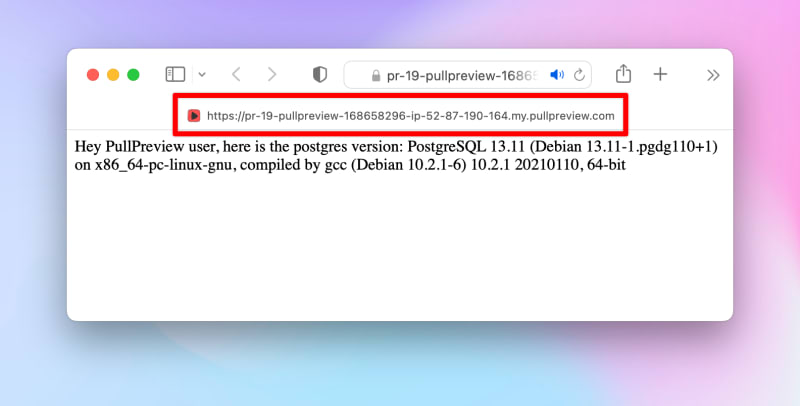
          -e'get("/"){ "Hey PullPreview user, here is the postgres version: #{PG.connect(ENV["PGURI"]).exec("SELECT VERSION()").getvalue(0,0)}" }'
        EXPOSE 4567
    environment:
      PGURI: "postgres://postgres:p4ssw0rd@db/postgres"
      APP_ENV: production

  db:
    restart: unless-stopped
    image: postgres:13
    environment:
      POSTGRES_PASSWORD: p4ssw0rd
Let the magic begin
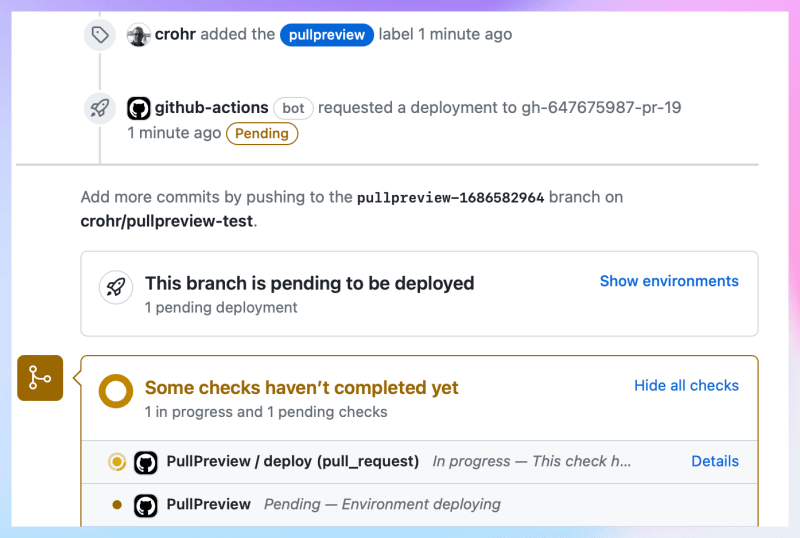
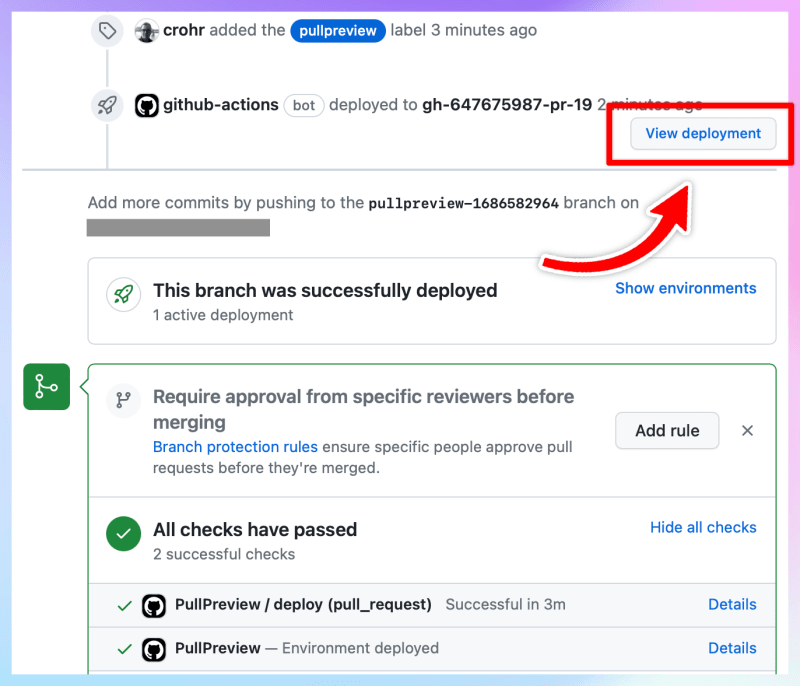
Now commit the previous files, push your new branch, and open a pull request with the pullpreview label applied. GitHub will start executing the PullPreview job, and a new preview environment will be up and running a few minutes later!
Going further
Next steps would be to replace the example docker-compose.ci.yml file with your own Docker Compose file, and see if the environment gets successfully deployed as well! You might need a few attempts to get to the point where your environment is fully setup, but remember that you can always SSH into the temporary server if the need arises!
Conclusion
We've only scratched the surface of what PullPreview can do. The fact that it runs entirely within the GitHub ecosystem and in your own AWS account allows for a wide variety of use cases:
- access restriction from specific IP ranges
- custom domains
- various instance types
- support for private docker registries
- support for multiple docker compose files
- support for multiple preview environments per pull request
- support for seed data
- etc.
You should definitely have a look at the documentation.
Also note that the PullPreview action is free to use for personal use, but comes with a commercial license (300€/year) for businesses. This ensures that the action is maintained and new features added.




Top comments (0)