Home Backup Solution
I setup a NAS a while ago using Arch Linux and ZFS migrating away from Synology. It’s really nice to control your data and be able to use more advanced tooling then the limited set of applications that are available from Synology.
I had S3 backups setup with Synology and wanted to create something similar on the Arch Server.
I have about 3 TB of data I want to backup and was looking for something that’s secure and is a bit more intelligent than a crontab of aws sync.
Also, on the off chance that my backup takes more than a few days, I wanted it to be smart enough to not execute two jobs at the same time.
Choosing Storage Solution
I was initially using S3 but firstly I find the AWS permissioning incredibly convoluted to manage. I started using GCP more so of late and I really like its simplicity. I ended up giving it a go and made sure to use the equivalent of their ‘cold storage’
From the available list of Storage classes I ended up choosing ‘Archive’
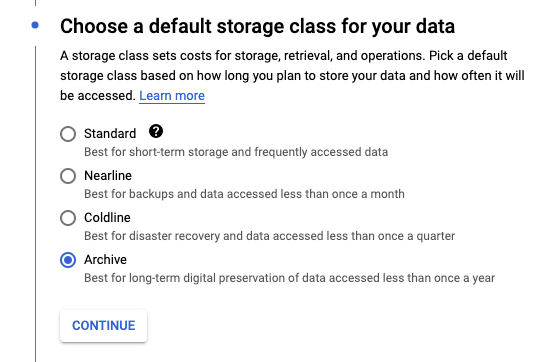
it Also seems to have a very reasonable pricing for essentially long term storage that does not need to be access very frequently as you can see below.

The other reason I chose GS (Google Storage) over S3 is because the tool I ended up choosing didn’t support S3 coldstorage backup.
Backup Service
Duplicati is a really cool project though it can be a bit tricky to setup. I ended up utilizing docker-compose and docker to get it up and running.
Here’s my simple little setup.
version: "3.7"
services:
  duplicati:
    image: ghcr.io/linuxserver/duplicati
    container_name: duplicati
    hostname: duplicati
    environment:
      - PUID=1000
      - PGID=1000
      - TZ=America/Los_Angeles
# - CLI_ARGS= #optional
    volumes:
      - ./config:/config
      - /backups:/backups
      - /tank:/source
    ports:
      - 8200:8200
    restart: unless-stopped
Please note the mounts. /backups is the destination where you want to store data. I’m mainly using it for the cloud storage so that is mainly pointless. /tank is my ZFS mount point which is mapped to /source and of course the configuration is exposed as a local volume.
Systemd Service
Place the following file under /etc/systemd/system/duplicati.service
[Unit]
Description = Duplicati
After=docker.service
Requires=docker.service

[Service]
Type=idle
WorkingDirectory=/home/docker_user/backup
ExecStart=/usr/bin/docker-compose up
ExecStop=/usr/bin/docker-compose stop
ExecReload =/usr/bin/docker-compose restart
User=docker_user
Restart=always
RestartSec=3
RestartPreventExitStatus=0
TimeoutStopSec=10

[Install]
WantedBy=multi-user.target
As you can see I’m running this as a special user I created with limited permissions only being used for running docker applications.
Let’s enable the service using:
systemclt enable duplicati
and of course if you haven’t done so already you should start the service.
systemctl start duplicati
BackUp Data
Once duplicati is running it’ll be accessible via at port 8200. My NAS’s local ip, is 192.168.1.200, so I can access it via http://192.168.1.200:8200
You should see something that looks like this:
Encryption
When you create a backup it’ll ask you to enter an Encryption key if you would like. GS is already private but the added level of encryption doesn’t hurt. Like all secrets make sure you remember the key in case you need it for disaster recovery.

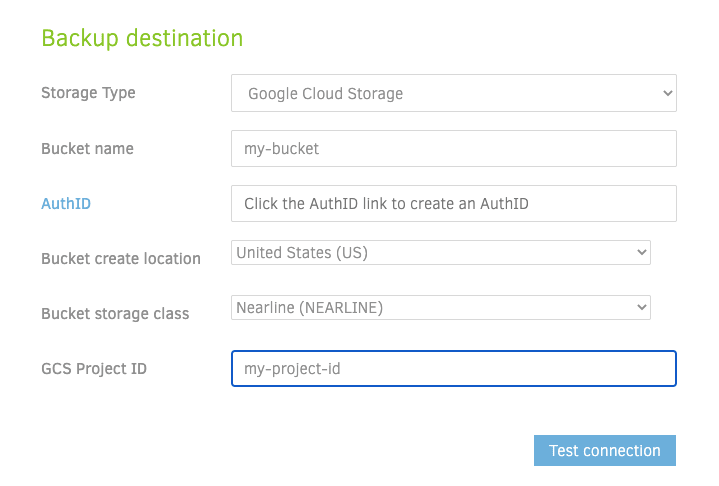
Destination
The next screen lets you setup the GS bucket. You can use any number of alternative offsite solution ranging from a local backup, (s)ftp, S3, Azure, webdav and many more. You can find the full list here.
If you use GS, then authorization is made very simply by simply clicking on the Auth key will generate a token for duplicati to use.
Source
The next two steps i’ll skip over as they’re fairly straight forward. Just choose the Source data. If you remember you mounted your Raid/ZFS as /source and the destination if you did mount it should be /backup. Navigation has a mild windows feel with My Computer replacing the typical root but otherwise this should feel familiar. You can add a single or multiple paths.
Please note, that the output will be stored in a duplicati special format. You won’t be able to go to the backup location and simply look at the files without Duplicati restoring the data.
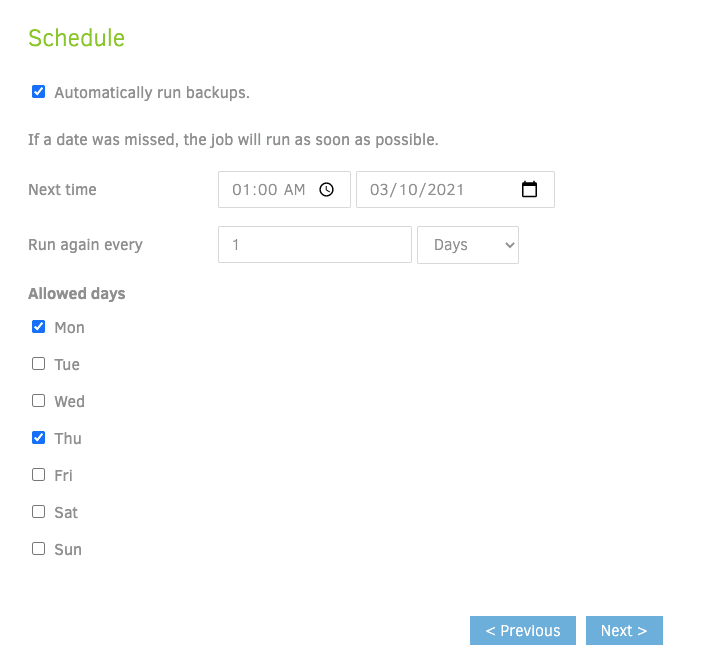
Schedule
The schedule is pretty easy to setup. Though it would be nice if they supported cron expression, I found their UI pretty flexible and configurable for every pattern that I was interested in.
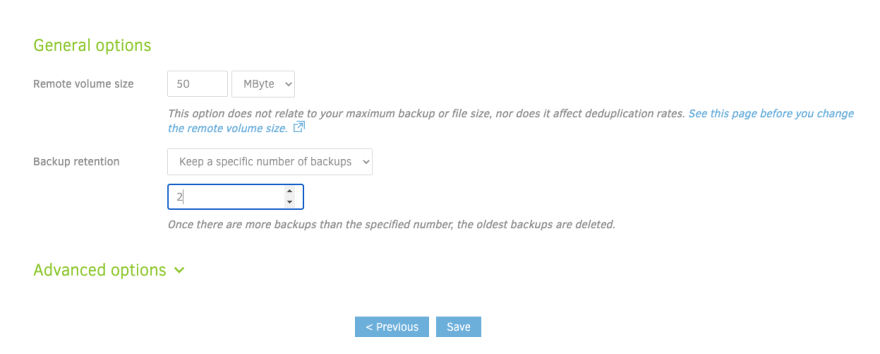
Backup Retention
Finally the backup retention. You can set it up so backups older than so many days are deleted, or ensure that you have no more than N number of backups etc. Smart backup retention is pretty cool as well keeping one copy of the last 7 days, one copy of the last 4 weeks and one copy of the last 12 months. Personally since i’m storing about 3 TB of data as it is, I’m only keeping one copy remotely.
Final Step, Backup Duplicati
I also wanted to backup my Duplicati installation. Initially I had setup duplicati to save to my NAS as a local backup but since I need duplicati to restore it I ended up just adding a little cron + rsync to ensure that I have a copy of the settings in case I do something extra dumb and destroy my docker installation of duplcati.

Oldest comments (0)