Hi guys, this is my first post and I will help to install Neovim for MacOS. In this case, the plugins to install will be mostly backend development (Python and Go).
Why Neovim? :
Personally, my primary motivation to try out Neovim was:
- Reducing load on my machine.
- Have the experience of using Vim/NeoVim as my IDE.
- To be curios about why Vim/Neovim is so special.
What is Neovim?:
Neovim is a project that seeks to aggressively refactor Vim source code to achieve the following goals:
- Simplify maintenance to improve the speed that bug fixes and features get merged.
- Split the work among multiple developers.
- Enable the implementation of new/modern user interfaces without any modifications to the core source.
- Improve the extensibility power with a new plugin architecture based on coprocesses. Plugins will be written in any programming language without any explicit support from the editor.
Let's start:
Setup:
Install Neovim from:
Installing Neovim · neovim/neovim Wiki-
You need to install brew
- Brew is a package manager for macOS
- Open your terminal and paste this line of code:
/bin/bash -c "$(curl -fsSL https://raw.githubusercontent.com/Homebrew/install/HEAD/install.sh)"
- Copy and paste this command to install neovim
brew install neovim
- Then go to this file
<username>/.config/nvim/init.vim- If the files/directories don't exist, just create them manually.
- Open the file and set your config file:
- Use nvim init.vim on the console, to open the config file or any text editor.
- You can use the configurations below:
" Options
set clipboard=unnamedplus " Enables the clipboard between Vim/Neovim and other applications.
set completeopt=noinsert,menuone,noselect " Modifies the auto-complete menu to behave more like an IDE.
set cursorline " Highlights the current line in the editor
set hidden " Hide unused buffers
set autoindent " Indent a new line
set inccommand=split " Show replacements in a split screen
set mouse=a " Allow to use the mouse in the editor
set number " Shows the line numbers
set splitbelow splitright " Change the split screen behavior
set title " Show file title
set wildmenu " Show a more advance menu
set cc=80 " Show at 80 column a border for good code style
filetype plugin indent on   " Allow auto-indenting depending on file type
syntax on
set spell " enable spell check (may need to download language package)
set ttyfast " Speed up scrolling in Vim
- If the configuration is correct, when you open a file it should be looking like this.
-
The next step we need to install a PlugIn manager. In this case, we are using vim-plug, this is the link.
https://github.com/junegunn/vim-plug
- Because we are using neovim we need to use this command
sh -c 'curl -fLo "${XDG_DATA_HOME:-$HOME/.local/share}"/nvim/site/autoload/plug.vim --create-dirs \
           https://raw.githubusercontent.com/junegunn/vim-plug/master/plug.vim'
    ```
{% endraw %}

- After installing vim-plug, is necessary to add these couple of lines on init.vim, so we can use :PlugInstall command.
 - The Plug command is to install the plugins we want to install in our configuration.
{% raw %}

```bash
call plug#begin(has('nvim') ? stdpath('data') . '/plugged' : '~/.vim/plugged')
Plug 'Example'
call plug#end()
- List of plugins:
Plug 'morhetz/gruvbox'
Plug 'vim-airline/vim-airline'
Plug 'vim-airline/vim-airline-themes'
Plug 'ryanoasis/vim-devicons'
Plug 'scrooloose/nerdtree'
Plug 'scrooloose/nerdcommenter'
Plug 'sheerun/vim-polyglot'
Plug 'jiangmiao/auto-pairs'
Plug 'neoclide/coc.nvim', {'branch': 'release'}
Plug 'tpope/vim-fugitive'
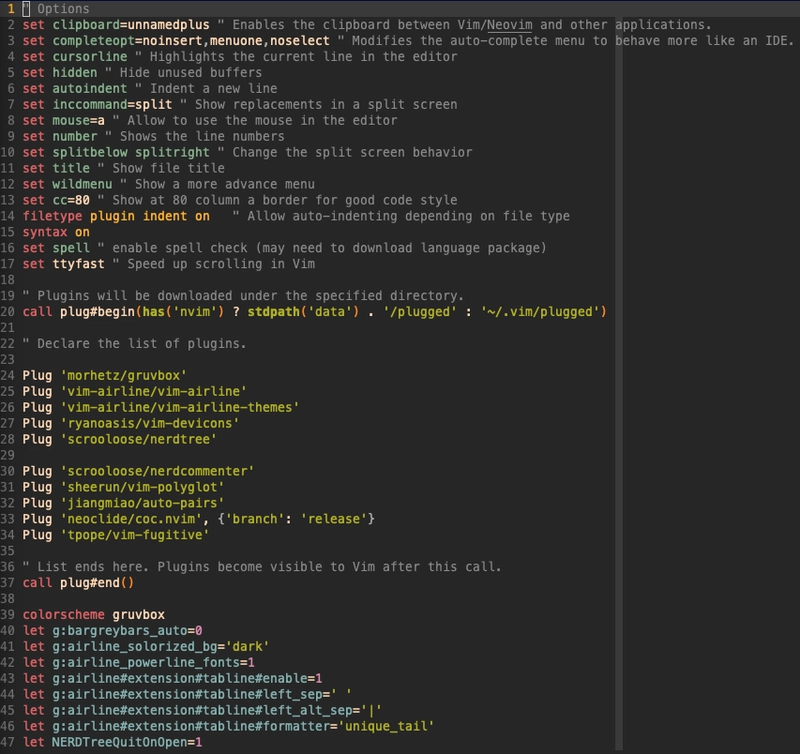
- After the line "Call plug#end()" you need to add a configuration lines to use the theme, the airline extension and the NERDTree
colorscheme gruvbox
let g:bargreybars_auto=0
let g:airline_solorized_bg='dark'
let g:airline_powerline_fonts=1
let g:airline#extension#tabline#enable=1
let g:airline#extension#tabline#left_sep=' '
let g:airline#extension#tabline#left_alt_sep='|'
let g:airline#extension#tabline#formatter='unique_tail'
let NERDTreeQuitOnOpen=1
- After you install the Plugins, your neovim configuration should be looking like this:
Links:
- If you don't want to use "Gruvbox" as you main theme you can take a look to this page: Vim Themes
- Repo: Init File
That's it, hope this article helped you in some way. Give a like and share with your friends.
If you need help or have any questions, you can leave a comment.


Top comments (3)
Lunarvim is a great NeoVim centric configuration that is very fast. Check it out!
Good to know!! Thanks!
Liquid syntax error: Unknown tag 'endraw'