Like many apps, we want our app to pull data from a specific API.
In this case, it's a Pokemon TCG (Trading Card Game) API.
It's a good practice to create a service that will wrap the API, so we will be looking at that today.
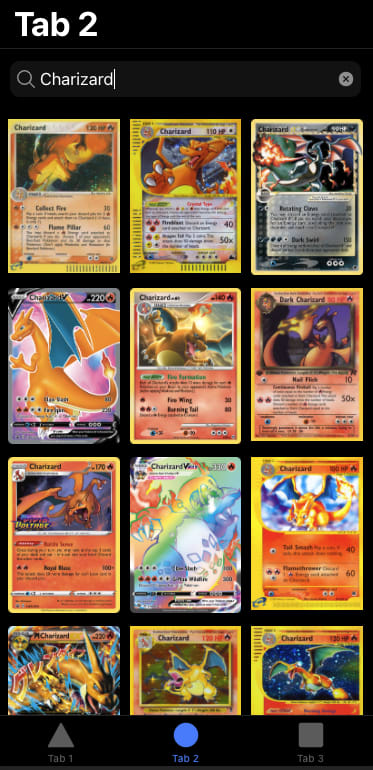
The end result will be this list of Pokemon cards when we search for a specific Pokemon name.
Note: Today's article covers a wrapped API, for your casual API's I refer you to my article on showing Ionic API Results.
Adding the API
The API comes as a typescript variant, so we don't need to wrap our calls in an HTTP wrapper.
We do have to add the package to our project.
npm install --save pokemon-tcg-sdk-typescript
This will install the Pokemon TCG API.
Then we want to create our own service where we can implement all our logic for the API calls.
ng g service services/card
That will generate a service inside the shared folder called card.service.ts.
Open up the card.service.ts file and start by importing the PokemonTCG API.
import { PokemonTCG } from 'pokemon-tcg-sdk-typescript'
Now we want to build a function that can search the API for a specific card name.
searchCard(name:string) {
    let params:PokemonTCG.IQuery[] = [{name: 'name', value: name}];
    return PokemonTCG.Card.where(params);
}
The API comes with something called an IQuery, which we can use to provide a specific search.
Then we call the Card API and pass our search query.
Using the API Service in a component
So far, we have the Card Service, but it won't do much if we don't have a component talking to it.
Let's modify the tab2.page component since we previously made sure that it was secured for logged in users.
Let's start by defining an empty array of cards.
cards: Card[];
We load the Card type from the API as such:
import { Card } from 'pokemon-tcg-sdk-typescript/dist/sdk';
Then we want to add our own wrapping service in the constructor.
constructor(private cardService: CardService) {}
This will load the Card service we created. You do need to import it still.
import { CardService } from '../services/card.service';
The last thing we need is a function that can search for a specific name of Pokemon.
searchCard(event) {
    this.cardService.searchCard(event.srcElement.value).then(cards => {
      this.cards = cards;
    })
}
This function will receive an event, at which point it will call the cardService and invoke the searchCard method. It will return a list of cards and set the local reference to these cards as a callback.
Now let's look at how we can call this function from our HTML file.
<ion-searchbar (search)="searchCard($event)"></ion-searchbar>
The ion-searchbar is a great way to accomplish this. I used the (search) callback since I didn't want to flood the API with a partial request.
This means the search event will only fire once we click search or enter, instead of doing it on every tick.
Now we need a grid to showcase all our cards.
<ion-grid>
    <ion-row>
      <ion-col size="4" *ngFor="let card of cards">
          <img [src]="card.imageUrl" [title]="card.name">
      </ion-col>
    </ion-row>
</ion-grid>
This will loop over our cards and add the image to our output.
It will make size four columns, which means 4/12, so basically 1/3 of the width.
And that's it if we now search for a Pokemon and click enter, we should see all the cards associated.
You can find today's code on the following GitHub repo.
Thank you for reading, and let's connect!
Thank you for reading my blog. Feel free to subscribe to my email newsletter and connect on Facebook or Twitter


Top comments (0)