Imagine you have two class of images, Class_A & Class_B.
Now, you need a custom dataset with train set and test set for training and validation of our image data.
We are going to use Keras for our Dataset generation.
----------------------------------logo:keras.io----------------------------
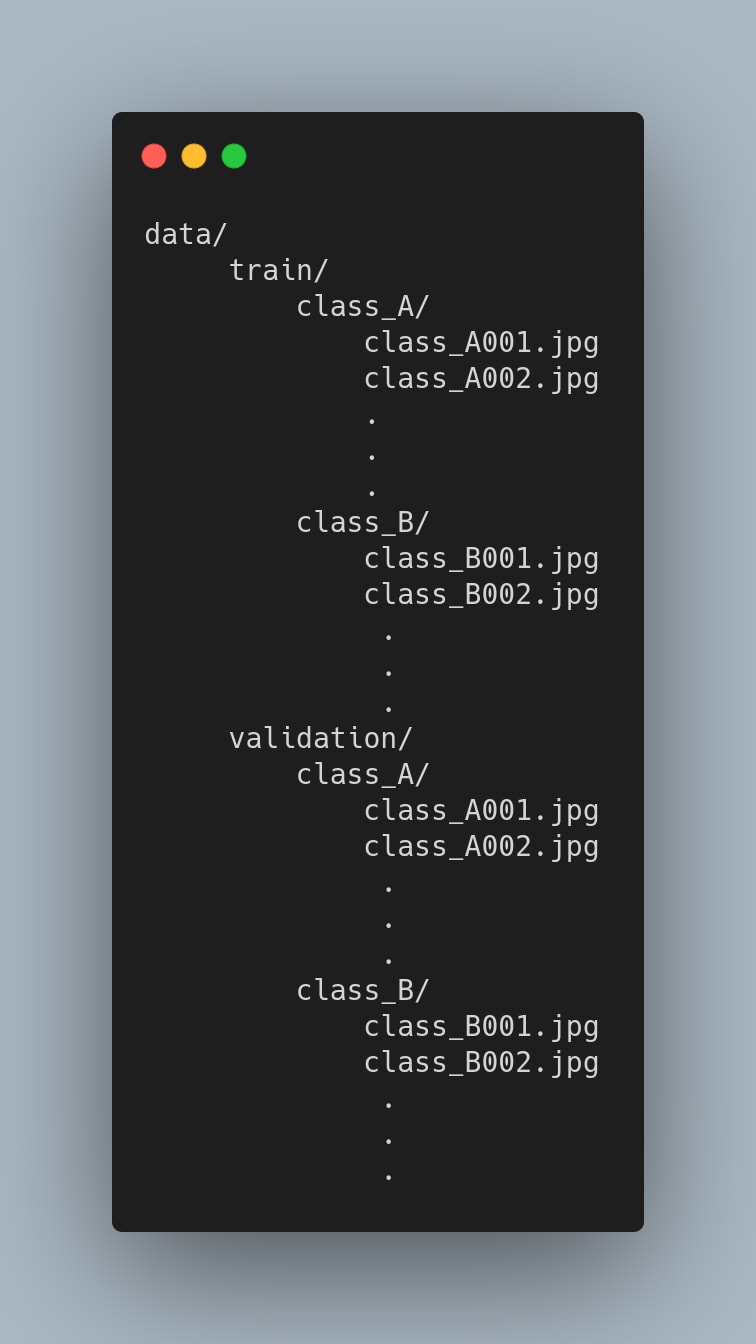
Steps in creating the directory for images:
- Create folder named
data - Create folders
trainandvalidationas subfolders inside folderdata. - Create folders
class_Aandclass_Bas subfolders insidetrainandvalidationfolders. - Place 80% class_A images in
data/train/class_Afolder path. - Place 20% class_A imagess in `data/validation/class_A folder path.
- Place 80% class_B images in
data/train/class_Bfolder path. - Place 20% class_B imagess in
data/validation/class_Bfolder path.
Directory structure.
Steps to do in code.
1, Imports.
from keras.preprocessing.image import ImageDataGenerator

from keras.models import Sequential

from keras.layers import Conv2D, MaxPooling2D

from keras.layers import Activation, Dropout, Flatten, Dense
2, Initialize variables as follow
# image dimensions, set as per your preference.

img_width, img_height = 150, 150
train_data_dir = 'data/train'

validation_data_dir = 'data/validation'
set the following parameters as per your preference
batch_size = 10

nb_train_samples = 800

nb_validation_samples = 200

epochs = 40
3, Augmentation configuration for train set
train_datagen = ImageDataGenerator(

    rescale=1. / 255,

    shear_range=0.2,

    zoom_range=0.2,

    horizontal_flip=True)
4, Augmentation configuration for test set
# rescaling

test_datagen = ImageDataGenerator(rescale=1. / 255)
5, Now, use the flow_from_directory() method in ImageDataGenerator class to generate a data generator from image files in a directory.
train_generator = train_datagen.flow_from_directory(

    train_data_dir,

    target_size=(img_width, img_height),

    batch_size=batch_size,

    class_mode='binary')
validation_generator = test_datagen.flow_from_directory(

    validation_data_dir,

    target_size=(img_width, img_height),

    batch_size=batch_size,

    class_mode='binary')
6, Build an image classifier model, a sequential CNN architecture with relu as hidden neurons activation function and sigmoid as output neuron activation function.
model = Sequential()

model.add(Conv2D(32, (3, 3), input_shape=input_shape))

model.add(Activation('relu'))

model.add(MaxPooling2D(pool_size=(2, 2)))
model.add(Conv2D(32, (3, 3)))

model.add(Activation('relu'))

model.add(MaxPooling2D(pool_size=(2, 2)))
model.add(Conv2D(64, (3, 3)))

model.add(Activation('relu'))

model.add(MaxPooling2D(pool_size=(2, 2)))
model.add(Flatten())

model.add(Dense(64))

model.add(Activation('relu'))

model.add(Dropout(0.5))

model.add(Dense(1))

model.add(Activation('sigmoid'))
7, Compile the model as follows
model.compile(loss='binary_crossentropy',

              optimizer='rmsprop',

              metrics=['accuracy'])
8, Now use fit() method to fit your train set, validate your image dataset and calculate steps_per_epoch & validation_steps by doing a floor division of steps_per_epoch=nb_train_samples // batch_size validation_steps=nb_validation_samples // batch_size.
model.fit(

    train_generator,

    steps_per_epoch=nb_train_samples // batch_size,

    epochs=epochs,

    validation_data=validation_generator,

    validation_steps=nb_validation_samples // batch_size)
Reference :
Keras Image data preprocessing
Explore Us On:Doge Algo


Oldest comments (0)