A friend asked me to create a tool for logging when one of his staff enters a room to turn on and off machine jobs. It needed to be on the cloud and run on an ipad. He wanted it to be simple and have an MVP fast.
I wanted to see if i could build the tool using no-code or similar. I got it built in around 2 hours using airtable! Though I found that I needed a tiny bit of code to make it more professional by having it on its own url.
The solution steps
- Setup an airtable account
- Setup a new base
- Add a new table
- Add a new form
- Test the form
- Add the site template
- Add a github repository
- Add a netlify site
- Deploy your site
- Add a password on airtable
- Add a domain
Setting up the basic air table account
First step is to go to air table and open an account. For our purposes you will have to purchase a Pro level account. This gives you custom branding on the form and a password restriction so you can keep it private.
Go here to sign up: https://airtable.com
Setting up a new base
In air table there is this concept of a base. This is like a single database or an app. We need a new one of these for our app.
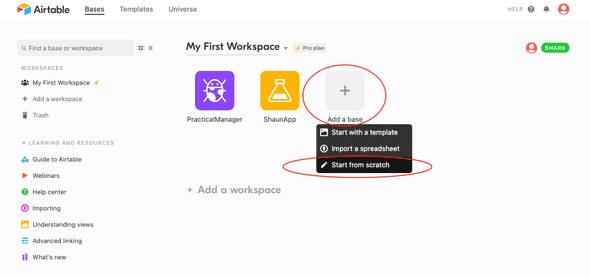
Click add a base (the + symbol) and then “from scratch”. Call it “Machine Log”.
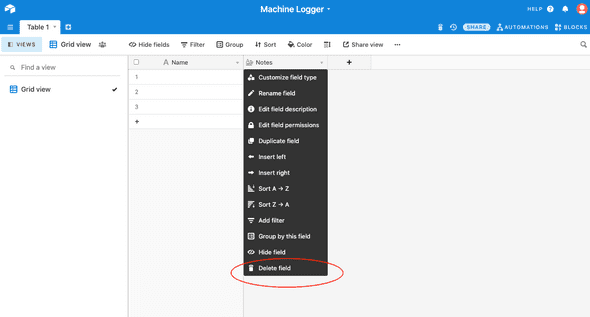
Open the new base. This will show you a grid view where we can edit the columns (they are called “fields” in air table). Airtable adds some default columns and sample data for us. For our app we need to customise these columns. You can remove all the fields to the right of “Name” that airtable adds by default.
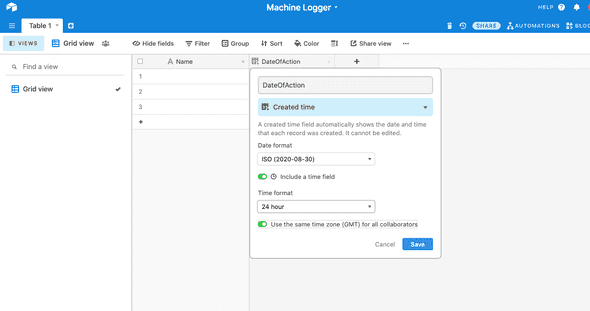
We need to add a column that records when the person enters the log. For this we add Name: “DateOfAction”, Type: “Created time”, Date format: ISO, Include time, 24-Hour clock and use GMT time.
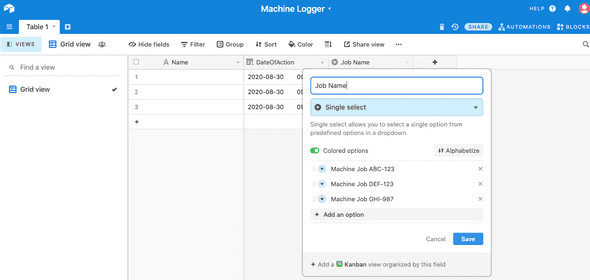
Next we add the name of the machine job that we’re logging. This is a fixed list of options for this application so we add a column called “Job Name”. Type: “Single select”, add some options.
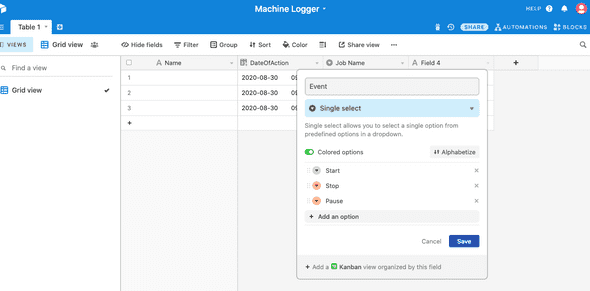
Add the action that the operator is recording. We will call this the “Event”. Another single select field with “Start”, “Stop” and “Pause” options.
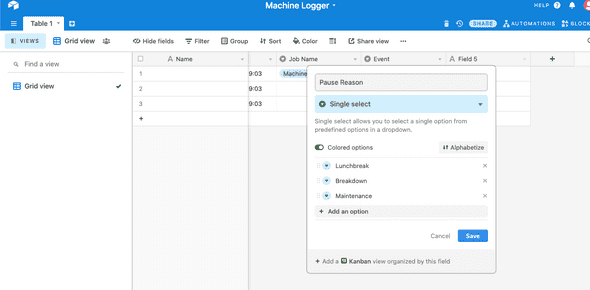
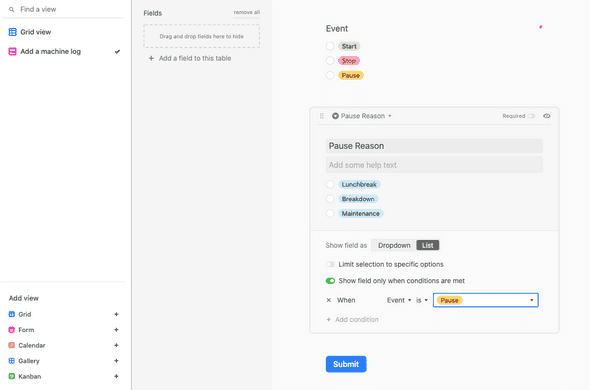
We add a field that the operator can use to indicate why they are pausing the job. This will only be shown to the operator in our form if they have selected “Pause” in the event field.
The last column change we need is to make the Name column automatically filled when a new record is created. To do this we will use a formula column. The formula is DateOfAction & "-" & {Job Name} & "-"&Event. This combination should be unique for a single log entry.
Rename the table to “Machine Job Logs”
Adding a form
So now that we have a table to store the data. We need to create the form for our machine operators to enter the data with a better ui than the grid view / excel view. To do this click on Add form. The form should already have all of our fields. You can add a logo if you like here.
Change the title and description to help our machine operator. You can edit the form field properties by clicking on the title of the form field.
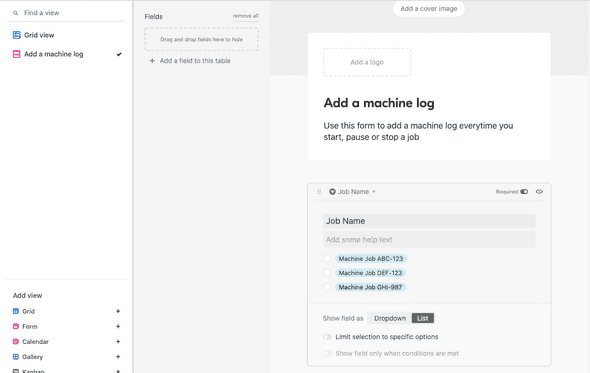
Change the Job name field properties to look like this. It should be required and because there aren’t many options right now I change it to show the list of options.
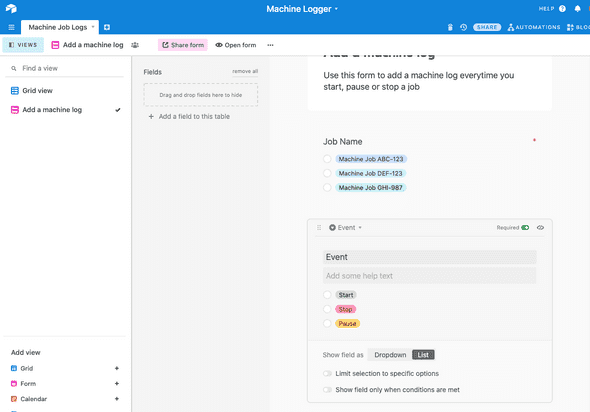
Same for event - required, show list
Set the pause reason to only show when the event is “Pause”.
Change form so that:
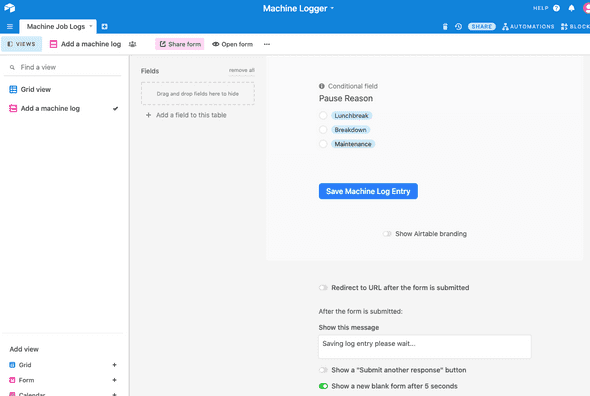
- The button reads “Save Machine Log Entry” so it’s clear what will happen for the operator.
- Turn off airtable branding
- Show a message “Saving log entry please wait…”
- And select “Show a new form in 5 seconds”
Test the form
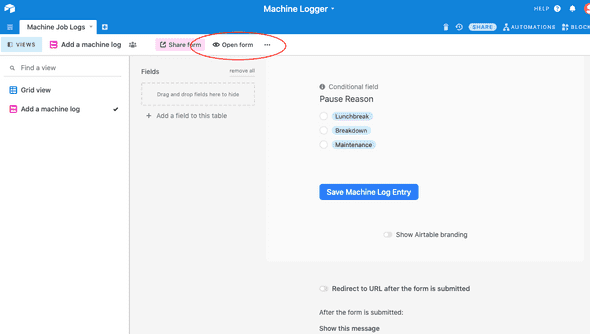
Use the preview feature to test your new form ! You can see that it will show with very little branding because of our pro account. This would take (me at least) a lot of work to set up and test with full code.
Add Some Code
Now we need to add some code but it isn’t much.
Create a folder on your computer and add this content to a file called “index.html”.
<!DOCTYPE html>
<html lang="en">
  <head>
    <meta charset="utf-8" />
    <title>Machine Job Logging</title>
    <script src="https://static.airtable.com/js/embed/embed_snippet_v1.js"></script>
  </head>
  <body>
    <iframe
      class="airtable-embed airtable-dynamic-height"
      src="======PASTE EMBED LINK HERE========"
      frameborder="0"
      onmousewheel=""
      width="100%"
      height="1000"
      style="background: transparent; border: 1px solid #ccc;"
    ></iframe>
  </body>
</html>
Get your embed link
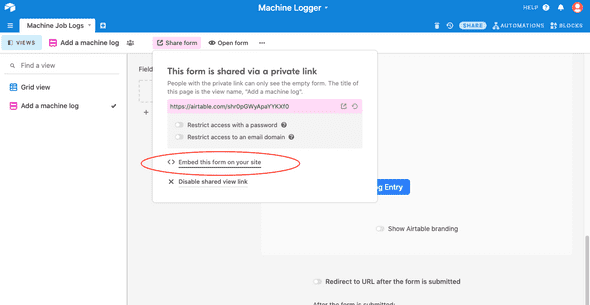
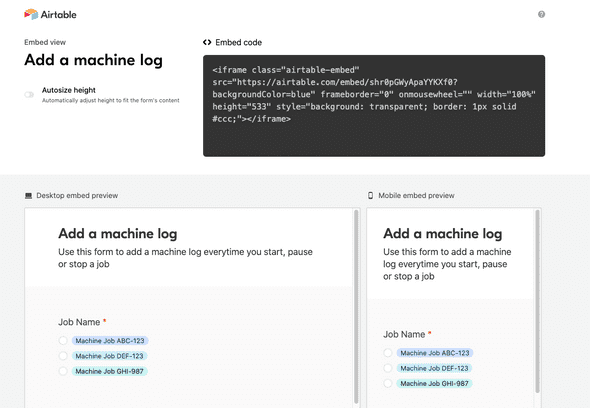
Air table allows us to embed our forms in another site. We’re going to create a netlify site to host our form soon. To get the embed share link from airtable. Click on “Share form”
and then “Embed this form on your site”. This will open a new window with the details we need.
Copy the contents of the src="" bit from this page and past it into index.html replacing “======PASTE EMBED LINK HERE========“. So from the example in the image, our index. html would be
...
<body>
    <iframe
      class="airtable-embed airtable-dynamic-height"
      src="https://airtable.com/embed/shr0pGWyApaYYKXf0?backgroundColor=blue"
      frameborder="0"
      onmousewheel=""
      width="100%"
      height="1000"
      style="background: transparent; border: 1px solid #ccc;"
    ></iframe>
  </body>
...
Add a github repository
There are many guides on the internet to show you how to do this. But create a new github repository and add the index.html folder to it.
Add a netlify site
Signup for netlify and add a new netlify site. Tell it to use your new github repository from the step above. Because our site is super simple we don’t need any build command or output directory specified.
Deploy your site
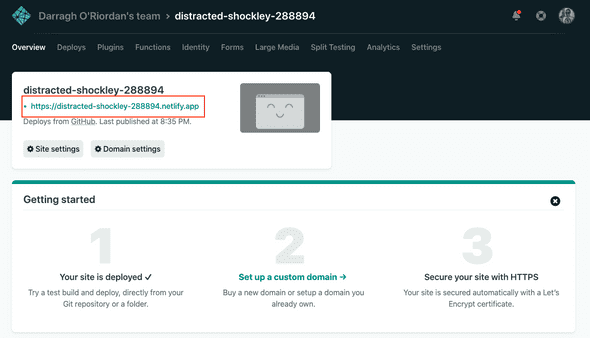
It should deploy in a second. Click on the link and you should see the form!
Password protect your site
Your site is now public to world and we don’t want people messing with it so add a password. Back in air table open the “Share form” popup again. Click on “Restrict access with password” and enter a password. Now when someone visits your netlify site they will have to enter the password.
Add a domain
Use netlify to set up a custom domain (if you like). Follow their instructions here: https://docs.netlify.com/domains-https/netlify-dns/




Top comments (0)