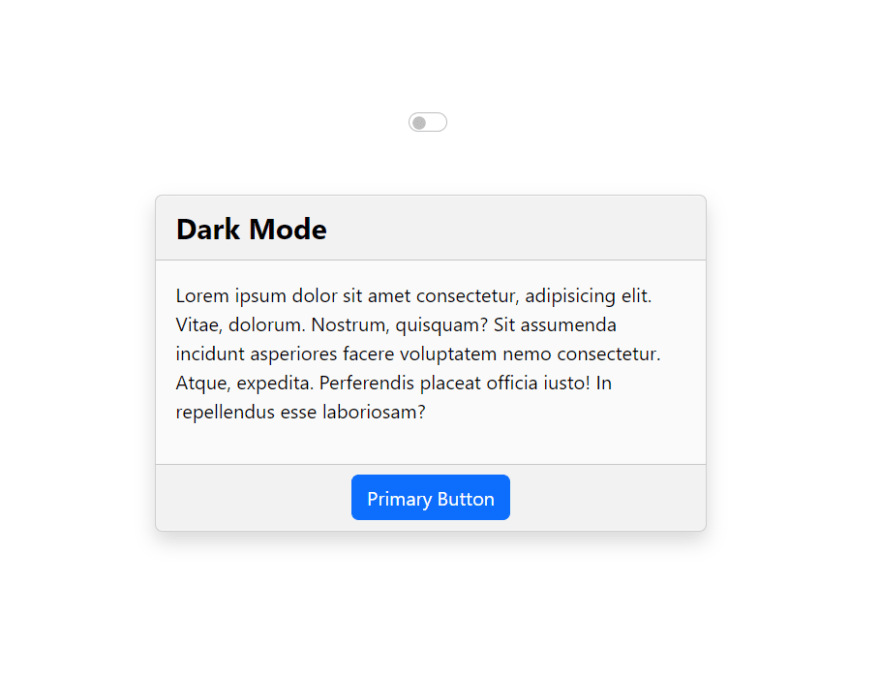
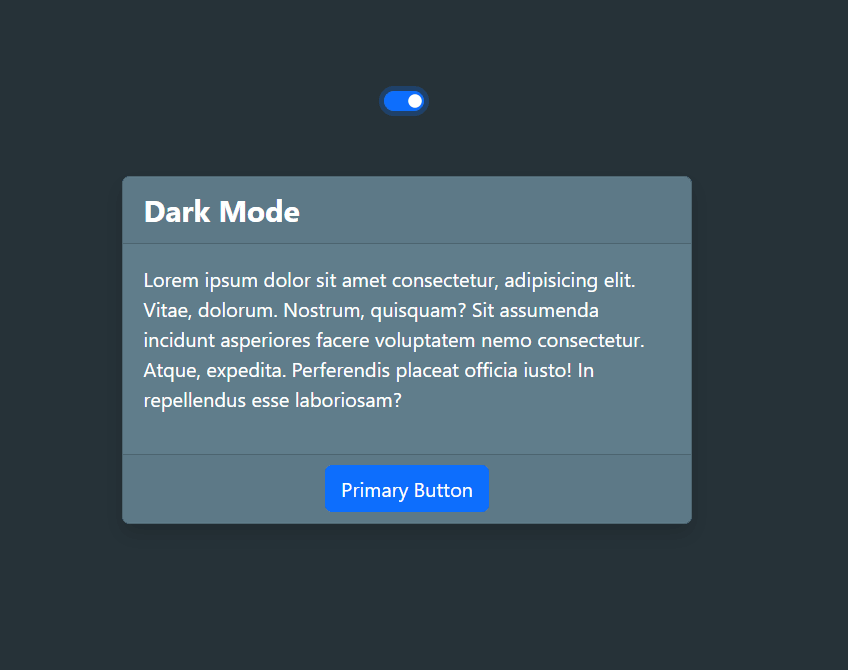
In this post I'm going to show you how you can easily create Dark/Light mode switcher using CSS, JavaScript, and little bit of Bootstrap 5.
I'll show you everything in steps, so you can easily understand.
Step 1 - (HTML Code)
<!DOCTYPE html>
<html lang="en">

  <head>
    <meta charset="UTF-8">
    <meta http-equiv="X-UA-Compatible" content="IE=edge">
    <meta name="viewport" content="width=device-width, initial-scale=1.0">
    <title>Document</title>
    <link rel='stylesheet' href='https://cdnjs.cloudflare.com/ajax/libs/twitter-bootstrap/5.2.0/css/bootstrap.min.css' integrity='sha512-XWTTruHZEYJsxV3W/lSXG1n3Q39YIWOstqvmFsdNEEQfHoZ6vm6E9GK2OrF6DSJSpIbRbi+Nn0WDPID9O7xB2Q==' crossorigin='anonymous' />
    <link rel="stylesheet" href="style.css">
  </head>

  <body>
    <div class="container">
      <div class="row justify-content-center align-items-center min-vh-100">
        <div class="col-lg-6">
          <div class="form-switch text-center my-5">
            <input type="checkbox" id="mode" class="form-check-input">
            <label for="mode" class="form-check-label"></label>
          </div>
          <div class="card shadow">
            <div class="card-header">
              <div class="fs-4 fw-bold">Dark Mode</div>
            </div>
            <div class="card-body">
              <p>Lorem ipsum dolor sit amet consectetur, adipisicing elit. Vitae, dolorum. Nostrum, quisquam? Sit assumenda incidunt asperiores facere voluptatem nemo consectetur. Atque, expedita. Perferendis placeat officia iusto! In repellendus esse laboriosam?</p>
            </div>
            <div class="card-footer d-flex justify-content-evenly">
              <button class="btn btn-primary">Primary Button</button>
            </div>
          </div>
        </div>
      </div>
    </div>
    <script src="script.js"></script>
  </body>

</html>
In above HTML code you can see I'm using Bootstrap 5 to design a card to the center of the page. Also I've linked a style.css within head tag and a script.js file at the end of closing body tag. So in later steps we'll see the codes of both the files.
Step 2 - (CSS Code)
:root,
:root.light {
    --color-bg: #ffffff;
    --color-fg: #000000;
    --card-bg-color: #fafafa;
}
In the above codes you can see I'm using :root and :root.light selector. to store light background and dark foreground colors. :root selector is by default, so when nothing is set by the JavaScript then light mode will be applied to all the elements. Similarly I'll use :root.dark selector to store dark background and light foreground colors as shown below:
:root.dark {
    --color-bg: #263238;
    --color-fg: #ffffff;
    --card-bg-color: #607d8b;
}
Now next We'll apply the CSS variables to the element in which we want to apply the colors, so we'll var function of CSS like below:
body {
    background-color: var(--color-bg);
    color: var(--color-fg);
}

.card {
    background-color: var(--card-bg-color) !important;
}
So in above codes you can see I've used var function of CSS to give background and foreground colors to the elements.
So the final codes of style.css file are:
:root,
:root.light {
    --color-bg: #ffffff;
    --color-fg: #000000;
    --card-bg-color: #fafafa;
}
:root.dark {
    --color-bg: #263238;
    --color-fg: #ffffff;
    --card-bg-color: #607d8b;
}

body {
    background-color: var(--color-bg);
    color: var(--color-fg);
}

.card {
    background-color: var(--card-bg-color) !important;
}
Step 3 - (JavaScript Code)
In script.js first We'll select the switch checkbox using below code:
const modeBtn = document.getElementById('mode');
Now next We'll use a onchange event on switch button:
modeBtn.onchange = (e) => {
  if (modeBtn.checked === true) {
    document.documentElement.classList.remove("light")
    document.documentElement.classList.add("dark")
    window.localStorage.setItem('mode', 'dark');
  } else {
    document.documentElement.classList.remove("dark")
    document.documentElement.classList.add("light")
    window.localStorage.setItem('mode', 'light');
  }
}
In above coding you can see I'm checking if checkbox is checked === true then I'm first removing the *light * class from the html tag using documentElement and then adding *dark * class, also I'm using localStorage to store the *mode * type to *persist * the mode in the browser. Similarly when checkbox is unchecked then I'm removing the *dark * class from the html tag and adding *light * class and also change the localStorage *mode * value to light.
Now if you click the switch button then you can see the dark mode is applied to your web page, and when you again click the switch button then light mode applied to your web page.
This is working fine but this works until you refresh/reload the page. When you reload the page then again it come back to default theme i.e. light, now how to persist this, so in above coding you can see I've used localStorage to store the mode type value in the broswer's local storage. Now next we'll see how use localStorage value to persist any applied theme.
const mode = window.localStorage.getItem('mode');
First We'll get the mode value from the localStorage using above code.
if (mode == 'dark') {
  modeBtn.checked = true;
  document.documentElement.classList.remove("light")
  document.documentElement.classList.add("dark")
}

if (mode == 'light') {
  modeBtn.checked = false;
  document.documentElement.classList.remove("dark")
  document.documentElement.classList.add("light")
}
Now in above codes you can see I'm checking condition that if mode == 'dark' then add light class to html tag and remove dark class. And also make the checkbox to checked state. Similarly We'll do for light mode also.
Here below is the final codes script.js file:
const modeBtn = document.getElementById('mode');
modeBtn.onchange = (e) => {
  if (modeBtn.checked === true) {
    document.documentElement.classList.remove("light")
    document.documentElement.classList.add("dark")
    window.localStorage.setItem('mode', 'dark');
  } else {
    document.documentElement.classList.remove("dark")
    document.documentElement.classList.add("light")
    window.localStorage.setItem('mode', 'light');
  }
}

const mode = window.localStorage.getItem('mode');
if (mode == 'dark') {
  modeBtn.checked = true;
  document.documentElement.classList.remove("light")
  document.documentElement.classList.add("dark")
}

if (mode == 'light') {
  modeBtn.checked = false;
  document.documentElement.classList.remove("dark")
  document.documentElement.classList.add("light")
}
Below are some screenshots:


Top comments (0)