
Intro
My data science Bootcamp introduced me Deep Learning a few months ago. While reading materials, I was so surprised to know my RTX 3090 can be used for Deep Learning! I thought GPUs were only for gaming. Now, I have one more excuse to buy the high-end GPU for the next time I build a new desktop.
However, the excitement didn't last long as it was not easy to set up a new environment for Deep Learning using GPU on Anaconda or Git Bash. I have done some research, and the steps were pretty straightforward, but they were mostly at least a year old, and no information was related to Git Bash.
In this article, I like to show you how to incorporate Git Bash to use GPU Deep Learning on Jupyter notebook. Let me talk through how we can set up an environment.
Benefit of Using GPU
Let me talk briefly about the benefit of using GPU for Deep Learning. It is much faster.

Based on the image above from this link, GPU is generally 3 times faster than CPU. A better GPU can give you much a better performance.
Set-up
Step 0
Before starting, please make sure Anaconda and Git Bash are installed.
Step 1 - Anaconda

After opening Anaconda, click "Environment" on the menu.

Click "Create" at the bottom of the list of environments.

A small window should pop up. Name the environment. I previously named the environment "gpu". The next step is to choose a version. The walkthrough I read showed me to choose version 3.6, but I was able to make mine work with version 3.7. So, I recommend 3.7, but you can try a newer version and see if it works or not.

Select the environment you just created. Choose "Not Installed" from the drop-down menu. On the "Search Packages" box, type in "tensorflow" and hit "Enter".
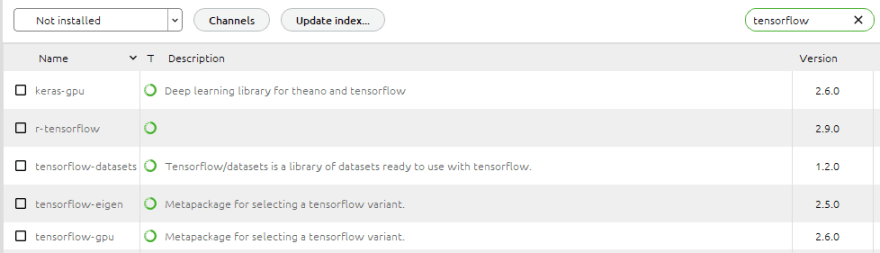
You should see some results like what you see in the picture above. Check "keras-gpu" and "tensorflowo-gpu" then click "Apply". This should take some time to get things ready to install the packages. If Anaconda shows you they can't be installed, then this is where you should try again with a different version mentioned earlier in this article.
Once the packages are installed, we are ready for Git Bash.
Step 2 - Git Bash
This step is pretty simple and quick. We only need to change the environment.

Just type "conda activate gpu", then hit "enter".
Now type "jupyter notebook", then hit "enter" to open the notebook.
Step 3 - Test on Jupyter Notebook
Run the codes below. I have attached an output below.
import tensorflow as tf
from tensorflow import keras
print(len(tf.config.experimental.list_physical_devices('GPU')))
tf.test.is_gpu_available()
tf.test.is_built_with_cuda()

You can also check Git Bash logs after running the codes above.

The logs mention my RTX 3090 with the size of memory. It should print out your GPU.
The images below show the GPU memory usage difference when using GPU or not. Please pay attention to "Dedicated GPU memory".


Top comments (0)