
Introduction
Hey guys, In today’s article, we will explore how to create a search bar using HTML, CSS, and JavaScript. The search bar will allow users to filter and display a list of characters and status from the "Rick and Morty" API based on their input. We will cover the HTML structure, CSS styling, and JavaScript functionality step by step. And by the end of this article you will understand how to consume data from an API. Let’s dive right into it 😉.
🧰 Prerequisites
To follow along with this article, you need basic knowledge of HTML, CSS, and JavaScript(I will still explain everything though), Familiarity with fetch requests and event listeners in JavaScript.
🏚️ HTML Structure
The HTML structure defines the layout and elements of the web page. Let's examine the HTML code 👇🏽
<body>
    <h2>Characters from Rick and Morty</h2>
    <div class="search-input">
      <input type="text" placeholder="Search Characters" />
      <button class="submit">
        <i class="fa-solid fa-magnifying-glass"></i>
      </button>
    </div>

    <div class="loading-indicator"></div>

    <ul class="character-list"></ul>
        <script src="script.js"></script>
  </body>
As you can see from the code above, we have a <body> element which wraps our entire content and the <h2> element displays the heading "Characters from Rick and Morty."
The search functionality is implemented using an input field and a button wrapped inside a <div> with the class "search-input."
The loading indicator is represented by a <div> element with the class "loading-indicator."
The character list is represented by an unordered list <ul> element with the class "character-list." Finally, you can include a reference to an external JavaScript file like "script.js" using the <script> tag.
Here is our output so far 👇🏽

Let’s make it look more better by adding some styling to it.
🏡 CSS Styling
CSS is used to define the visual appearance and layout of the HTML elements. Let's explore the CSS code 👇🏽
*,
*::before,
*::after {
  box-sizing: border-box;
  margin: 0;
  padding: 0;
}

li {
  list-style: none;
}

body {
  font-family: 'Poppins', sans-serif;
  font-size: 1rem;
  line-height: 1.5;
  background: #e6e7e7;
  color: #333;
  margin-top: 3rem;
  height: 100vh;
}

.search-input {
  width: 80%;
  max-width: 500px;
  margin-inline: auto;
  display: flex;
}

input {
  font-family: inherit;
  width: 100%;
  height: 40px;
  padding-left: 0.5rem;
}

h2 {
  text-align: center;
  margin-bottom: 1rem;
}

button {
  width: 15%;
  cursor: pointer;
  margin-left: 0.4rem;
}

span {
  display: inline-block;
}

.character-list {
  color: white;
  width: 80%;
  max-width: 500px;
  margin-inline: auto;
  margin-top: 1rem;
  padding: 1.5rem 1rem;
  border-radius: 0.2rem;

  & li:not(:last-child) {
    padding-bottom: 1rem;
  }
}

li {
  display: flex;
  justify-content: space-between;
}

.loading-indicator {
  position: absolute;
  left: 50%;
  top: 13rem;
  transform: translateX(-50%);
  width: 40px;
  height: 40px;
  border: 4px solid white;
  border-top: 4px solid #0f172a;
  border-radius: 50%;
  animation: spin 1s linear infinite;
}

@keyframes spin {
  0% {
    transform: rotate(0deg);
  }
  100% {
    transform: rotate(360deg);
  }
}
From the code above, The *, *::before, and *::after selectors are used to reset the default box model and remove any margin and padding.
The li selector removes the default list styles.
The body selector sets the font family, size, line height, background color, and margin.
The .search-input selector sets the width, max-width, and display properties for the search input container.
The input selector sets the font family, width, height, and padding properties for the search input field. The h2 selector sets the text alignment and margin properties for the heading.
The button selector sets the width, cursor, and margin properties for the search button.
The span selector sets the display property for inline elements.
The .character-list selector sets the color, width, max-width, margin, padding, and border-radius properties for the character list container.
The li:not(:last-child) selector sets the padding-bottom property for all list items except the last one.
The li selector sets the display and justify-content properties for the list items.
The .loading-indicator selector sets the position, size, border, border-radius, and animation properties for the loading indicator.
Here is our output so far 👇🏽

Looks nice right?. Let’s even make it more better by adding some functionalities to it.
🏗️ JavaScript Functionality
This is the fun part of the article. We’ll be using the JavaScript to handle the search functionality and dynamically populate the character list. Let's analyze the JavaScript code 👇🏽
const characterList = document.querySelector('.character-list');
const searchInput = document.querySelector('.search-input');
const loadingIndicator = document.querySelector('.loading-indicator');
let isLoading;
// load the api on the screen
const getCharacters = async () => {
  try {
    isLoading = true;

    loadingIndicator.style.display = 'block';

    const api = await fetch('https://rickandmortyapi.com/api/character');
    const data = await api.json();
    const characters = data.results;
    const filterCharacters = characters.filter(
      (character) => character.id <= 15
    );

    // clear the previous character list
    characterList.innerHTML = '';

    filterCharacters.forEach(({ name, status }) => {
      const listItem = document.createElement('li');
      listItem.innerHTML = `
        <span>${name}</span>
        <p>${status}</p>
      `;
      characterList.style.backgroundColor = '#0f172a';
      characterList.appendChild(listItem);
    });

    isLoading = false;
    loadingIndicator.style.display = 'none';
  } catch {
    console.log('Error fetching characters');
  }
};

// Filter characters based on search
const filterCharacter = (query) => {
  const characters = characterList.querySelectorAll('li');
  characters.forEach((character) => {
    const text = character.textContent.toLowerCase();

    if (text.includes(query)) {
      character.style.display = 'flex';
    } else {
      character.style.display = 'none';
    }
  });
};

// get the input text from the search input
const searchQuery = (event) => {
  const query = event.target.value.toLowerCase();
  filterCharacter(query);
};

searchInput.addEventListener('input', searchQuery);
window.addEventListener('DOMContentLoaded', getCharacters);
We are going to breakdown the explanation into segments for better understanding 👇🏽
Segment 1
From the code above, we use the querySelector method to select elements from the DOM and store them in variables.
The characterList variable refers to the character list <ul> element.
The searchInput variable refers to the search input field.
The loadingIndicator variable refers to the loading indicator <div> element.
The isLoading variable is initially set to false. This variable will be used to track the loading state of the character data.
Segment 2
The getCharacters function is an asynchronous function that fetches character data from the Rick and Morty API.
Inside the function, we set isLoading to true and display the loading indicator by setting its display style property to 'block'.
We use the fetch function to make a GET request to the API endpoint and await the response using the await keyword.
The response is then parsed as JSON using the json method.
We extract the array of characters from the response and filter it to include only the characters with an id less than or equal to 15.
💡 The max characters is 20, so you can decide not to filter it if you want to. Let’s move on
We clear the previous character list by setting the innerHTML property of characterList to an empty string.
Then, we iterate over the filtered characters and create <li> elements dynamically using createElement.
Each <li> element contains the character's name and status.
We set the background color of characterList to #0f172a and append the <li> elements to the characterList.
Finally, we set isLoading to false and hide the loading indicator by setting its display style property to 'none'.
Segment 3
The filterCharacter function takes a query parameter and filters the characters in the character list based on the query.
We use the querySelectorAll method to select all the <li> elements inside characterList.
Then, we iterate over each character and compare its text content (converted to lowercase) with the query.
If the text includes the query, we set the display style property to 'flex' to show the character. Otherwise, we set it to 'none' to hide the character.
The searchQuery function is an event handler for the input event on the search input field. It extracts the value of the input field, converts it to lowercase, and calls the filterCharacter function with the query value.
Finally, we add event listeners to the searchInput and window objects. The searchQuery function is called whenever the input value changes. The getCharacters function is called when the DOM is fully loaded.
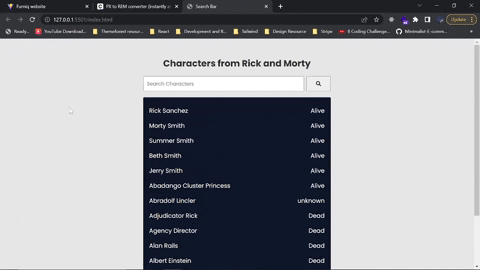
Here is the final output of the code 👇🏽
Conclusion
That’s it guys, Congrats on getting to the end of this article 🎉 🎉. I hope you found it really helpful. You can leave a question in the comments if you have one. Hope you have an amazing weekend and see you next week 😃

Top comments (0)