As a software developer with a fair amount of experience with Expo and React Native, I know how annoying it can get to just simply build an app from an Expo project.
Just the other day I found myself blankly staring at my screen wondering why my local Expo builds were failing, just to find out a few hours later that there is nothing that I can do about it because it was not my fault but a weird glitch with React Native and Expo. Thankfully I found a way to get the app to build and get it published. This is an article about how I went about doing that.
Don’t use the Expo commands
After several trial and errors I found out that there is no need to use the Expo/EAS build commands because you can just archive your app directly through Xcode. Yes, it works. To my surprise all the build phases are already setup in Xcode, so all you need to do is run Archive and your project will be completely built and archived for any platform you have selected, and yes the Javascript React Native code will be compiled.
Another reason why I recommend against using the Expo/EAS commands is that it asks for a file that is automatically present in Xcode if you’re logged into a company profile. I believe that file is some sort of certificate/signing file. Having all devs working on the project to manually provide this file can add a level of unnecessary complexity.
How to archive your project
Before talking about how you can go about archiving your project first let’s talk about what archiving even is in iOS app development.
Simply put archiving is the overall packaging of your application. This package includes .ipa files that are similar to .apk files in android. The wording can be a bit deceiving with calling it Archive and having Build directly under, but trust me if you’re looking to get a distributable file or start the distribution process via Xcode, Archive is what you’re looking for.
Now let’s get started on how we can go about archiving our app.
Firstly you’ll need to run npx expo prebuild if you have an Expo managed project.
After running the prebuild command you’ll need to run npx pod-install or cd into the ios directory and run pod install whichever you choose is totally up to your preference.
Once that’s done you’ll need to open the ios directory using Xcode. You can do that via right clicking in VSCode and selecting “open in xcode”. If you don’t make use of VSCode you can open the ios directory in finder from your terminal using the open . command, once that’s open you should see a file with the .xcworkspace file extension, double click it and it should open in Xcode.
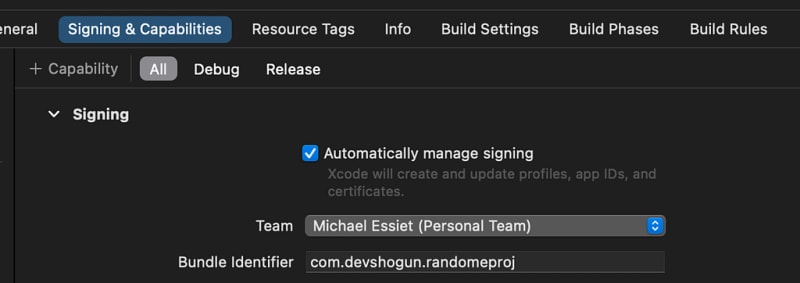
Now that Xcode is open we’ll need to verify our Signing and Capabilities settings. For those not well versed in certificate management with MacOS and Xcode I suggest ticking the “Automatically manage signing” setting to leave signing to Xcode and the certificates associated with the logged in Apple developer account.
Now that we’re done with all the settings it’s time to Archive. To start archiving your project go to the “Product” drop down in the menu bar and select “Archive”.
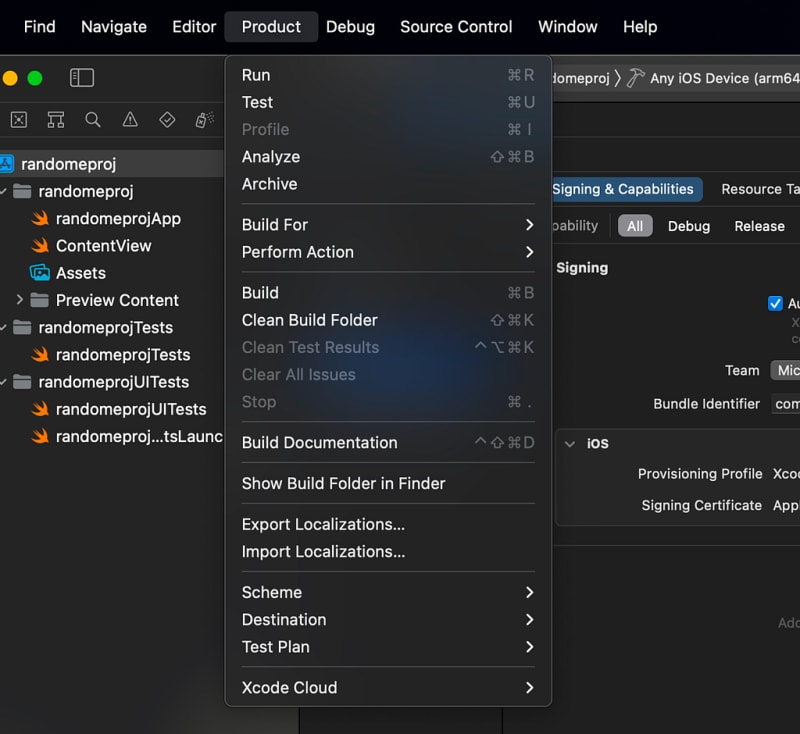
That’s it, your project will start archiving.
Note that you will see a lot of warnings but that is normal as most of them are just null safety checks.
Once archiving is done a screen will popup where you can choose to export your app or just distribute it to App Store directly from Xcode.
Conclusion
In conclusion this method saved me a lot of time and painstaking hours of debugging. I highly recommend this over building locally using the EAS commands.

Top comments (0)