
In this article, I will show you how you can create and deploy your static website very fast. When I want to create a static website and want to deploy it, I usually use these steps.
In this article, We will create a product launch timer website which will have some time and will be decrementing the time every second.
Create an HTML page with a timer
Deploy static website
Connect our custom domain
Let's create an HTML page that will have a timer
<!DOCTYPE HTML>
<html>
<head>
<meta name="viewport" content="width=device-width, initial-scale=1">
<link href='https://fonts.googleapis.com/css?family=Atkinson Hyperlegible' rel='stylesheet'>
<link rel="icon" href="wall.png" />
<title>The Awesome Company Inc.</title>
</head>
<body>

<style type="text/css">
  html{
    height: 100%;
  }
  body{
    font-family: 'Atkinson Hyperlegible';font-size: 22px;
    height: 100%;
  }
  p {
  text-align: center;
  font-size: 60px;
  margin-top: 0px;
}

  .container {
    display: flex;
    align-items: center;
    justify-content: center;
    height: 100%;
  }
</style>
<body onload="loadInitialCount()">
  <div class="container">
    <div>
      <center>
        <h1>Product Launch In</h1>
        <p id="demo"></p>
        <h6>The Awesome Company Inc.</h6>
      </center>
    </div>
  </div>
</body>

<script>
// Set the date we're counting down to
var countDownDate = new Date("Mar 29, 2022 00:00:00").getTime();

// Update the count down every 1 second
var x = setInterval(function() {

  // Get today's date and time
  var now = new Date().getTime();

  // Find the distance between now and the count down date
  var distance = countDownDate - now;

  // Time calculations for days, hours, minutes and seconds
  var days = Math.floor(distance / (1000 * 60 * 60 * 24));
  var hours = Math.floor((distance % (1000 * 60 * 60 * 24)) / (1000 * 60 * 60));
  var minutes = Math.floor((distance % (1000 * 60 * 60)) / (1000 * 60));
  var seconds = Math.floor((distance % (1000 * 60)) / 1000);

  // Output the result in an element with id="demo"
  document.getElementById("demo").innerHTML = days + "d " + hours + "h "
  + minutes + "m " + seconds + "s ";

  // If the count down is over, write some text
  if (distance < 0) {
    clearInterval(x);
    document.getElementById("demo").innerHTML = "EXPIRED";
  }
}, 1000);
</script>

</body>
</html>
Now we will deploy it on the cloud quickest way possible. When I want to host any static sites I directly go to Netlify (https://www.netlify.com/). It's an awesome platform where you can deploy your sites easily and free of cost.
Simply create your account and log in to Netlify.
Click on Add new site

Click on Deploy Manually , Here you will need to just drag the folder where you have your index.html file, and that's it.
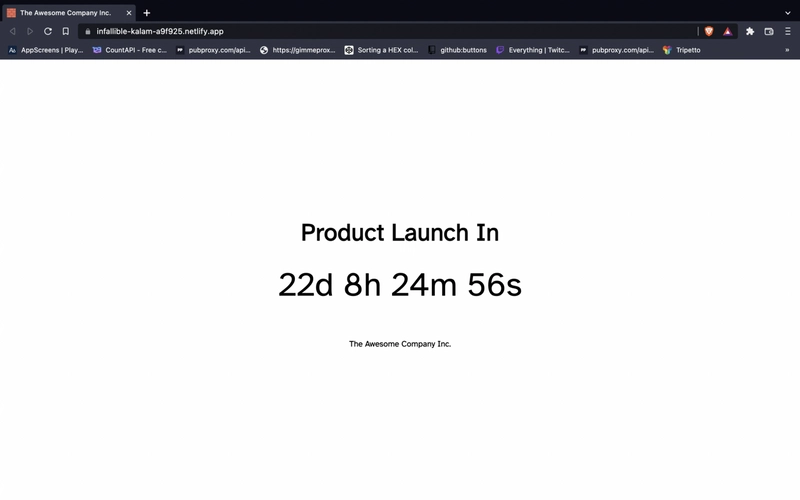
it will give you an address where your site is live.

You can go to this URL and check.
Now let's connect our own domain name to our page. You can buy your domain from GoDaddy, Namecheap, or any other domain registrar.
For this article, I already have a domain that I will be using.
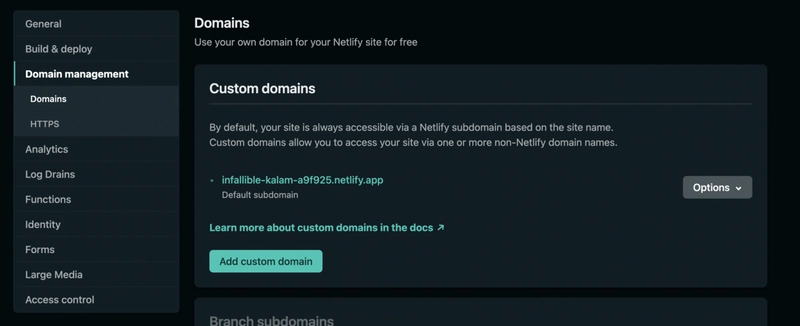
Go to Domain Settings
Click on Add Custom Domain
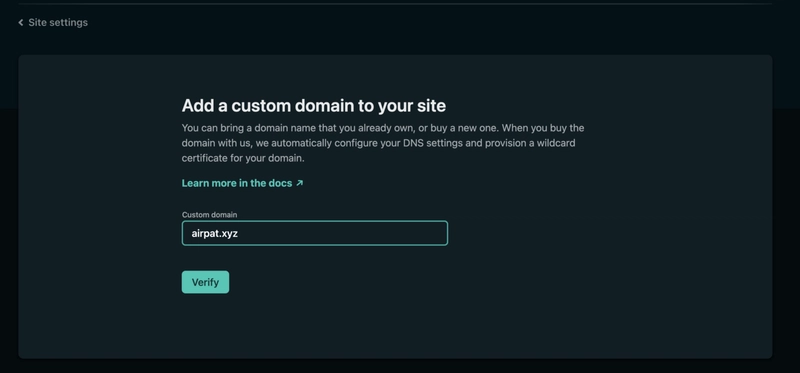
Enter your domain name and click Verify then click Add domain.

Now on your Domain Settings , Click on Options and go to DNS settings.

Here you will get the Netlify name servers that you will need to add to your domain. Go to your domain console where you registered your domain name and add these 4 nameservers.
It will take some time to reflect the changes After changes are done. Your site will be live.
Congratulations, You just made your static website live within a couple of clicks.
Isn’t this the fastest way to do this?
Hope you like this article.
Cheers!!

Top comments (0)