
what is a Data table
Data table are simply tables with options that can be used to configure and process the data to be displayed.
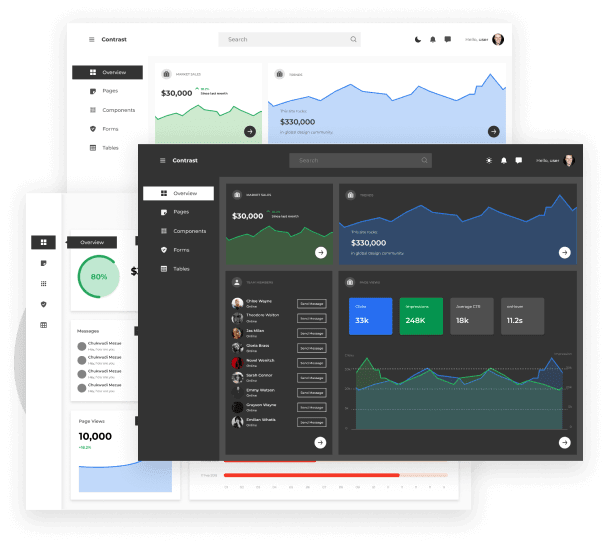
What is Contrast?
Contrast Design Bootstrap, popularly known as Contrast, was developed by Devwares. It is an amazing UI kit with a vast number of components that helps make the development process a breeze.
Contrast incorporated bootstrap into its core, making it all the more functional, responsive, and elegant. This goes without saying. By installing Contrast in your project, bootstrap is also tagged along. It’s like getting two amazing products for the price of one. What a bargain!
Contrast has offered one of the components the data table component, which is functional and easy to use. The data table component mixes tables with advanced options like searching, sorting, and pagination.
What is Angular Bootstrap
Angular Bootstrap is a powerful and popular web framework used by developers to create dynamic user interfaces. It is used to create a wide variety of web applications, such as web-based data tables. Data tables are a great way to display and manage large amounts of data. They make it easy to search, filter, and sort data quickly and efficiently.
Creating a data table using Angular Bootstrap is relatively easy, as long as you have some basic HTML and JavaScript knowledge. This tutorial will walk you through the steps of creating a data table with Angular Bootstrap.
PREREQUISITES
This Data table will be built using Angular, Bootstrap, and Contrast (ng-cdbangular-pro). You don’t need to have any prior knowledge of ng-cdbangular-pro, but the following are necessary:
- A basic understanding of Angular
- A basic understanding of Bootstrap
- NPM installed
Let’s get started, shall we?
STEP 1
Get the Pro version of Contrast from here
STEP 2
Add the ng-cdbangular-pro tgz file to your projects root folder and run this command in your terminal:
npm install ./ng-cdbangular-pro-1.0.0.tgz
STEP 3
Add Contrast Pro’s assets and bootstrap-css-only to angular.json
"assets": [
{
"glob": "**/*",
"input": "node_modules/ng-cdbangular-pro/assets",
"output": "/assets/"
}
],
"styles": [
"node_modules/bootstrap-css-only/css/bootstrap.min.css"
]
STEP 4
Import table module in app.module.ts
import { TableModule } from 'ng-cdbangular-pro';
@NgModule({
imports: [ TableModule ]
})
NB, for our example, we will be needing some other components so our final app.module.ts file will look like this;
import { TableModule, CardModule } from 'ng-cdbangular-pro';
@NgModule({
imports: [ TableModule, CardModule ]
})
Note: instead of importing one component at a time, the contrast has a module called CDBProModule which contains the imports of all the custom components contrast has to offer.
import { CDBProModule } from 'ng-cdbangular-pro';
@NgModule({
imports: [CDBProModule]
})
Easy right? Now let’s go on.
Contrast’s data table component has quite a lot of boilerplate code, so let’s go through it. In the .component.ts file, paste the following code snippets:
import { Component, OnInit, ViewChild } from '@angular/core';
import { CdbTableDirective } from 'ng-cdbangular-pro';

export class ExampleComponent implements OnInit {
  @ViewChild(CdbTableDirective, { static: true }) CdbTable: CdbTableDirective;

  pages = [];
  activePage = 0;
  previousData;
  entries = [5, 10, 15];
  searchText: string = '';
  elements: any = [
    {
      name: 'Tiger Nixon',
      position: 'System Architect',
      office: 'Edinburgh',
      age: '61',
      date: '2011/04/25',
      salary: '320',
    },
    {
      name: 'Garrett Winters',
      position: 'Accountant',
      office: 'Tokyo',
      age: '63',
      date: '2011/07/25',
      salary: '170',
    },
    {
      name: 'Ashton Cox',
      position: 'Junior Technical Author',
      office: 'San Francisco',
      age: '66',
      date: '2009/01/12',
      salary: '86',
    },
    {
      name: 'Cedric Kelly',
      position: 'Senior JavaScript Developer',
      office: 'Edinburgh',
      age: '22',
      date: '2012/03/29',
      salary: '433',
    },
    {
      name: 'Airi Satou',
      position: 'Accountant',
      office: 'Tokyo',
      age: '33',
      date: '2008/11/28',
      salary: '162',
    },
    {
      name: 'Brielle Williamson',
      position: 'Integration Specialist',
      office: 'New York',
      age: '61',
      date: '2012/12/02',
      salary: '372',
    },
    {
      name: 'Herrod Chandler',
      position: 'Sales Assistant',
      office: 'San Francisco',
      age: '59',
      date: '2012/08/06',
      salary: '137',
    },
    {
      name: 'Rhona Davidson',
      position: 'Integration Specialist',
      office: 'Tokyo',
      age: '55',
      date: '2010/10/14',
      salary: '327',
    },
    {
      name: 'Colleen Hurst',
      position: 'JavaScript Developer',
      office: 'San Francisco',
      age: '39',
      date: '2009/09/15',
      salary: '205',
    },
    {
      name: 'Sonya Frost',
      position: 'Software Engineer',
      office: 'Edinburgh',
      age: '23',
      date: '2008/12/13',
      salary: '103',
    },
    {
      name: 'Jena Gaines',
      position: 'Office Manager',
      office: 'London',
      age: '30',
      date: '2008/12/19',
      salary: '90',
    },
    {
      name: 'Quinn Flynn',
      position: 'Support Lead',
      office: 'Edinburgh',
      age: '22',
      date: '2013/03/03',
      salary: '342',
    },
    {
      name: 'Charde Marshall',
      position: 'Regional Director',
      office: 'San Francisco',
      age: '36',
      date: '2008/10/16',
      salary: '470',
    },
    {
      name: 'Haley Kennedy',
      position: 'Senior Marketing Designer',
      office: 'London',
      age: '43',
      date: '2012/12/18',
      salary: '313',
    },
  ];
  headElements = [
    {
      label: 'Name',
      field: 'name',
      enableSort: 'enabled',
    },
    {
      label: 'Position',
      field: 'position',
      enableSort: 'enabled',
    },
    {
      label: 'Office',
      field: 'office',
      enableSort: 'enabled',
    },
    {
      label: 'Age',
      field: 'age',
      enableSort: 'enabled',
    },
    {
      label: 'Date',
      field: 'date',
      enableSort: 'enabled',
    },
    {
      label: 'Salary',
      field: 'salary',
      enableSort: 'enabled',
    },
  ];

  ngOnInit(): void {
    this.CdbTable.\_activePage.subscribe(data => {
      this.activePage = data;
    });

    this.CdbTable.setEntries(this.entries[0]);
    this.CdbTable.setDataSource(this.elements);
    this.CdbTable.setPages();
    this.previousData = this.CdbTable.getDataSource();
    this.pages = this.CdbTable.pages;
  }

  searchItems() {
    const prev = this.CdbTable.getDataSource();

    if (!this.searchText) {
      this.elements = this.CdbTable.getDataSource();
      this.CdbTable.setDataSource(this.previousData);
      this.CdbTable.setPages();
      this.pages = this.CdbTable.pages;
    }

    if (this.searchText) {
      this.CdbTable.setDataSource(this.previousData);
      this.elements = this.CdbTable.filterData(this.searchText);
      this.CdbTable.setDataSource(this.elements);
      this.CdbTable.setPages();
      this.pages = this.CdbTable.pages;
    }
  }

  changeEntries(e) {
    this.CdbTable.setEntries(e.target.value);
    this.CdbTable.setPages();
    this.pages = this.CdbTable.pages;
    this.CdbTable.\_activePage.next(0);
  }

  sort() {
    this.pages = this.CdbTable.pages;
  }
}
The elements property should contain your custom data and the headElements should contain your data’s thead values.
By passing enabled to the enableSort option, you give the table head (thead) the ability to sort the data by ascending value and descending value. To disable this, just pass “disabled” to the “enableSort” option.
The entries property should contain the customizable number of data values to be shown per page.
P.S, everything apart from elements, headElements and entries should be left alone.
HTML VIEW
Paste the following code snippet in your html view:
<CDBCard>
<CDBCardBody>

<div class="container">
<div class="row">
<div class="col-md-6 mx-auto pl-0">
<label>
Show Entries
<select
class='custom-select custom-select-sm form-control form-control-sm ml-0'
style="margin-left: .5rem" (change)='changeEntries(\$event)'>
<option *ngFor='let entry of entries' [value]="entry">
{{ entry }}
</option>
</select>
</label>
</div>
<div class="col-md-6 mx-auto pl-0 pr-0 mb-1">
<div class="md-form">
<input
type="text"
placeholder="Search"
class="form-control" [(ngModel)]="searchText"
(keyup)="searchItems()" id="search-input">
</div>
</div>
<table CdbTable CdbTableScroll maxHeight="500"
#tableEl1="CdbTable" stickyHeader="true" hover="true"
striped='true' bordered="true" class="z-depth-1 col-md-12">
<thead class="sticky-top">
<tr>
<th *ngFor="let head of headElements; let i = index" (sortEnd)="sort()"
[CdbTableSort]="elements" [tableEl]='tableEl1'
[enableSort]='headElements[i].enableSort'
[sortBy]="headElements[i].field" scope="col">
{{head.label | titlecase}}
<CDBIcon [fas]=true icon="sort"></CDBIcon>
</th>
</tr>
</thead>
<tbody #row>
<tr *ngFor="let el of pages[activePage]; let i = index">
<th scope="row">{{el.name}}</th>
<td class="red-text">{{el.position}}</td>
<td>{{el.office}}</td>
<td>{{el.age}}</td>
<td>{{el.date}}</td>
<td>{{el.salary | currency:'USD' }}</td>
</tr>
<tr *ngIf="!pages[activePage]">
<td scope="row" colspan="100%">No Matching Records Found</td>
</tr>
</tbody>
<thead class="sticky-top">
<tr>
<th _ngFor="let head of headElements; let i = index"
(sortEnd)="sort()"
[CdbTableSort]="elements" [tableEl]='tableEl1'
[enableSort]='headElements[i].enableSort'
[sortBy]="headElements[i].field"
scope="col">{{head.label | titlecase}}
<CDBIcon [fas]=true icon="sort"></CDBIcon>
</th>
</tr>
</thead>
</table>
<div class="mt-2">
Showing
{{activePage > 0 ? (activePage _ pages[0].length) + 1 : activePage + 1}}
to {{pages.length -
    1 > activePage
    ? pages[activePage].length * (activePage + 1)
    : elements.length}} of {{elements.length}} records
</div>
<CDBTable-pagination class="ml-auto pr-0 mt-2" [tableEl]='tableEl1'>
</CDBTable-pagination>
</div>
</div>
</CDBCardBody>
</CDBCard>
This example made use of another Contrast component called CDBCard for purely visual purposes. The result looks like this:
Whew! We’ve come to the end of this article. I hope it was as fun and informative.
Contrast’s Data table component ships with a lot of customizable features. For more information, please check out the docs.
Download a free Angular admin template
We have created a free Angular admin template to help you quickly build clean and beautiful interfaces for your web apps and websites. The template was built using the Contrast UI Library, which is a Angular bootstrap library to help you easily build mobile-first, responsive and elegant websites and web apps.
Resources
Tailwind grid-How to use tailwind CSS grid templates in your project
How to create a Beautiful Responsive Navigation bar Using Tailwind CSS
Tailwind form-How to create and style a Responsive Form using Tailwind CSS
How to use tailwind CSS padding, margin and border in your project
How to create a beautiful React Bootstrap select with icons.
How to create a Beautiful Responsive Navigation bar Using Tailwind CSS
Tailwind Modal-How to create a React Modal using Tailwind CSS.
How to Implement a React Step Progress Bar Using Tailwind CSS

Top comments (0)