What is DID.app
DID.app is an Identity Provider, that authenticates users by verifying access to either an email address or securely stored private key.
This allows your users to sign in with just a single click.
This guide will step you through the process of adding DID to your Wordpress website using the ‘WordPress OpenID Connect Client' plugin by miniOrange.
There is a working example website here: wordpress.did.app.
Requirements
This tutorial requires you to have Wordpress installed.
Install the plugin on your Wordpress website
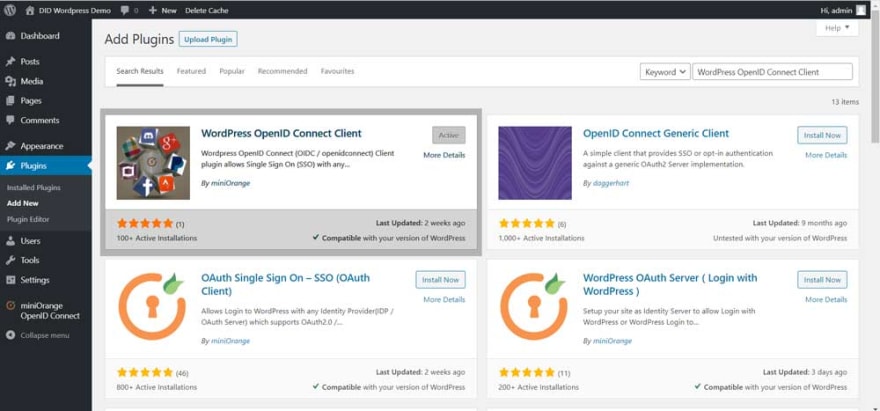
In your Wordpress admin dashboard, select Plugins > Add New from the main menu.
On the ‘Add Plugins’ page, search: ‘WordPress OpenID Connect Client’. Look for the highlighted result in the screenshot below and click ‘Install Now’. Once the app has installed, click ‘Activate’.
You can also visit the plugin’s page to download, install and activate manually if you prefer:
wordpress.org/plugins/miniorange-openid-connect-client/
Setup the App on did
You will need a DID account. Sign up to create one now.
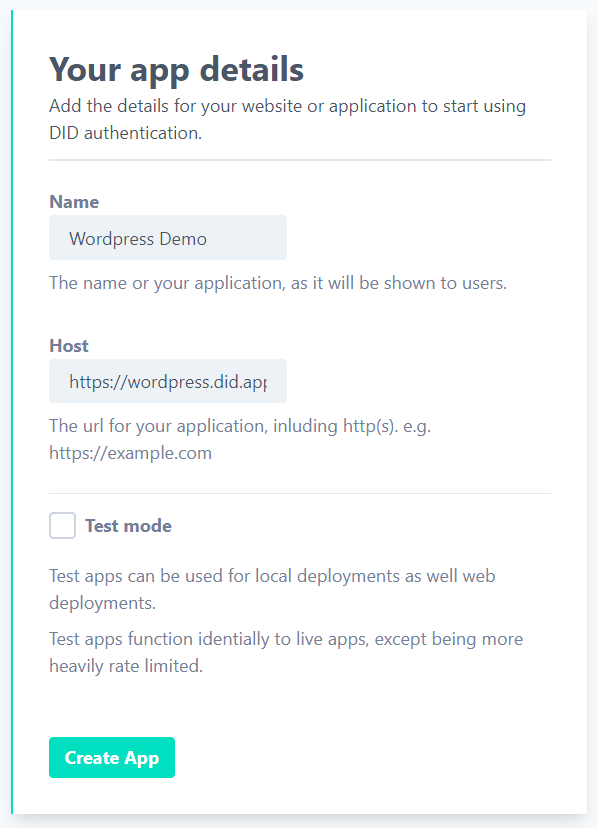
After signing up, you will be directed to set up your first app.
Give your new app a descriptive name e.g. ‘Wordpress Demo’ and use the full URL of the website in the ‘host’ box.
DID will generate a Client ID and a Client Secret for your app. Retain this information for the next step (leave the tab open so you can come back to it).
Configure the plugin
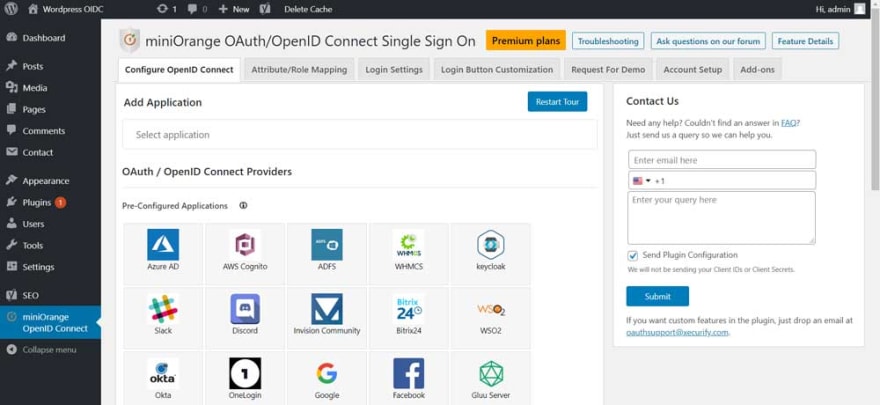
Once activated, the plugin creates a menu option called ‘miniOrange OpenID Connect’. Click on this to start configuring the plugin to work with DID.

You will be presented with a screen which looks like this:
Scroll right to the bottom on this page and look for the option called ‘Custom OpenID Connect App’ under the heading ‘Custom Applications’. It looks like this:

Select ‘Custom OpenID Connect App’. You will now see this screen:

Complete the fields using the following values:
- App Name: DID
- Client ID: copy and paste this from your DID app settings page.
- Client Secret: copy and paste this from DID app settings page.
- Scope: openid
- Authorize Endpoint: https://auth.did.app/oidc/authorize
- Access Token Endpoint: https://auth.did.app/oidc/token
Make sure these options are set as follows:
- Set client credentials in header: checked.
- Set client credentials in body: unchecked.
- Show on login page: checked.
Finally, press ‘Save Settings’.
DID’s integration with this plugin is now complete. A ‘Sign in with DID’ button now appears on the Wordpress sign in page:

Optional: Adding Login Buttons to your Wordpress Template
You can add ‘Login with DID’ buttons elsewhere on your Wordpress website using the plugin. To do this, choose the menu options: Appearance > Widgets.
In the example Wordpress theme we are using, we have been able to add a login button to ‘Footer 1’. You can add the Login button widget to any dynamic part of your website templates by selecting the miniOrange Open ID Connect widget and clicking ‘add widget’ as per the screenshot below. The exact appearance of this will vary depending on your Wordpress theme.

Optional: Login Button Styling
The ‘Login with DID’ button can be styled with some simple CSS rules. The following CSS can be used to style the button with DID’s colour scheme:
.mo_oauth_login_button {
    display: block;
    border: 1px solid #00dfc0;
    width: auto;
    text-align: center;
    background-color: #00dfc0;
}
.mo_oauth_login_button_icon {
     display: none;
}

Have a question?
If you have any further questions contact us at team@did.app.

Top comments (0)