Streaming data with FastAPI & Vue made easy
Want effortless live updates — stock prices, notifications, logs — in your web app without complex setup? Server-Sent Events (SSE) simplify this using standard HTTP. They provide an efficient server-to-client push mechanism, hitting a sweet spot between clunky polling and potentially overkill WebSockets for one-way data. This guide demonstrates how to implement SSE with FastAPI and Vue.js for responsive results.
TL;DR
Server-Sent Events (SSE) provide a simple way to stream real-time data from your server to web clients using standard HTTP. This guide demonstrates a minimal implementation with FastAPI and Vue.js, showing system RAM usage monitored in real-time. Get the code and try it yourself:
git clone https://github.com/Edwardvaneechoud/stream-logs-demo
git checkout feature/simple_example
cd stream-logs-demo
pip install fastapi uvicorn psutil
python stream_logs.py
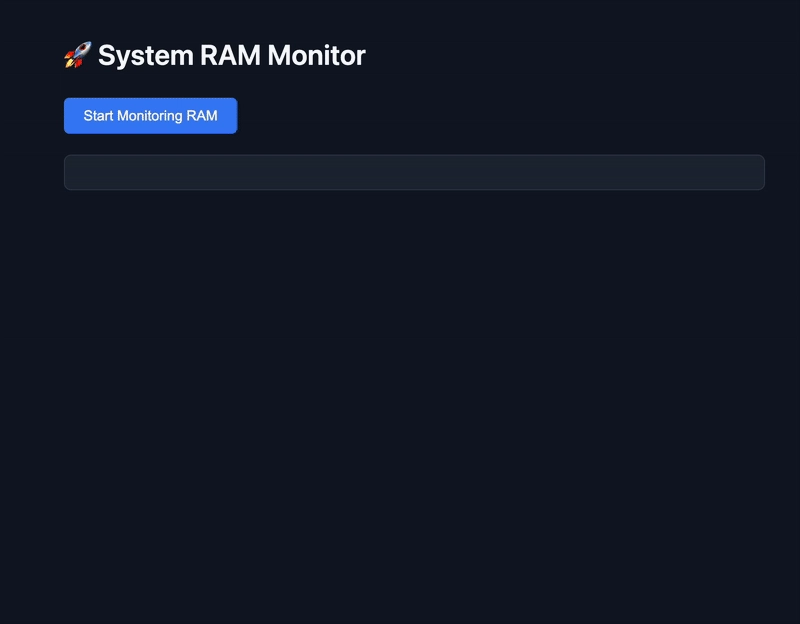
Then open your browser to http://localhost:8000 and click "Start Monitoring RAM" to see it in action. And if you want all the details… read on!
What are Server-Sent Events (SSE)?
Server-Sent Events (SSE) is a standard web technology designed for this. It's a simple and efficient way to stream data over HTTP. SSE works by keeping a single HTTP connection open between the client and server after the initial request. This open connection allows the server to automatically push updates to the client whenever new information is available.
Compared to alternatives:
Polling: With polling, the client repeatedly asks the server for updates at regular intervals. This can lead to unnecessary network traffic and delayed data. SSE is more efficient because the server pushes updates only when there's new data — no need for the client to keep checking.
WebSockets: WebSockets are built for full-duplex communication — both the client and server can send messages independently at any time. This makes them ideal for real-time, interactive applications like live chat, multiplayer games, or collaborative tools where two-way communication is essential. But if your use case only requires the server to push updates — for example, live logs, real-time monitoring, or status feeds — WebSockets can be unnecessarily complex. That's where SSE shines.
Because SSE runs over regular HTTP, there's no need to introduce a new protocol — it just works like any other HTTP request. That means you can plug it directly into most existing setups with zero friction. If your app already talks over HTTP, you're ready to stream.
Implementing SSE in FastAPI
In FastAPI, the implementation relies on StreamingResponse combined with an asynchronous generator. Here's the essential core code from stream_logs.py that sets up the SSE endpoint (note: the full file also includes app setup, static file serving, etc.):
# From stream_logs.py
import asyncio
import json
import time
import psutil
from typing import AsyncGenerator
from fastapi import FastAPI
from fastapi.responses import StreamingResponse

# Assume 'app = FastAPI()' is defined elsewhere

# 1. SSE Message Formatter
async def format_sse_message(data: str) -> str:
    # Ensures data adheres to the 'data: ...\n\n' SSE format
    return f"data: {json.dumps(data)}\n\n"

# 2. Asynchronous Data Generator
async def stream_logs() -> AsyncGenerator[str, None]:
    # Initial log entry
    yield await format_sse_message("Starting system RAM monitoring...")

    # Send 20 RAM usage log entries
    for i in range(1, 21):
        # Get current timestamp
        timestamp = time.strftime("%Y-%m-%d %H:%M:%S", time.localtime())

        # Get RAM usage
        ram = psutil.virtual_memory()
        ram_percent = ram.percent
        ram_total = ram.total / (1024 * 1024 * 1024)  # Convert to GB
        ram_used = ram_total * ram_percent/100

        # Format log entry
        log_entry = f"{timestamp} - RAM usage: {ram_percent}% ({ram_used:.2f}GB / {ram_total:.2f}GB)"
        yield await format_sse_message(log_entry)

        await asyncio.sleep(1)  # One second delay between logs

    # Final log entry
    yield await format_sse_message("RAM monitoring completed")

# 3. FastAPI Endpoint using StreamingResponse
@app.get("/api/stream")
async def stream_logs_endpoint():
    # Return the StreamingResponse, feeding it the generator
    # and setting the essential media_type for SSE
    return StreamingResponse(
        stream_logs(), # The generator provides the data stream
        media_type="text/event-stream" # Identifies the stream as SSE
    )
Explanation:
format_sse_message: This utility function ensures each piece of data sent conforms to the SSE specification. Thedata:prefix followed by the message payload and two newline characters (\n\n) is the standard way to delimit messages in an event stream. Usingjson.dumpsensures the data is reliably encoded as a JSON string.stream_logs: This async function is a generator because it uses theyieldkeyword. Instead of running to completion and returning a single result, it can pause its execution state withyield, sending back the specified value (here, the formatted message). When iterated over (byStreamingResponse), its execution resumes from where it left off until the next yield or the function completes. Theawait asyncio.sleep(1)simulates an asynchronous operation, like waiting for new data to become available.@app.get("/api/stream"): This decorator defines the HTTP GET endpoint that clients will connect to initiate the SSE stream.StreamingResponse(...): This FastAPI class is key for sending data incrementally. It's initialized with the result of calling the generator (stream_logs()), which gives it an iterator object.StreamingResponsepulls values from this iterator (triggering the generator's execution up to the next yield) and sends each value immediately over the network connection.media_type="text/event-stream": Setting this specific IANA media type in theStreamingResponseis crucial. It sends the correct Content-Type header, signaling to the browser that this response is a Server-Sent Event stream, enabling the browser to use its built-in EventSource API to listen for and process the incoming messages.
Okay, now that we have the backend sending the stream, let's look at how the frontend receives and displays these updates using Vue.js and the browser's built-in EventSource API.
Frontend: Receiving Events with EventSource
Frontend Setup Note: For this demonstration, the frontend is kept intentionally simple. We use a single index.html file which includes Vue.js directly from a CDN. Basic styling is provided in style.css. The core logic for connecting to the SSE stream and updating the display resides in app.js. You can explore the full frontend code in the repository.
On the client side, the browser's built-in EventSource API is used to connect to the SSE stream and process incoming messages. While the full static/app.js example uses Vue.js for display, let's isolate the essential EventSource interactions:
1. Set the reactive property
Before we initiate any streaming, we define our reactive state and prepare variables in the setup() function. This is where Vue's Composition API comes into play:
// From static/app.js
const logLines = ref([]);        // Reactive array bound to the template
const isStreaming = ref(false);  // Tracks whether we're currently streaming
let eventSource = null;          // Will hold the SSE connection
Explanation:
-
logLinesis a reactive array. Each time we push new data into it, Vue will automatically update the DOM—no manual re-rendering needed. -
isStreamingtracks whether a stream is currently active. It's used to toggle UI state (like disabling the button while data is being streamed). -
eventSourceis declared here so it can be shared across functions (startStreaming,closeEventSource). It's initially null and gets initialized when we start the stream.
2. Define the start streaming Logic
This function runs when the user clicks the "Start Monitoring RAM" button. It clears existing logs, updates state, and opens the SSE connection.
const startStreaming = () => {
  logLines.value = [];           // Clear previous logs
  isStreaming.value = true;      // Update UI state
  // Create the SSE connection
  eventSource = new EventSource("/api/stream");
  // Set up message and error handlers (see next section)
};
Explanation: This function sets up the streaming session. The connection isn't live yet, but we're establishing it and preparing to listen for events.
3. Handle Incoming Events (onmessage)
The logic for handling messages from the server is defined inside the startStreaming function, immediately after the SSE connection is created. Here's what that looks like:
// Still inside startStreaming()

eventSource.onmessage = (event) => {
  try {
    const data = JSON.parse(event.data);
    logLines.value.push(data); // Add new log entry to the reactive array

    // If the server signals that monitoring has completed, stop streaming
    if (data === "RAM monitoring completed") {
      closeEventSource(); // cleanup the connection and reset the UI components
    }
  } catch (error) {
    console.error("Error parsing data:", error);
  }
};

eventSource.onerror = (error) => {
  console.error("EventSource error:", error);
  closeEventSource();
};
Explanation: Once the server begins sending messages, onmessage is triggered for each new piece of data. We parse the event, push the result to logLines, and let Vue's reactivity do the rest—your UI updates automatically. If the message is "RAM monitoring completed", we assume the stream is done and clean up by calling closeEventSource(). We also define onerror here to catch any disconnections or issues. This ensures we always close the stream gracefully and reset the UI state if something goes wrong.
💡 Reminder: This entire block lives inside the startStreaming() function, which is returned from setup() and triggered when the user clicks the "Start Monitoring RAM" button.
4. Rendering the Data in HTML
Finally, we connect the reactive Vue properties directly to our HTML using standard Vue template syntax. Take a look at the relevant snippet from index.html:
<button @click="startStreaming" :disabled="isStreaming">
  Start Monitoring RAM
</button>
<div class="log-container">
  <div v-for="(line, index) in logLines" :key="index" class="log-line">
    {{ line }}
  </div>
</div>
Explanation:
- The
@clickdirective on the button binds thestartStreamingfunction to the click event. -
:disabled="isStreaming"disables the button while the stream is active. - The
v-forloop dynamically renders each message inlogLinesas a new row in the UI.
📁 You can view the complete HTML structure in index.html in the repo if you'd like to see how the full layout is styled and structured.
Running the Demo Locally
Now that we've walked through the backend setup and the frontend logic, it's time to see the demo in action.
Clone the repository and move into the directory:
git clone https://github.com/Edwardvaneechoud/stream-logs-demo
cd stream-logs-demo
git checkout feature/simple_example
Install the required dependencies and start the server:
pip install fastapi uvicorn psutil
python stream_logs.py
Now open your browser and navigate to http://localhost:8000. Click the "Start Monitoring RAM" button and watch the RAM usage update in real-time! If you look at your terminal where FastAPI is running, you'll notice in the logs that there is only one request (GET /api/stream) for the stream itself, however, your website is updating!
You can explore the complete implementation of this demo at github.com/Edwardvaneechoud/stream-logs-demo/tree/feature/simple_example or checkout the more advanced example: github.com/Edwardvaneechoud/stream-logs-demo/
Stay Tuned!
This simple example demonstrates the core principles of Server-Sent Events. In my next post, I'll show how you can use SSE to stream real-time log information directly from your Python applications by implementing a custom logging handler. You'll learn how to capture and stream logs from any Python process without writing to files, making it easier to monitor and debug your applications in real-time. You'll see exactly how these principles scale to monitor complex data flows without polling.
If you found this helpful, follow me to catch the upcoming deep-dive where I'll break down the monitoring implementation from the main branch, complete with code examples and performance insights from a real production environment.
Next Steps
- Extend the monitor to track CPU usage and disk I/O
- Build a real-time dashboard with multiple system metrics
- Try to handle different type of logs (warning, error, info, debug)
Happy streaming!
If you're interested in seeing Server-Sent Events applied in a more complex, real-world scenario, you can explore my personal project, Flowfile. I utilize SSE extensively in that project, specifically for efficiently streaming live logs from running data pipeline processes directly into the UI console, providing immediate feedback much like the examples discussed here. You can check out the implementation and the project on GitHub: https://github.com/Edwardvaneechoud/Flowfile

Top comments (0)