
Prerequisite- If you didn’t read part I of this article I suggest you read that first here. I am assuming you already have a working DigitalOcean account. If you don’t have an account create an account using this link and get 100 USD free credit.
Objective- In part I of this article series we discussed the two dockerfiles powering the web server and our database. We also discussed some configuration files and scripts needed to run and operate our containers. In this article, we are going to build our docker image, push it to DigitalOcean container registry and deploy it to DigitalOcean App platform. We will also setup CI/CD for the build and deploy process using GitHub actions.
To get full code for this blog clone the repository.
git clone https://github.com/endalk200/prod-django-docker-config.git
or download the zip file here.
We will do this step by step.
Step 1- Install and configure doctl
doctlis CLI for interacting with DigitalOcean APIs.
To install this CLI refer to this official documentation. It has instructions for each platform and package managers. After you install the CLI you have to authenticate the CLI to interact with DigitalOcean APIs. To do that you have to generate AuthToken first. Go to your DigitalOcean dashboard, and click the API then Generate New Token Button
Give your token a name and generate the token. You will see the token generated in a table (Notice: This token is only visible to you once so copy the token and store it in a secure location). Now that you have you access token lets authenticated the CLI from your terminal run
doctl auth init
After that, you will be prompted to enter the access token, Paste it there and click enter. After that, you should see a message like this.
Validating token: OK
Now you have installed and configured your CLI to talk to DigitalOcean APIs you are good to go.
Step 2 — Build and push your image to container registry
Before we build our docker image we need to create container registry on DigitalOcean. Go to the **Container Registry **and you will be prompted with the following.
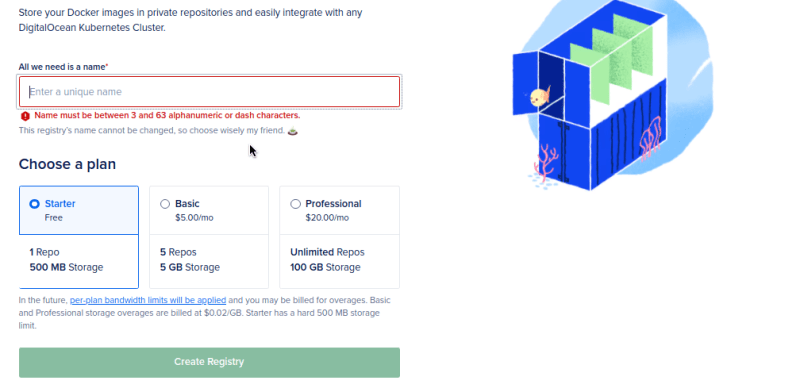
Enter the name (the name should be unique) of the container registry you want to create, chose a plan that suits your needs, and **Create Registry. **After creating your registry you will be redirected to your registry page like this.
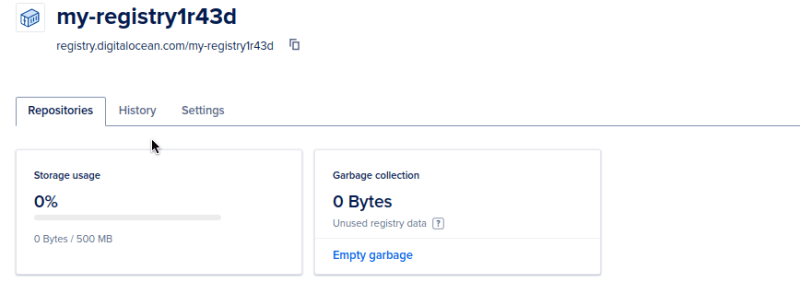
Copy the registry URL (we are going to need that URL when we push to this registry).
By default, docker pulls and pushes Docker images from docker hub. We want docker to point to the container registry we just created. We can do that by running the following command.
doctl registry login
This command will tell docker to point to DigitalOcean for container registry.
To build our docker image run the following command in the root directory of the project.
docker build -t my-image-name:latest
In this command, we are tagging our image with the name my-image-name After that, we are telling Docker to tag the version of this docker image latest
The command will build the docker image and store it locally. What we want is to push the image to our container registry. To do that run
docker tag my-image-name:latest registry.digitalocean.com/my-registry1r43d/my-image-name:latest
This command is tagging our docker image we just build and pointing it to the container registry we created above. To push our container use the following command.
docker push registry.digitalocean.com/my-registry1r43d/my-image-name:latest
Step 3 —Setup CI/CD for the build process using GitHub actions
Now that we built our Docker image and push it to DigitalOcean container registry let's configure CI/CD for this process.
Before we setup CI/CD with GitHub we need to create a repository secret in our GitHub repository settings tab. Name the secret CONTAINER_REGISTRY_TOKEN and the value of the token we created above. After that create .github/workflows directory in you root project and create a file with the name of docker-image-build-push.yml and put the following yml config in it.
name: Build and push docker imageon:

push:
    branches:
        - release

jobs:
    build:
        runs-on: ubuntu-latest
        steps:
            - name: Checkout master
              uses: actions/checkout@main
            - name: Install doctl
              uses: digitalocean/action-doctl@v2
              with:
                  token: ${{ secrets.CONTAINER_REGISTRY_TOKEN }}
            - name: Build container image
              run: docker build -t my-image-name:latest
            - name: Log in to DigitalOcean Container Registry
              run: doctl registry login --expiry-seconds 1200
            - name: Tag the container being built
              run: docker tag my-image-name:latest registry.digitalocean.com/my-registry1r43d/my-image-name:latest
            - name: Push image to DigitalOcean Container Registry
              run: docker push registry.digitalocean.com/my-registry1r43d/my-image-name:latest
Step 4 — Deploy your container to app platform
App platform is DigitalOceans PAAS offering. We can deploy to this platform from our terminal using the CLI we installed. First, create yml file with the following config and name it spec.yml
name: my-project
services:
- name: my-project-image
  image:
    registry_type: "DOCR"
    registry: "my-registry1r43d"
    repository: "my-image-name"
    tag: "latest"
  run_command: start.sh server --worker-tmp-dir /dev/shm
  envs:
  - key: DEBUG
    scope: RUN_AND_BUILD_TIME
    value: "False"
  http_port: 8080
  instance_count: 1
  instance_size_slug: basic-xs
  routes:
  - path: /
  source_dir: /
The above config file tells DigitalOcean how to create your instance and run it.
To create the instance run the following command.
doctl apps create --spec spec.yml
After that command is executed your web app will be live with HTTPS and you can see the process in your dashboard.
Conclusion
This two-part article attempted to cover production level docker configuration and how you can build and deploy the image to DigitalOcean container registry. The deployment process guide is only meant to get you started there are many considerations when deploying your web application.
To get the full code and try it for yourself, It is on GitHub here.
Please comment on any gaps or improvements in the above setup. Follow me for more articles like this one.
Use the following link and get 100 USD in DigitalOcean free credit.

Follow me to get articles like this and more.

Top comments (0)