This is a guest post by Ibsitam Arif. Check him out!
Vector graphics have become a standard in almost every manufacturing industry. The blueprint is usually given in vector form and the machine operates accordingly. Similarly, in the printing industry, print designs are in vector form.
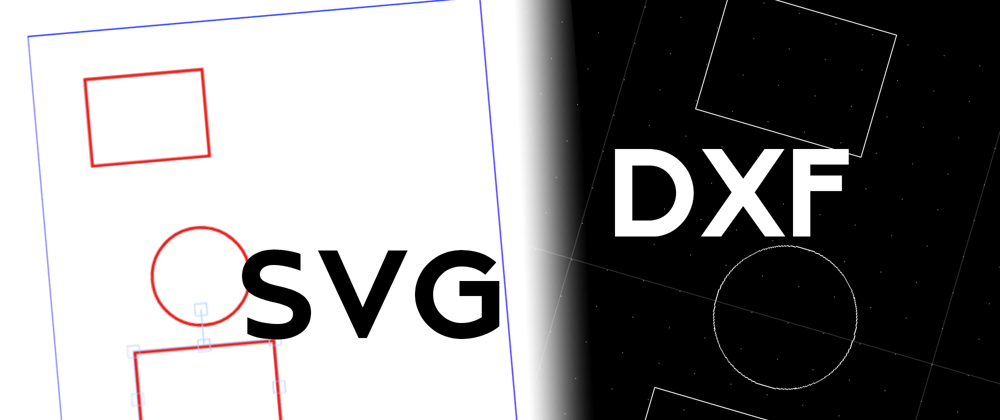
When we talk about the web, the most popular vector files are SVGs, and in this article, we will see how we can convert an SVG to DXF; a popular vector file for 2D and 3D models created by AutoDesk and it is popular for exporting data between different CAD programs. We have our simple frontend canvas that will allow the user to design an SVG which input will be sent to the Express.js backend where we will be making an API call to the Vector Express API. Vector Express is an excellent API for people that are looking to convert their vectors into different forms without any hassle. In this tutorial we use it to conert the resulting SVG to a DXF. So let us get started!
 ibtisamarif831
/
svg-to-dxf
A simple web application that takes SVG and sends request to Vector-express for conversion to DXF
svg-to-dxf
A simple web application that takes SVG and sends request to Vector-express for conversion to DXF
Project running.
run node myserver.js in terminal to start the server
What we'll be building
Let's imagine that we have a CNC machine that can cut various materials. We want to build a webshop where our customers can design various shapes, and place an order. When the order has been placed, we want to automatically generate a DXF file which we can send directly to the machine for manufacturing.
Project structure
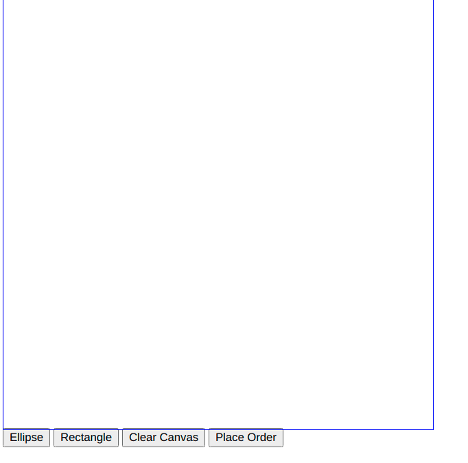
In this project, we have our client-side frontend and our backend. Let's start with the client-side first which will be served by our Express server.
Create a new folder and name it as you please. Make sure you have the following files in it.
Frontend
The HTML file looks as follows.
<!DOCTYPE html>
<html lang="en">
<head>
   <meta charset="UTF-8">
   <meta http-equiv="X-UA-Compatible" content="IE=edge">
   <meta name="viewport" content="width=device-width, initial-scale=1.0">
   <title>Canvas</title>
   <link rel="stylesheet" href="index.css">
</head>
<body>
  <canvas id="canvas" height="500" width="500" ></canvas>
  <button id='ellipse' type='submit'>Ellipse</button>
  <button id='rectangle' type='submit'>Rectangle</button>
  <button id='clear' type='submit'>Clear Canvas</button>
  <button id="order" type="button">Place Order</button>
  <h3 id="success"></h3>
</body>
<script
src="https://code.jquery.com/jquery-3.6.0.min.js"
integrity="sha256-/xUj+3OJU5yExlq6GSYGSHk7tPXikynS7ogEvDej/m4="
crossorigin="anonymous"></script>
<script src="https://cdnjs.cloudflare.com/ajax/libs/fabric.js/451/fabric.min.js"></script>
<script src="canvas.js" type="text/javascript"></script>
</html>
Here, we have imported jQuery and fabric.js for our canvas.
Our CSS file only adds a border to canvas. I have kept things simpler but you are free to edit.
#canvas{
  border: 1px solid blue;
}
And finally, the main file, canvas.js, which handles all the logic for creating shapes on the canvas. We create a fabric canvas that takes the id of our HTML canvas. This gives us access to the functionality of the library.
var canvas = new fabric.Canvas("canvas");
var clear = document.getElementById("clear");
var rectangle = document.getElementById("rectangle");
var ellipse = document.getElementById("ellipse");
var order = document.getElementById("order");
var success = document.getElementById("success");
var isEllipse = false;
var isRectangle = false;

var circle, isDown, origX, origY;

$(rectangle).on("click", function () {
  isEllipse = false;
  isRectangle = true;
  console.log("rectangle");
});

$(ellipse).on("click", function () {
  isEllipse = true;
  isRectangle = false;
  console.log("ellipse");
});

$(clear).on("click", function () {
  var objects = canvas.getObjects();
  for (var i = 0; i < objects.length; i++) {
    canvas.remove(objects[i]);
  }
  canvas.renderAll();
});

$(order).on("click", async function () {
  let mySvg = canvas.toSVG();
  let response = await fetch("http://127.0.0.1:3000/", {
    method: "POST",
    body: mySvg,
  }).then(function (response) {
    alert("Order Placed");
  });
});

canvas.on("mouse:down", function (o) {
  isDown = true;
  var pointer = canvas.getPointer(o.e);
  origX = pointer.x;
  origY = pointer.y;

  if (isEllipse) {
    circle = new fabric.Circle({
      left: origX,
      top: origY,
      originX: "left",
      originY: "top",
      radius: pointer.x - origX,
      angle: 0,
      fill: "",
      stroke: "red",
      strokeWidth: 3,
    });
    canvas.add(circle);
  }

  if (isRectangle) {
    rectangle = new fabric.Rect({
      left: origX,
      top: origY,
      fill: "transparent",
      stroke: "red",
      strokeWidth: 3,
    });
    canvas.add(rectangle);
  }
});

canvas.on("mouse:move", function (o) {
  if (!isDown) return;
  var pointer = canvas.getPointer(o.e);
  var radius =
    Math.max(Math.abs(origY - pointer.y), Math.abs(origX - pointer.x)) / 2;
  if (isEllipse) {
    if (radius > circle.strokeWidth) {
      radius -= circle.strokeWidth / 2;
    }
    circle.set({ radius: radius });

    if (origX > pointer.x) {
      circle.set({ originX: "right" });
    } else {
      circle.set({ originX: "left" });
    }
    if (origY > pointer.y) {
      circle.set({ originY: "bottom" });
    } else {
      circle.set({ originY: "top" });
    }
    canvas.renderAll();
  }

  if (isRectangle) {
    if (origX > pointer.x) {
      rectangle.set({ left: Math.abs(pointer.x) });
    }
    if (origY > pointer.y) {
      rectangle.set({ top: Math.abs(pointer.y) });
    }

    rectangle.set({ width: Math.abs(origX - pointer.x) });
    rectangle.set({ height: Math.abs(origY - pointer.y) });
    canvas.renderAll();
  }
});

canvas.on("mouse:up", function (o) {
  isDown = false;
});
After we are done drawing on canvas, we invoke the toSVG() on the fabric canvas which returns everything on the canvas as SVG. Then this is sent to the backend where the SVG is saved.
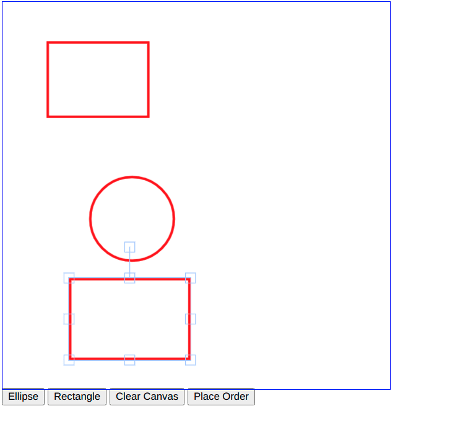
This is what we will end up with:
Let us draw some shapes and place an "order".
After placing the order, we get an alert and our request is sent to the backend.
Backend
For the handling of SVG and DXF, we are using Express.js. Create a new folder and name it as a server. Let us install the following libraries to get started.
npm install body-parser cors express @vector-express/vectorexpress-nodejs
Let's now create server.js to house our backend code.
const express = require("express");
const app = express();
const port = 3000;
const vectorExpress = require("./node_modules/@vector-express/vectorexpress-nodejs/index");
const fs = require("fs");
var cors = require("cors");
app.use(cors());

var bodyParser = require("body-parser");

app.use( express.static( __dirname + '/client' ));
app.use(bodyParser.urlencoded({ extended: false }));
app.use(bodyParser.text());
app.get('/', (req, res) => {
  res.sendFile( __dirname, +'client'+'/index.html');
})

app.post("/", function (req, res) {
  let svg = req.body;
  fs.writeFile("svgFromFrontend.svg", svg, () => {
    const file = fs.readFileSync(__dirname + "/svgFromFrontend.svg");
    vectorExpress
      .convert("svg", "dxf", {
        file,
        save: true,
        path: __dirname + "/svgFromFrontendConverted.dxf",
      })
    });
  res.send("Converted");
});

app.listen(port, () => console.log(`App listening on ${port} port!`));
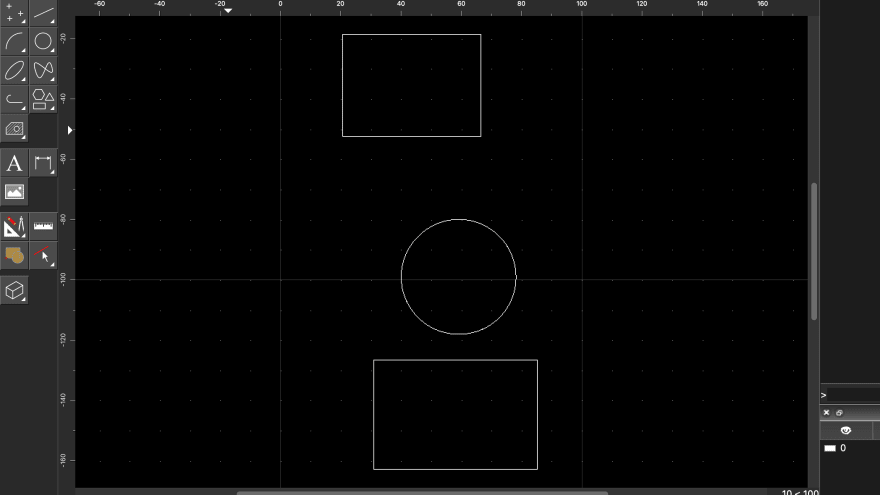
Let's see how the backend works. First, after the user makes a POST request, it is saved in a new SVG file. In the frontend, we created 2 rectangles and one eclipse. The SVG for it was saved as follows in the same folder with the following content.
<?xml version="1.0" encoding="UTF-8" standalone="no" ?>
<!DOCTYPE svg PUBLIC "-//W3C//DTD SVG 1.1//EN" "http://www.w3.org/Graphics/SVG/1.1/DTD/svg11.dtd">
<svg xmlns="http://www.w3.org/2000/svg" xmlns:xlink="http://www.w3.org/1999/xlink" version="1.1" width="500" height="500" viewBox="0 0 500 500" xml:space="preserve">
<desc>Created with Fabric.js 4.5.1</desc>
<defs>
</defs>
<g transform="matrix(1 0 0 1 123.5 100.5)"  >
<rect style="stroke: rgb(255,0,0); stroke-width: 3; stroke-dasharray: none; stroke-linecap: butt; stroke-dashoffset: 0; stroke-linejoin: miter; stroke-miterlimit: 4; fill: rgb(255,255,255); fill-opacity: 0; fill-rule: nonzero; opacity: 1;"  x="-65" y="-48" rx="0" ry="0" width="130" height="96" />
</g>
<g transform="matrix(1 0 0 1 167.5 280.5)"  >
<circle style="stroke: rgb(255,0,0); stroke-width: 3; stroke-dasharray: none; stroke-linecap: butt; stroke-dashoffset: 0; stroke-linejoin: miter; stroke-miterlimit: 4; fill: none; fill-rule: nonzero; opacity: 1;"  cx="0" cy="0" r="54" />
</g>
<g transform="matrix(1 0 0 1 164.5 410)"  >
<rect style="stroke: rgb(255,0,0); stroke-width: 3; stroke-dasharray: none; stroke-linecap: butt; stroke-dashoffset: 0; stroke-linejoin: miter; stroke-miterlimit: 4; fill: rgb(255,255,255); fill-opacity: 0; fill-rule: nonzero; opacity: 1;"  x="-77" y="-51.5" rx="0" ry="0" width="154" height="103" />
</g>
</svg>
Now, this is sent to the Vector Express API using its Node.js wrapper and it returns us a DXF file that is saved in the same directory.
Conclusion
With this, we have a basic SVG designer app which does DXF conversion. The manufacturer can always get the DXF file from the backend while the client can place an order for his SVG vector.
To develop this further, we should implement a database to store the orders, and a way for us to access our orders and the corresponding DXF file through a browser. We may even wish to build this on top of an existing e-commerce framework.


Oldest comments (0)