Using VueJS + GraphQL to make Practical Magic
Make some practical magic with VueJS + GraphQL to solve everyday problems like auto-complete searching and form submission saving with a headless Craft CMS server
Andrew Welch / nystudio107

The advance of new technologies can be daunting. We hear about shiny new things like VueJS and GraphQL, but there’s only so much time in the day to learn every new thing that comes along.
So I think a more practical approach is to figure out how these technologies can help us solve the real world problems we face every day.
Here are the two problems we’re going to solve:
- Auto-complete search — dynamically present a list of results as the user types
- Contact form submission saving — The ability to take form submission data, and save it to a backend database
So let’s get down to it, and talk about the tooling we need to get the job done.
Tooling
Every project needs at least a little bit of tooling; I’ve tried to keep it to a minimum here, so we can focus on the examples. But we still need some.

Here’s what we’ll be using for our tooling on the frontend:
- VueJS — a frontend JavaScript framework that is approachable, versatile, and performant
- Axios — a JavaScript library for doing http requests
- Bootstrap 4 — a popular CSS framework, just so our examples don’t look ugly
For simplicity’s sake, all of these frontend resources will just be grabbed from a CDN. I used Bootstrap because much as I love Tailwind CSS, I didn’t want to get distracted by utility-first CSS in the examples.
If you’re not familiar with VueJS, that’s okay. You could do the same thing with jQuery, vanilla JS, or whatever you like. It’d just be more work; we’re just using VueJS here to make the GraphQL examples easier to do.
A full explanation of VueJS is beyond the scope of this article, but you can check out the following resources if you want to learn more:
- Learn Vue 2: Step By Step
- Spelunking into the VueJS Frontend JavaScript Framework
- Using VueJS 2.0 with Craft CMS
You might be looking at the list, and wondering to yourself “Hey, where’s the GraphQL?” There’s a good reason it isn’t listed there; GraphQL is a specification, not an implementation. So there’s no JavaScript to include at all!
Here’s what we’ll be using for our tooling on the backend:
- Craft CMS — a wonderful CMS that offers a rich content authoring experience
- CraftQL — Mark Huot’s excellent plugin simply provides a GraphQL layer on top of Craft CMS
The examples will be using Craft CMS as the backend, but the glory of JAMstack technologies like VueJS + GraphQL is that the backend doesn’t really matter. You could swap out whatever you wanted to use on the backend! We’re using Craft CMS as a “headless” CMS just to serve up our content data via API.
Even if you’re not using Craft CMS, almost everything in this article will apply. So read on!
Auto-complete search
It’s pretty common that we might want to provide the ability for people to type in a search field, and have it dynamically list a series of results.
For this example, we have a blog section in Craft CMS that has some sample data in it. We want to let people type in a field to find blog entries that match what they are typing.
The end result looks like this on the frontend:

At the top we have a Search field, and below it we present a dynamic list of matches to blog entries as they type. Below that is just some debugging information that may help you understand what’s going on under the hood.
I’m going to jump around a bit in this explanation, but the full source will be at the end of the article.
Vue Instance for Auto-complete search
So… how do we accomplish this? Let’s start with defining the data we need to make this happen, and create our Vue instance around it.
This is what I love about VueJS. You define the data as the source of truth for your application, and the HTML result is just a byproduct of it.
Let’s have a look:
// Instantiate our Vue instance
    new Vue({
        el: '#demo',
        data: {
            searchApi: axios.create(configureApi(apiUrl, apiToken)),
            searchQuery: '',
            searchResults: {}
        },
        methods: {
            // Perform a search
            performSearch() {
                // If they haven't entered anything to search for, return nothing
                if (this.searchQuery === '') {
                    this.searchResults = {};
                    return;
                }
                // Set the variables we will pass in to our query
                const variables = {
                    sections: searchSections,
                    needle: searchPrefix + this.searchQuery,
                    limit: 5
                };
                // Execute the query
                executeQuery(this.searchApi, searchQuery, variables, (data) => {
                    this.searchResults = data.data.entries;
                });
            }
        }
    })
Our data is pretty simple, and consists of just:
- searchApi — the Axios instance we’ll use to send & receive GraphQL via http (more on this later)
- searchQuery — the search string the user is looking for
- searchResults — and object with the results (if any) of their search
The configureApi() function looks like this:
// Configure the api endpoint
    const configureApi = (url, token) => {
        return {
            baseURL: url,
            headers: {
                'Authorization': `Bearer ${token}`,
                'X-Requested-With': 'XMLHttpRequest'
            }
        };
    };
It’s returning a config object that we can pass to axios.create() so that all of our http requests have the same basic settings. We’re just creating our own Axios instance that is pre-configured with the settings we want.
Here are the settings we pass in:
// Information needed for connecting to our CraftQL endpoint
    const apiToken = 'wwYfgLejf27AxoSmR0K3wUzFoj9Y96QSNTICvpPslO2l2JcNsjfRY9y5eIec5KhN';
    const apiUrl = '/api';
While this might seem overly complicated, what if we had multiple API URLs? Or what if we had different permissions for each type of API call? This makes it easier to set up our API endpoints in a reusable way.
apiUrl is set to the default /api URL that CraftQL listens to for GraphQL requests. apiToken is a Bearer Token that CraftQL uses to grant permission to read and write data in Craft CMS.
In the Craft AdminCP, you create these bearer tokens:

And define what permissions they have:

None of this is unique to Craft CMS or CraftQL; whatever you end up using on the backend, there will be a URL to access the API, and a bearer token to define permissions.
HTML for Auto-complete search
So that’s our Vue instance; before we get to the performSearch() method and our GraphQL, let’s have a look at the HTML template we’re using:
<!DOCTYPE html>
<html>
<head>
    <script src="https://cdn.jsdelivr.net/npm/vue/dist/vue.js"></script>
    <script src="https://unpkg.com/axios/dist/axios.min.js"></script>
    <link rel="stylesheet" href="https://maxcdn.bootstrapcdn.com/bootstrap/4.0.0/css/bootstrap.min.css" integrity="sha384-Gn5384xqQ1aoWXA+058RXPxPg6fy4IWvTNh0E263XmFcJlSAwiGgFAW/dAiS6JXm" crossorigin="anonymous">
</head>

<body>
<div class="container p-5">
    {% verbatim %}
    <form id="demo" autocomplete="off">
        <div class="form-group">
            <label for="searchQuery">Search:</label>
            <input v-model="searchQuery" v-on:keyup="performSearch()" id="searchQuery" class="form-control" type="text" />
        </div>

        <div class="form-group">
            <ul class="list-group">
                <li v-for="(searchResult, index) in searchResults" class="list-group-item">
                    <a v-bind:href="searchResult.url">{{ searchResult.title }}</a>
                </li>
            </ul>
        </div>

        <div class="form-group">
            <pre>data: {{ $data }}</pre>
        </div>
    </form>
    {% endverbatim %}
</div>
So nothing too exciting here; we have our JavaScript and Bootstrap CSS coming from CDNs.
Then we have the rather strange looking {% verbatim %} statement. This is just a Twig tag that tells Craft CMS not to process anything inside of it. We have to do this because both Twig and VueJS uses the same mustache {{ }} delimiters, and we want to be using VueJS here, not Twig.
Then we have an input that is bound to our searchQuery data in VueJS via the v-model attribute. This means that any time the value of the searchQuery data changes, so does our input… and vice versa, any time the user types something into the input, the value in our searchQuery data is updated.
There is also a v-on:keyup attribute set on it that causes VueJS to call the performSearch() method any time there’s a keyup event. This is what causes our API call to GraphQL to happen dynamically as the user types.
After that we have a list item that has the v-for attribute set on it. This causes VueJS to render a <li> for every object in our searchResults data.
So whenever data is returned from our GraphQL API endpoint, the searchResults data gets updated, which causes the DOM on the frontend to magically update with all of the results.
If there are no results, then nothings renders!
The {{ $data }} at the bottom just dumps all of the data in our Vue instance as JSON, so we can see what’s going on under the hood.
GraphQL for Auto-complete Search
Now let’s have a look in more detail at our performSearch() method. While this is technically still part of our Vue instance, it’s relevant to the GraphQL query we’ll be doing:
// Perform a search
            performSearch() {
                // If they haven't entered anything to search for, return nothing
                if (this.searchQuery === '') {
                    this.searchResults = {};
                    return;
                }
                // Set the variables we will pass in to our query
                const variables = {
                    sections: searchSections,
                    needle: searchPrefix + this.searchQuery,
                    limit: 5
                };
                // Execute the query
                executeQuery(this.searchApi, searchQuery, variables, (data) => {
                    this.searchResults = data.data.entries;
                });
            }
First it just checks to see if the searchQuery is an empty string, and if so sets searchResults to an empty object, and returns.
We do this because if we pass an empty search string into our Craft CMS backend, it’s going to return all results. We want it to return none.
Then it sets the variables we’re going to pass in to our GraphQL query. If you’re familiar with Craft CMS, this should seem fairly similar to what we might pass in to craft.entries to look up data:
- sections — the Sections to search in Craft CMS
- needle — the search string to look for; this is whatever the user typed prefixed with searchPrefix
- limit — the number of results we want returned
To make things easy to change, we’ve defined the following constants:
// What to search for
    const searchSections = ['blog'];
    const searchPrefix = 'title:';
The searchSections tells it we only want to search the blog section. The searchPrefix is used to limit the search to just the title field, and it all works just the same as Searching in Craft CMS. If we wanted it to search everything in an entry, we could just set this to be an empty string ('').
Finally we get to some GraphQL! Next it calls executeQuery(), passing in our Axiois API we created, the query we want to execute, our variables, and then a callback function.
Here’s what the searchQuery GraphQL query looks like:
// The query to search for entries in Craft
    const searchQuery =
        `
        query searchQuery($sections: [SectionsEnum], $needle: String!, $limit: Int)
        {
            entries(section: $sections, search: $needle, limit: $limit) {
                title
                url
            }
        }
        `;
While the syntax may look a little funky to you, it should be pretty clear what’s going on here. We’re defining a GraphQL query called searchQuery and we’re defining the names of the incoming variables as well as their type. The ! after a type definition means that the variable is required, and [] is array syntax in GraphQL.
This is an important concept in GraphQL; it has a strict type system to ensure the purity & correctness of the data being passed into it. See the GraphQL documentation on Schemas & Types for more information, if you’re curious.
GraphQL uses the query we pass in along with the variables to determine what data to select. Then the title and url are telling GraphQL what data we want back.
This is another important concept in GraphQL: it will only return to you the data you ask for! So even though these blog entries may contain a huge amount of data, it’s only going to return to us the title and url that we’re asking for.
Even if the syntax of the query doesn’t make 100% sense to you, that’s okay. You can see that it’s sending in some data to look for in the query, and defining what it’s returning.
When the query is complete, it will call our callback function:
(data) => {
    this.searchResults = data.data.entries;
}
It only calls our callback if the resulting query is successful; and we just set our searchResults to a subset of the data (just the entries) that was returned.
So good enough, let’s look at the guts of the executeQuery() function to see what exactly it’s doing:
// Execute a GraphQL query by sending an XHR to our api endpoint
    const executeQuery = (api, query, variables, callback) => {
        api.post('', {
            query: query,
            variables: variables
        }).then((result) => {
            if (callback) {
                callback(result.data);
            }
            console.log(result.data);
        }).catch((error) => {
            console.log(error);
        })
    };
It’s actually really simple! We’re not using any heavy GraphQL-specific JavaScript, we’re just using our Axios instance that we created to send a POST to our API URL with our data!
The first parameter to the .post() method is the URL which gets appended to the baseURL we specified earlier when we created our Axios instance. Since we’re just using one URL for all of our API, we pass in an empty string ('').
The second parameter to the .post() method is the data object we want to POST to the API endpoint; all we need here is the query and variables for our GraphQL query.
Then since the .post() method returns a Promise, then we call our callback when the data successfully returns, or we catch any errors, and log them to the console.
Have a Beer!
Phew! Are you tired? I’m tired! But I think the actual concepts here are not so bad, there is just some new nomenclature to learn.

We covered most of the important concepts that you need to understand how everything works already, so have a beer to celebrate, then let’s dive in to Contact form submission saving.
It won’t be that bad, since the majority of it is the same!
Contact form submission saving
Another common thing that needs doing is the user enters some data on the frontend, and you want to save it on the backend in a database.
In our case, we want to save people’s name, email address, and message from a contact form into our database on the backend so that our CRM folks can get back in touch with them.
On the frontend, it looks like this:

So, pretty standard. The user fills in a Name, Email, and Message, then clicks on the Submit button… and we save the information in the database on the backend.
We also display a nice little message to the user telling them that the submission was successfully submitted. It’s the little things.
Vue Instance for Contact form submission saving
Our Vue instance for the contact form is going to look pretty familiar:
// Instantiate our Vue instance
    new Vue({
        el: '#demo',
        data: {
            contactApi: axios.create(configureApi(apiUrl, apiToken)),
            contactName: '',
            contactEmail: '',
            contactMessage: '',
            submitted: false
        },
        methods: {
            // Submit the contact form
            submitContactForm() {
                // Set the variables we will pass in to our mutation
                const variables = {
                    contactName: this.contactName,
                    contactEmail: this.contactEmail,
                    contactMessage: this.contactMessage,
                };
                // Execute the query
                executeQuery(this.contactApi, contactFormMutation, variables, (data) => {
                    this.submitted = true;
                });
            }
        }
    })
We have our data as follows:
- contactApi — the Axios instance we’ll use to send & receive GraphQL via http
- contactName — the name the user enters into the contact form
- contactEmail — the email address the user enters into the contact form
- contactMessage — the message the user enters into the contact form
- submitted — whether or not the contact form was successfully submitted
The configureApi() function looks… well, dang, it’s exactly the same as we used in on Auto-complete Search example. Yay, code re-use!
The only thing that is different are the settings we pass in, because we have a separate bearer token for the contact form that has permissions that allow it to save data to our Contact Form channel:
// Information needed for connecting to our CraftQL endpoint
    const apiToken = 'DxOES1XTDtnFVILEp0kNcOpvJpRXOmjFQci4lz6jLrrUqan6zTJ02ZkZyM_VTXlH';
    const apiUrl = '/api';
This is great, it’s leveraging everything we’ve done already, so let’s move right along to the HTML for the contact form!
HTML for Contact form submission saving
Before we get into what the submitContactForm() method does, let’s have a look at the HTML template for our contact form:
<!DOCTYPE html>
<html>
<head>
    <script src="https://cdn.jsdelivr.net/npm/vue/dist/vue.js"></script>
    <script src="https://unpkg.com/axios/dist/axios.min.js"></script>
    <link rel="stylesheet" href="https://maxcdn.bootstrapcdn.com/bootstrap/4.0.0/css/bootstrap.min.css" integrity="sha384-Gn5384xqQ1aoWXA+058RXPxPg6fy4IWvTNh0E263XmFcJlSAwiGgFAW/dAiS6JXm" crossorigin="anonymous">
</head>

<body>
<div class="container p-5">
    {% verbatim %}
    <form id="demo" autocomplete="off">
        <div class="form-group">
            <label for="contactName">Name:</label>
            <input v-model="contactName" id="contactName" class="form-control" type="text" />
        </div>

        <div class="form-group">
            <label for="contactEmail">Email:</label>
            <input v-model="contactEmail" id="contactEmail" class="form-control" type="text" />
        </div>

        <div class="form-group">
            <label for="contactMessage">Message:</label>
            <textarea v-model="contactMessage" id="contactMessage" class="form-control"></textarea>
        </div>

        <div class="form-group">
            <button v-on:click="submitContactForm()" type="button" class="btn btn-primary">Submit</button>
        </div>

        <div v-if="submitted" class="alert alert-primary" role="alert">
            Message submitted!
        </div>

        <div class="form-group">
            <pre>data: {{ $data }}</pre>
        </div>
    </form>
    {% endverbatim %}
</div>
Again we have the same JavaScripts and Bootstrap CSS at the top, and then we have a pretty standard looking contact form HTML, with inputs for each piece of data that we want.
We again use the v-model attribute to bind the inputs to the appropriate data in our Vue instance, so we get that lovely reactivity whenever data is entered.
Then we have a button with the v-on:click attribute set, so that it’ll call our submitContactForm() method whenever the user clicks on the button.
Finally, we have a <div> with the v-if attribute set to display only if submitted is true, to display a nice message to the user to let them know their submission worked. Because we care.
GraphQL for Contact form submission saving
Now let’s get back to our submitContactForm() method to see what it’s doing:
// Submit the contact form
            submitContactForm() {
                // Set the variables we will pass in to our mutation
                const variables = {
                    contactName: this.contactName,
                    contactEmail: this.contactEmail,
                    contactMessage: this.contactMessage,
                };
                // Execute the query
                executeQuery(this.contactApi, contactFormMutation, variables, (data) => {
                    this.submitted = true;
                });
            }
So pretty simple, we’re extracting out the variables we want to pass along to GraphQL, and we’re calling executeQuery() again to execute our query.
The nifty thing here is that executeQuery() is once again exactly the same code! Even though we’re doing something different (saving data instead of reading data), we can use the exact same executeQuery() method!
When we want to change or add new data in GraphQL, that’s called a mutation. Mutations are just another query that happen to also change or add data.
So here’s what our contactFormMutation looks like:
// The mutation to write contact form data to Craft
    const contactFormMutation =
        `
        mutation contactFormMutation($contactName: String!, $contactEmail: String!, $contactMessage: String!)
        {
            upsertContactForm(
                authorId: 1
                title: $contactName
                contactName: $contactName
                contactEmail: $contactEmail
                contactMessage: $contactMessage
            ) {
            id
            }
        }
        `;
So it looks pretty similar to what we were doing before, but instead of query it’s now mutation. We’re still telling GraphQL what variables we’re passing in, and also the types of those variables.
But we’ve added upsertContactForm() that has a list of the data we want to upsert into the database. Upsert just means “add or update data,” and the ContactForm part is the name of the Section we want to upsert into.
Then since a mutation is just a type of query, we have to tell GraphQL what data we want returned; in this case we just ask for the id of the newly created entry back.
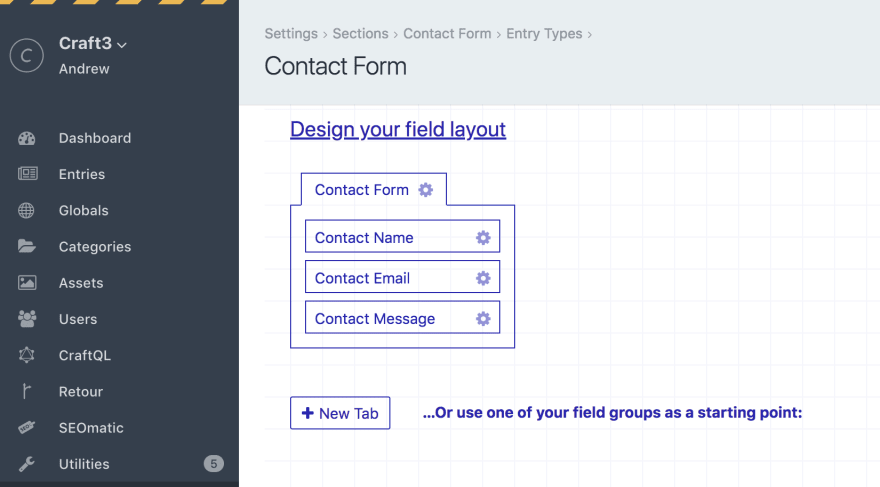
The fields we’re upsert’ing into the Contact Form channel match what we have defined in Craft CMS:
The only thing slightly unusual about this is what we’re passing in a hard-coded authorId; this is because all Entries need to be owned by someone in Craft CMS.
That’s it! We’re saving entries in the Craft CMS backend.
Obviously there’s more we could do here, such as validating the form input with vee-validate, hiding the form after it’s been submitted, etc. But that’s left as an exercise for you, dear reader.
Wrapping Up
While this may seem like a good bit to take in, once you get familiar with how GraphQL works, it’s infinitely easier to use than “rolling your own” custom API with the Element API, and you’ll have learned a skill that translates to many different platforms.

The best part is… you’ve separated your API from the system that implements it. So if you decide to move to a different CMS or platform, it makes it infinitely easier to do so!
One of the most fun and enjoyable ways you can learn GraphQL is by simply playing around with the in-browser GraphiQL IDE that is included with the CraftQL plugin:

You can play around with your queries & mutations with an auto-complete editor that knows the schema of your entry Craft CMS backend. It’s so fun!
If you just can’t get enough GraphQL, the GraphQL basics and practical examples with Vue article is a great place to go next. Also check out the GraphQL: Better than all the REST? podcast on devMode.fm!
Enjoy your day!
Auto-complete search full source
Here’s the full source to the Auto-complete search example:
<!DOCTYPE html>
<html>
<head>
    <script src="https://cdn.jsdelivr.net/npm/vue/dist/vue.js"></script>
    <script src="https://unpkg.com/axios/dist/axios.min.js"></script>
    <link rel="stylesheet" href="https://maxcdn.bootstrapcdn.com/bootstrap/4.0.0/css/bootstrap.min.css" integrity="sha384-Gn5384xqQ1aoWXA+058RXPxPg6fy4IWvTNh0E263XmFcJlSAwiGgFAW/dAiS6JXm" crossorigin="anonymous">
</head>

<body>
<div class="container p-5">
    {% verbatim %}
    <form id="demo" autocomplete="off">
        <div class="form-group">
            <label for="searchQuery">Search:</label>
            <input v-model="searchQuery" v-on:keyup="performSearch()" id="searchQuery" class="form-control" type="text" />
        </div>

        <div class="form-group">
            <ul class="list-group">
                <li v-for="(searchResult, index) in searchResults" class="list-group-item">
                    <a v-bind:href="searchResult.url">{{ searchResult.title }}</a>
                </li>
            </ul>
        </div>

        <div class="form-group">
            <pre>data: {{ $data }}</pre>
        </div>
    </form>
    {% endverbatim %}
</div>

<script>
    // Information needed for connecting to our CraftQL endpoint
    const apiToken = 'wwYfgLejf27AxoSmR0K3wUzFoj9Y96QSNTICvpPslO2l2JcNsjfRY9y5eIec5KhN';
    const apiUrl = '/api';
    // What to search for
    const searchSections = ['blog'];
    const searchPrefix = 'title:';
    // The query to search for entries in Craft
    const searchQuery =
        `
        query searchQuery($sections: [SectionsEnum], $needle: String!, $limit: Int)
        {
            entries(section: $sections, search: $needle, limit: $limit) {
                title
                url
            }
        }
        `;
    // Configure the api endpoint
    const configureApi = (url, token) => {
        return {
            baseURL: url,
            headers: {
                'Authorization': `Bearer ${token}`,
                'X-Requested-With': 'XMLHttpRequest'
            }
        };
    };
    // Execute a GraphQL query by sending an XHR to our api endpoint
    const executeQuery = (api, query, variables, callback) => {
        api.post('', {
            query: query,
            variables: variables
        }).then((result) => {
            if (callback) {
                callback(result.data);
            }
            console.log(result.data);
        }).catch((error) => {
            console.log(error);
        })
    };
    // Instantiate our Vue instance
    new Vue({
        el: '#demo',
        data: {
            searchApi: axios.create(configureApi(apiUrl, apiToken)),
            searchQuery: '',
            searchResults: {}
        },
        methods: {
            // Perform a search
            performSearch() {
                // If they haven't entered anything to search for, return nothing
                if (this.searchQuery === '') {
                    this.searchResults = {};
                    return;
                }
                // Set the variables we will pass in to our query
                const variables = {
                    sections: searchSections,
                    needle: searchPrefix + this.searchQuery,
                    limit: 5
                };
                // Execute the query
                executeQuery(this.searchApi, searchQuery, variables, (data) => {
                    this.searchResults = data.data.entries;
                });
            }
        }
    })
</script>
</body>
</html>
Contact form submission saving full source
Here’s the full source for the Contact Form Submission Saving:
<!DOCTYPE html>
<html>
<head>
    <script src="https://cdn.jsdelivr.net/npm/vue/dist/vue.js"></script>
    <script src="https://unpkg.com/axios/dist/axios.min.js"></script>
    <link rel="stylesheet" href="https://maxcdn.bootstrapcdn.com/bootstrap/4.0.0/css/bootstrap.min.css" integrity="sha384-Gn5384xqQ1aoWXA+058RXPxPg6fy4IWvTNh0E263XmFcJlSAwiGgFAW/dAiS6JXm" crossorigin="anonymous">
</head>

<body>
<div class="container p-5">
    {% verbatim %}
    <form id="demo" autocomplete="off">
        <div class="form-group">
            <label for="contactName">Name:</label>
            <input v-model="contactName" id="contactName" class="form-control" type="text" />
        </div>

        <div class="form-group">
            <label for="contactEmail">Email:</label>
            <input v-model="contactEmail" id="contactEmail" class="form-control" type="text" />
        </div>

        <div class="form-group">
            <label for="contactMessage">Message:</label>
            <textarea v-model="contactMessage" id="contactMessage" class="form-control"></textarea>
        </div>

        <div class="form-group">
            <button v-on:click="submitContactForm()" type="button" class="btn btn-primary">Submit</button>
        </div>

        <div v-if="submitted" class="alert alert-primary" role="alert">
            Message submitted!
        </div>

        <div class="form-group">
            <pre>data: {{ $data }}</pre>
        </div>
    </form>
    {% endverbatim %}
</div>

<script>
    // Information needed for connecting to our CraftQL endpoint
    const apiToken = 'DxOES1XTDtnFVILEp0kNcOpvJpRXOmjFQci4lz6jLrrUqan6zTJ02ZkZyM_VTXlH';
    const apiUrl = '/api';
    // The mutation to write contact form data to Craft
    const contactFormMutation =
        `
        mutation contactFormMutation($contactName: String!, $contactEmail: String!, $contactMessage: String!)
        {
            upsertContactForm(
                authorId: 1
                title: $contactName
                contactName: $contactName
                contactEmail: $contactEmail
                contactMessage: $contactMessage
            ) {
            id
            }
        }
        `;
    // Configure the api endpoint
    const configureApi = (url, token) => {
        return {
            baseURL: url,
            headers: {
                'Authorization': `Bearer ${token}`,
                'X-Requested-With': 'XMLHttpRequest'
            }
        };
    };
    // Execute a GraphQL query by sending an XHR to our api endpoint
    const executeQuery = (api, query, variables, callback) => {
        api.post('', {
            query: query,
            variables: variables
        }).then((result) => {
            if (callback) {
                callback(result.data);
            }
            console.log(result.data);
        }).catch((error) => {
            console.log(error);
        })
    };
    // Instantiate our Vue instance
    new Vue({
        el: '#demo',
        data: {
            contactApi: axios.create(configureApi(apiUrl, apiToken)),
            contactName: '',
            contactEmail: '',
            contactMessage: '',
            submitted: false
        },
        methods: {
            // Submit the contact form
            submitContactForm() {
                // Set the variables we will pass in to our mutation
                const variables = {
                    contactName: this.contactName,
                    contactEmail: this.contactEmail,
                    contactMessage: this.contactMessage,
                };
                // Execute the query
                executeQuery(this.contactApi, contactFormMutation, variables, (data) => {
                    this.submitted = true;
                });
            }
        }
    })
</script>
</body>
</html>
Further Reading
If you want to be notified about new articles, follow nystudio107 on Twitter.
Copyright ©2020 nystudio107. Designed by nystudio107

Top comments (0)