👋 Hello!
In this article, you'll see the following:
- how to detect faces in pictures,
- how to automatically anonymize, crop,… a picture with faces,
- how to make this a serverless online demo,
- in less than 300 lines of Python code.
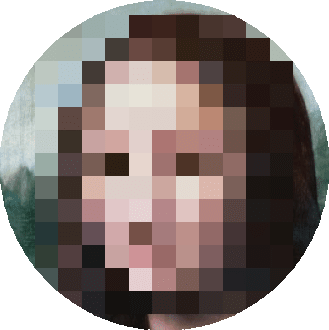
Here is a famous face that has been automatically anonymized and cropped. Do you guess who this is?
Note: We're talking about face detection, not face recognition. Though technically possible, face recognition can have harmful applications. Responsible companies have established AI principles and avoid exposing such potentially harmful technologies (e.g. Google AI Principles).
🛠️ Tools
A few tools will do:
- a machine learning model to analyze images,
- a library to process images,
- a web application framework,
- a serverless solution to keep the demo available 24/7 and at minimal cost.
🧱 Architecture
Here is an architecture using 2 Google Cloud services (App Engine + Vision API):
The workflow is the following:
- Open the demo: App Engine serves the home page.
- Take a selfie: the frontend sends it to the
/analyze-imageendpoint. - The backend sends a request to the Vision API: the image is analyzed and the results (annotations) are returned.
- The backend returns the annotations, in addition to the number of detected faces (to display the info directly in the web page).
- The frontend sends image, annotations, and processing options to the
/process-imageendpoint. - The backend processes the image with the given options and returns the result image.
- Change the options: steps 5 and 6 are repeated.
- Get the image with new options.
This is one of many possible architectures. The advantages of this one are the following:
- The web browser caches both the selfie and the annotations: no storage is involved and no private images are stored anywhere in the cloud.
- The Vision API is only called once per image.
🐍 Python libraries
Google Cloud Vision
- The client library that wraps calls to the Vision API.
- https://pypi.org/project/google-cloud-vision
Pillow
- A very popular imaging library, both extensive and easy to use.
- https://pypi.org/project/Pillow
Flask
- One of the most popular web app frameworks.
- https://pypi.org/project/Flask
Dependencies
Define the dependencies in the requirements.txt file:
google-cloud-vision==2.4.4

Pillow==8.3.2

Flask==2.0.2
Notes:
- As a best practice, also specify the dependency versions. This freezes your production environment in a known state and prevents newer versions from potentially breaking future deployments.
- App Engine will automatically deploy these dependencies.
🧠 Image analysis
Vision API
The Vision API gives access to state-of-the-art machine learning models for image analysis. One of the multiple features is face detection. Here is a way to detect faces in an image:
from google.cloud import vision_v1 as vision

Annotations = vision.AnnotateImageResponse
MAX_DETECTED_FACES = 50

def detect_faces(image_bytes: bytes) -> Annotations:
    client = vision.ImageAnnotatorClient()
    api_image = vision.Image(content=image_bytes)
    return client.face_detection(api_image, max_results=MAX_DETECTED_FACES)
Backend endpoint
Exposing an API endpoint with Flask consists in wrapping a function with a route. Here is a possible POST endpoint:
import base64

import flask

app = flask.Flask(__name__)

@app.post("/analyze-image")
def analyze_image():
    image_file = flask.request.files.get("image")
    annotations = detect_faces(image_file.read())

    return flask.jsonify(
        faces_detected=len(annotations.face_annotations),
        annotations=encode_annotations(annotations),
    )

def encode_annotations(annotations: Annotations) -> str:
    binary_data = Annotations.serialize(annotations)
    base64_data = base64.urlsafe_b64encode(binary_data)
    base64_annotations = base64_data.decode("ascii")
    return base64_annotations
Frontend request
Here is a javascript function to call the API from the frontend:
async function analyzeImage(imageBlob) {
  const formData = new FormData();
  formData.append("image", imageBlob);
  const params = { method: "POST", body: formData };
  const response = await fetch("/analyze-image", params);

  return response.json();
}
🎨 Image processing
Face bounding box and landmarks
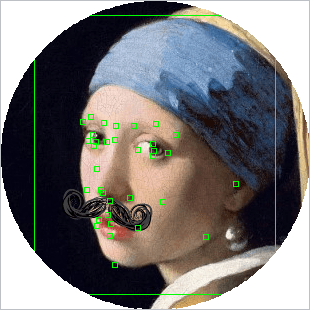
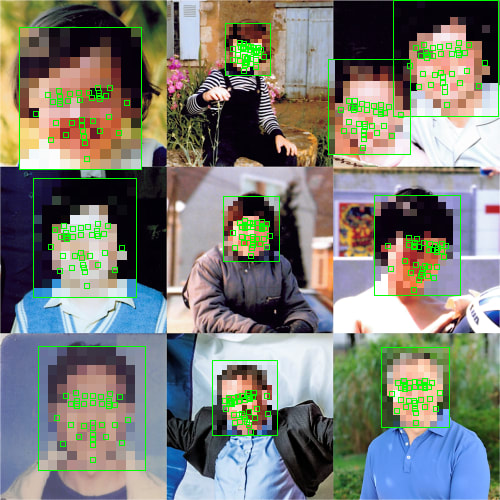
The Vision API provides the bounding box of the detected faces and the position of 30+ face landmarks (mouth, nose, eyes,…). Here is a way to visualize them with Pillow (PIL):
from PIL import Image, ImageDraw

PilImage = Image.Image
ANNOTATION_COLOR = "#00FF00"
ANNOTATION_LANDMARK_DIM_PERMIL = 8
ANNOTATION_LANDMARK_DIM_MIN = 4

def draw_face_landmarks(image: PilImage, annotations: Annotations):
    r_half = min(image.size) * ANNOTATION_LANDMARK_DIM_PERMIL // 1000
    r_half = max(r_half, ANNOTATION_LANDMARK_DIM_MIN) // 2
    border = max(r_half // 2, 1)

    draw = ImageDraw.Draw(image)
    for face in annotations.face_annotations:
        v = face.bounding_poly.vertices
        r = (v[0].x, v[0].y, v[2].x + 1, v[2].y + 1)
        draw.rectangle(r, outline=ANNOTATION_COLOR, width=border)

        for landmark in face.landmarks:
            x = int(landmark.position.x + 0.5)
            y = int(landmark.position.y + 0.5)
            r = (x - r_half, y - r_half, x + r_half + 1, y + r_half + 1)
            draw.rectangle(r, outline=ANNOTATION_COLOR, width=border)
Face anonymization
Here is way to anonymize the faces thanks to the bounding boxes:
ANONYMIZATION_PIXELS=13

def anonymize_faces(image: PilImage, annotations: Annotations):
    for face in annotations.face_annotations:
        v = face.bounding_poly.vertices
        face = image.crop((v[0].x, v[0].y, v[2].x + 1, v[2].y + 1))

        face1_w, face1_h = face.size
        pixel_dim = max(face1_w, face1_h) // ANONYMIZATION_PIXELS
        face2_w, face2_h = face1_w // pixel_dim, face1_h // pixel_dim
        face = face.resize((face2_w, face2_h), Image.NEAREST)
        face = face.resize((face1_w, face1_h), Image.NEAREST)

        image.paste(face, (v[0].x, v[0].y))
Face cropping
Similarly, to focus on the detected faces, you can crop everything around the faces:
CROP_MARGIN_PERCENT = 10

def crop_faces(image: PilImage, annotations: Annotations) -> PilImage:
    mask = Image.new("L", image.size, 0x00)
    draw = ImageDraw.Draw(mask)
    for face in annotations.face_annotations:
        draw.ellipse(face_crop_box(face), fill=0xFF)
    image.putalpha(mask)
    return image

def face_crop_box(face_annotation) -> tuple[int, int, int, int]:
    v = face_annotation.bounding_poly.vertices
    x1, y1, x2, y2 = v[0].x, v[0].y, v[2].x + 1, v[2].y + 1
    w, h = x2 - x1, y2 - y1
    hx, hy = x1 + w / 2, y1 + h / 2
    m = max(w, h) * (100 + CROP_MARGIN_PERCENT) / 100 / 2
    return int(hx - m + 0.5), int(hy - m + 0.5), int(hx + m + 1.5), int(hy + m + 1.5)
🍒 Cherry on Py 🐍
Now, the icing on the cake (or the "cherry on the pie" as we say in French):
- Having independent rendering functions lets you combine multiple options at once.
- Knowing the bounding box for all faces allows cropping the image to the minimal bounding box.
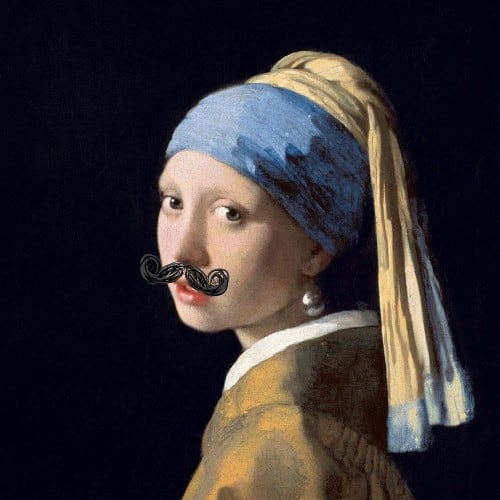
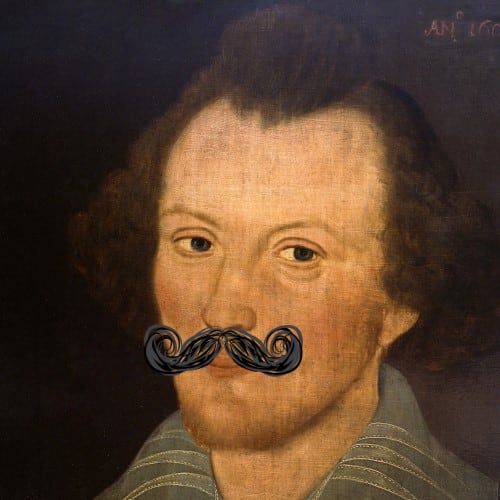
- Using the location of the nose and the mouth, you can add a moustache to everyone.
- If your functions have parameters to render a single frame, you can generate animations with a few lines of code.
- Once your Flask app works locally, you can deploy and keep it available 24/7 at minimal cost.
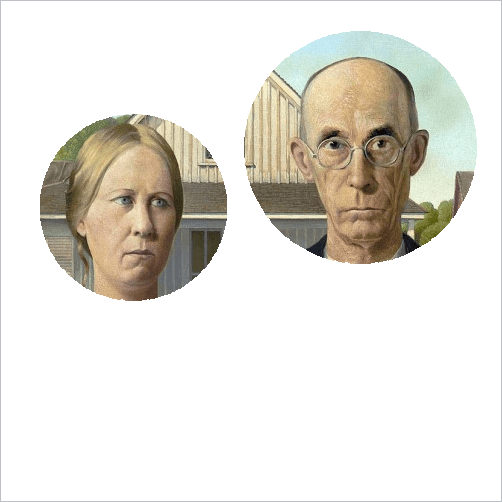
Here is what's detected on famous photorealistic paintings:
- American Gothic
- Girl with a Pearl Earring
- Shakespeare
Here are some animated versions:
- American Gothic
- Girl with a Pearl Earring
- Shakespeare
And, of course, this works even better on real pictures:
- Personal pictures (aged from 2 to 44)
- Yes, I've had a moustache for over 42 years, and my sister too ;)
And, finally, here is our famous anonymous from the beginning:
- Mona Lisa
🚀 Source code and deployment
- The Python source for the backend takes less than 300 lines of code.
- You can deploy this demo in 4 minutes.
- See "Deploying from scratch".
🎉 Online demo
- Try the demo by yourself:
➡️ https://face-detection.lolo.dev ⬅️
- Here is a preview:
🖖 See you
Feedback or questions? I'd love to read from you! Follow me on Twitter for more…
⏳ Updates
- 2021-10-08: Updated with latest library versions + Python 3.7 → 3.9









Top comments (0)