When I first learned to code, I had no idea what a server was, what one looked like or how I would ever end up using one.
In this guide, I'll try and provide the intro that I wish I'd had, and hopefully you'll end up with a better idea of what a server really is and how you can use one. These instructions should work whether you are on a Mac, Linux or Windows 10 machine.
So, what is a server?
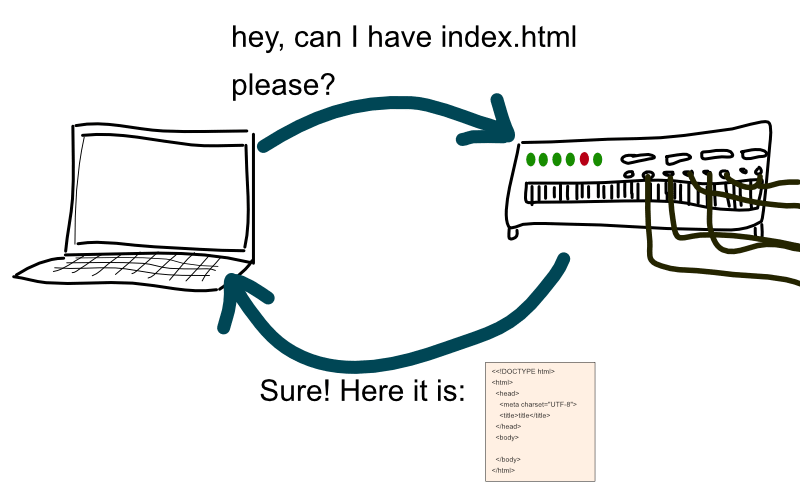
You might read all sorts of technical explanations of what a server is, but I like to describe it as a computer that's always connected to the internet. This is because it usually performs tasks that need an internet connection, such as providing the files that make up a website. That's the scenario we'll work with for this article.
When someone uses their web browser to request a website, a request is made to a specific server for the files that make up that website, and that server is always connected to the internet and is always ready to provide those files.
There is nothing special about that server apart from
- It's always connected to the internet
- It's always on
- It's been configured to "listen" for requests and provide the right files
Your own computer could be a server, if you really wanted.
In reality, when we need a server we tend to rent one, or part of one, that's stored with many others in a big warehouse.

Servers don't have screens because humans don't need to interact with them through a graphical user interface. So you tend to see a load of them all stored efficiently together in racks.
So how do you get a server and configure it?
If you want a server, these days you tend to go to a provider such as Amazon Web Services, Google Cloud Platform or Digital Ocean and "provision" yourself a server.
Let's do just that!
Most of these platforms have free tiers for new users, or generous allowances for low-use customers.
AWS allows new users a year of use of a small server, but even if you're not in your first year, we can create a server now and use it for a very short amount of time and it will only cost a few pennies.
Sign up with AWS
If you haven't signed up for AWS before, create an account now! You will need an active credit/debit card to sign up but we won't be doing anything that costs money.
Provision an instance
AWS calls servers "instances" because technically you're not getting a server of your own, you're renting "compute space" in the cloud, in other words, a virtual server which is just a small slice of space on a single piece of hardware.
But for all intents and purposes it feels like your own server. And it's much cheaper than buying a server just for yourself.
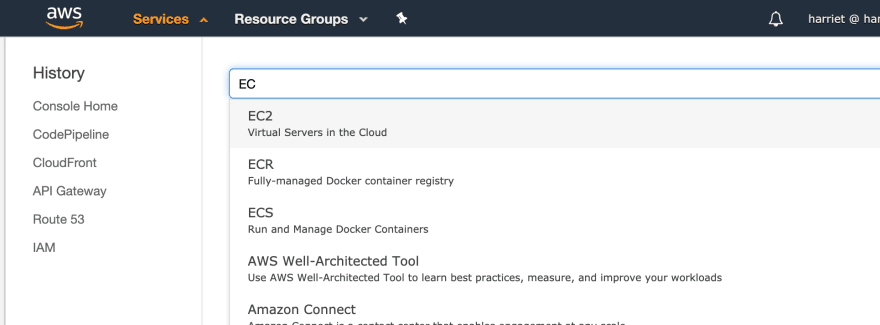
First, find the service called EC2:
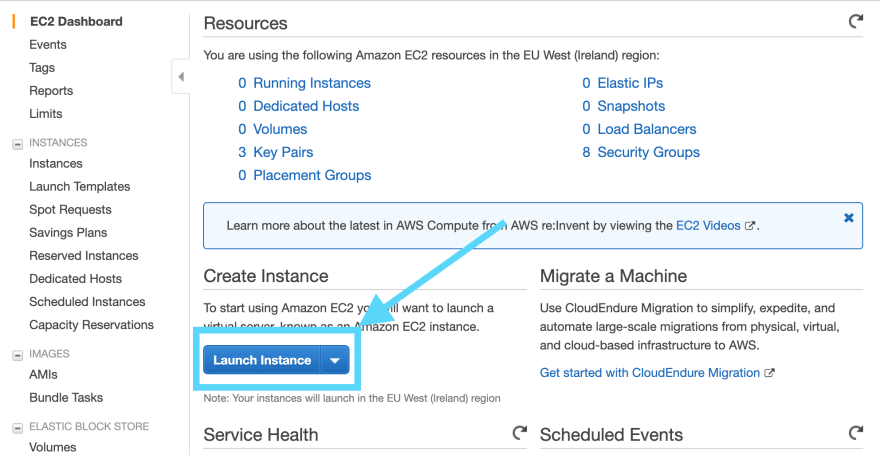
Then, choose the option to launch an instance:
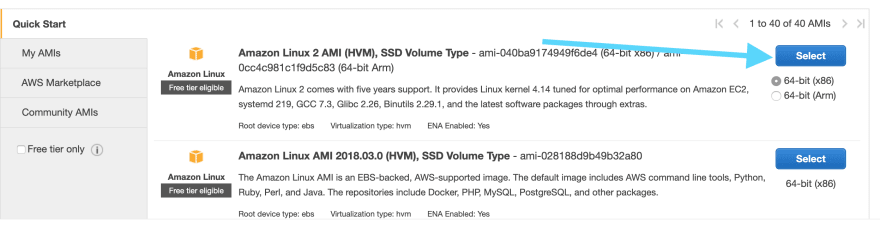
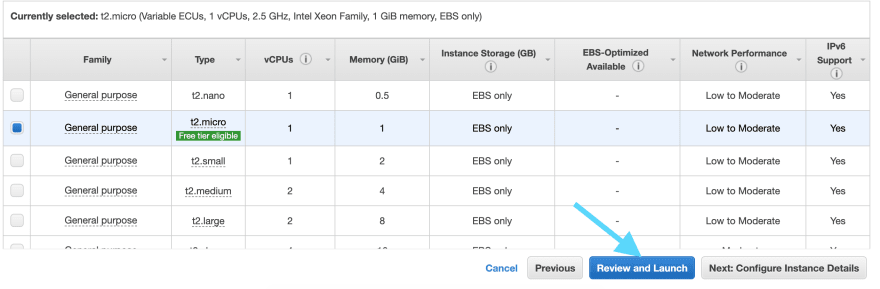
There are various types of instance you can choose, but only some are available in the free tier. Select the Amazon Linux 2 AMI type which is an instance running the latest version of Amazon's Linux operating system. Most servers run a version of the Linux Operating System.
On the next page, ensure the correct AMI type is still selected and press "Review and Launch":
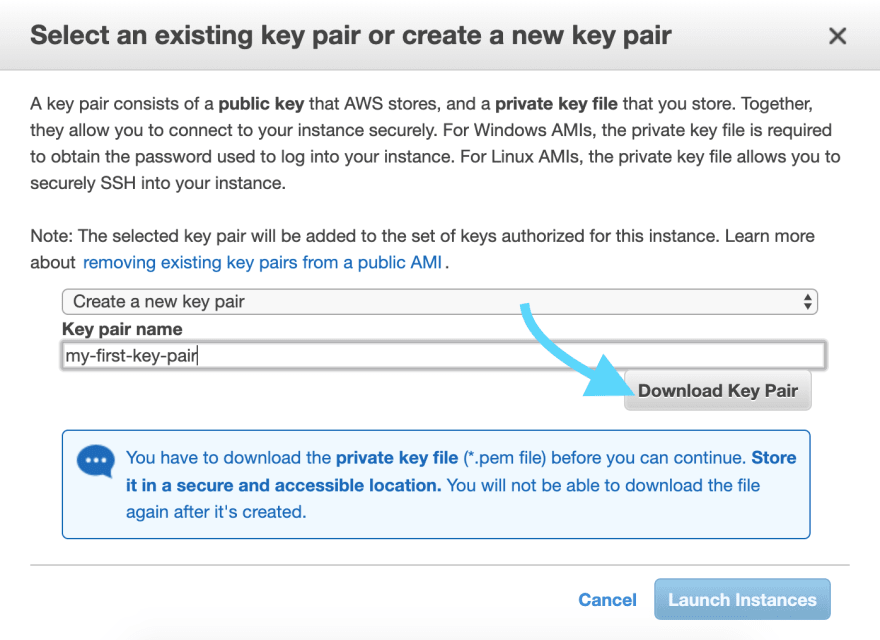
When you are asked whether to use an existing Key Pair or create a new one, create a new one and download it.
Your instance will then take a moment to provision, and when it does you'll be able to go to the EC2 dashboard and see a list of your running instances, probably only with 1 instance in it unless you already had some others running from before.
Connect to your instance
We mentioned that instances don't have screens, so how can we operate them? We can remotely access and operate them from the command line, by connecting to them with a command called ssh. SSH (Secure Shell) is a protocol for remotely and securely connecting to and operating computers across a network.
When we use SSH to connect to our instance we will need to prove we actually have permission to take control of our instance. This is vital, or anyone could connect to our server and wreak havoc, especially since servers are usually doing business-critical, sensitive tasks such working with user data or payment details.
When creating your instance you will have downloaded a private key. This key matches a public key, stored by AWS. Only the owner of the private key will be able to connect to the instance. This is called Public Key Authentication and is a standard method for authenticating with remote servers.
First, maybe move this key file out of your Downloads directory to somewhere you'll know where to find it in the future, if you ever use it again.
Then, we need to change the permissions on the file to make them more secure:
chmod 400 my-first-key-pair.pem
This means that it can only be read by the owner of the file.
Finally, go to the AWS EC2 dashboard and find the public IP of the instance:
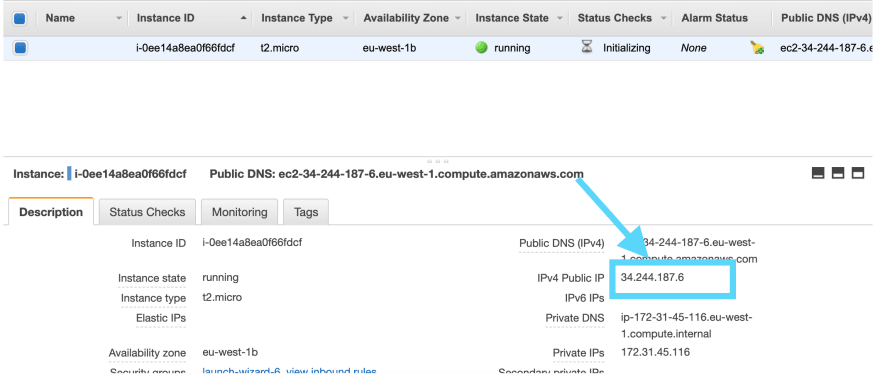
Then, use the IP to construct the below command, making sure you are providing the correct path to your .pem certificate file which you just modified, and substituting the IP address "34.244.187.6" for your instance's:
ssh -i my-first-key-pair.pem ec2-user@34.244.187.6
When asked whether you want to continue, type "yes" and hit enter.
You are now connected to your EC2 instance!
If you are using a Linux machine and you don't already have the ssh command enabled, you might need to run the following commands to enable it first:
sudo apt update
sudo apt install openssh-server
Now this command should work:
ssh -i my-first-key-pair.pem ec2-user@34.244.187.6
Look around! Make some files!
Your terminal is now behaving as though it is the terminal connected to your EC2 instance. If you ls and pwd you will see that it is not your computer any more. Feel free to make some files, explore the file system.
There are no files in your home directory as it's a completely new instance but you will see plenty of standard linux files if you move to the root directory cd /.
Making our instance serve a website
If we want to configure this instance to serve a website we have a do a few things:
- Allow HTTP connections, as browsers request websites using the HTTP protocol and currently our instance only allows SSH connections
- Configure some server software that will respond to HTTP requests by serving files
- Create these files (or get them onto the machine somehow)
Let's do these three things...
1. Allow web traffic to your instance
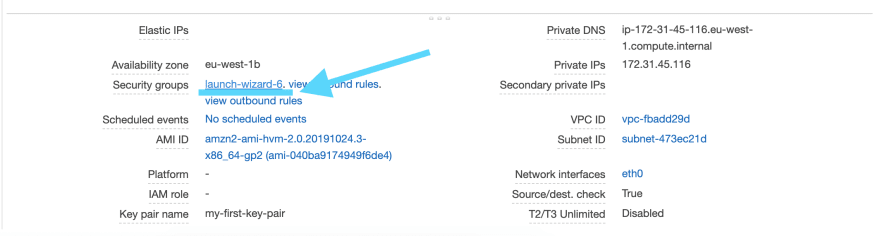
To allow web traffic we need to configure the "security group" settings of the instance. Click on the link to "launch wizard" next to the "Security Groups" heading on the EC2 dashboard.
On the Security Groups page, ensure your security group is highlighted and then select the Inbound tab, and press Edit:

Add a new HTTP rule and leave the default settings that are provided. This will allow HTTP traffic into the instance from any IP address:
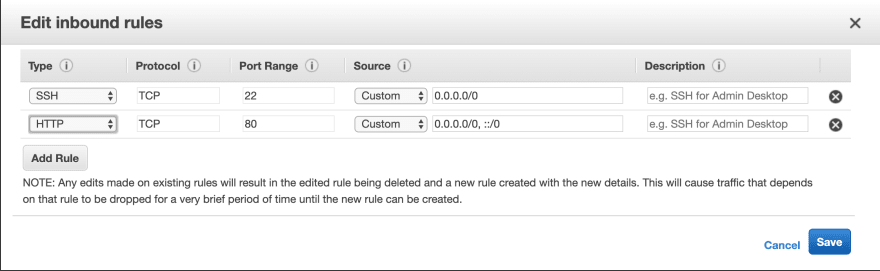
Save this new rule.
2. Install Apache
Back in the terminal which has an SSH session established with your instance, run the following command to install a piece of software called Apache. Apache is a simple server software, and its default configuration allows it to serve static files for a single website when the instance receives HTTP requests on port 80, i.e. requests from browsers or other web clients.
We can use the yum package manager to install httpd which is the package name for Apache, weirdly.
sudo yum install -y httpd
3. Create some files
By default Apache will serve files that are created in the /var/www/html/ directory.
cd into that directory and create an index.html file:
cd /var/www/html
sudo touch index.html
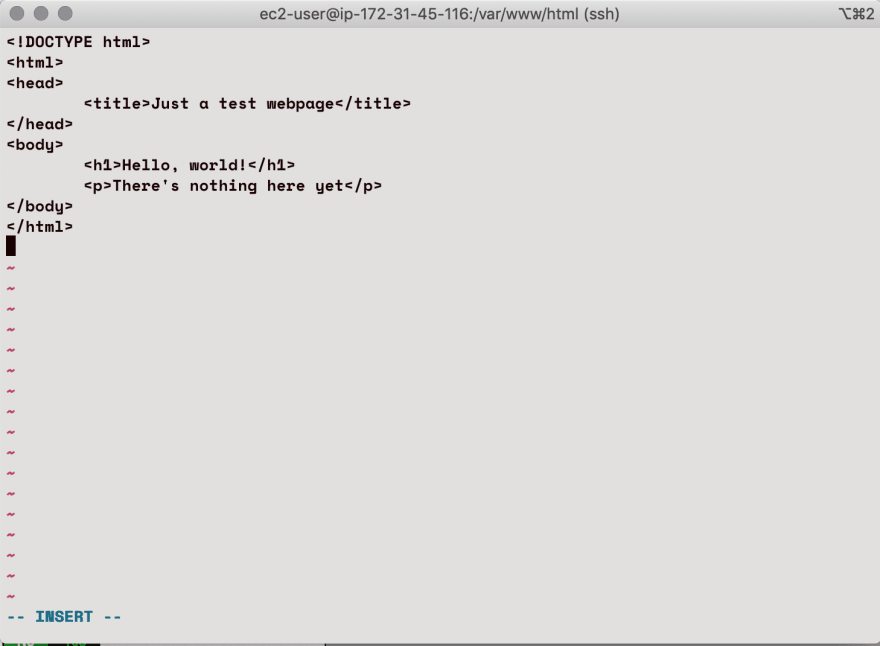
To edit this file we will have to use a command-line editor such as Vim, because we have no graphical user interface, therefore no VSCode etc!
sudo vi index.html
If you haven't used Vim before, you need to toggle insert/command mode using the key i to enter Insert mode and the Escape key to enter command mode.
Once in insert mode, create your HTML file, and when done, toggle to command mode and type :wq to save and quit.
One final step: Start the server
We must start the Apache server software by running:
sudo service httpd start
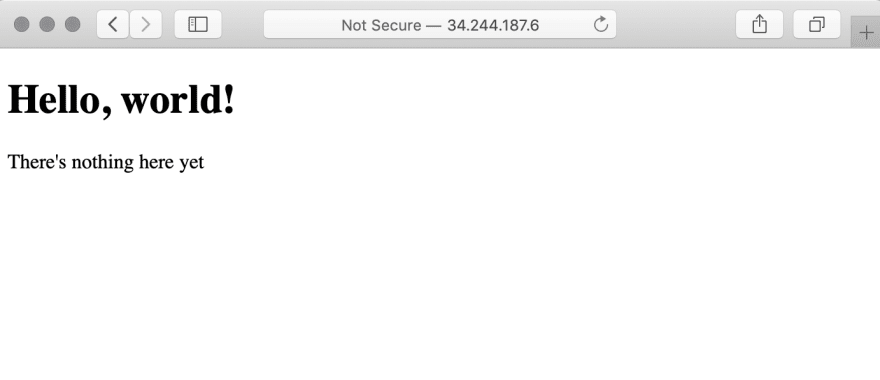
Visit the website
Finally, we should be able to go to our instance's public IP address in the browser and the website should be served!
There are many more ways a server can be configured, and servers can do much more than serve a static web application - most of the time they run an application that performs some logic alongside serving static files, and often they are not used to serve an web application at all.
However, I hope this has been a useful insight into just one way that a server can be configured.
Disconnect from your instance
To end your SSH session, hit they key combination ctrl + D in the terminal. You should be back on your own computer now.
Terminate your instance
To avoid charges, don't forget to terminate your instance when you're done!
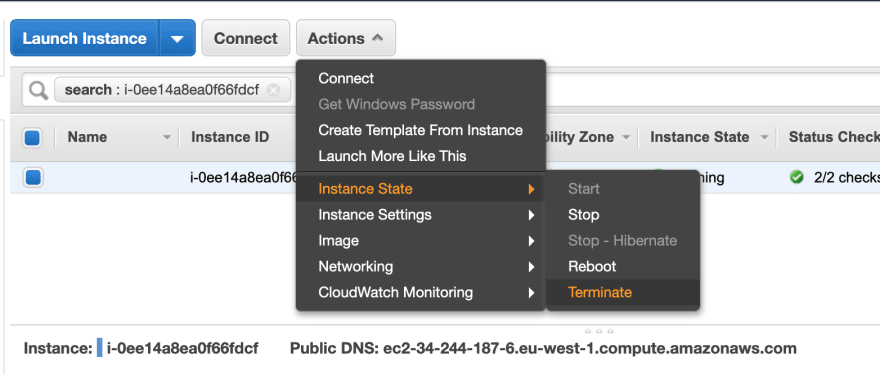
You can do this from AWS's EC2 dashboard. Terminating completely destroys the instance, or if you want to come back to it later you can "Stop" it and restart it again in the future. A stopped instance does not accrue charges.

Top comments (7)
That's a pretty great walkthrough, nicely done :)
For anyone interested, here's the equivalent if you're using digital ocean. I kinda love their tutorials, they've done an awesome job with it: digitalocean.com/docs/droplets/how...
thanks, I love digital ocean too. I think I've followed that tutorial in the past and it was brill :)
Great post Harriet. It's not easy to step back and write from the perspective of being new to a concept or idea. You elucidate very well. It's just the article I wish i'd had when I got started :)
Great post, will be sharing this widely. Thanks for taking the time to put it together.
Thanks Harriet I enjoyed following this through.
Thank you, great post!
I knew most of the information but it wasn't as clear and organized in my head as after reading your post.
Thank you!!