
Tailwind CSS is a utility-first CSS framework for rapidly building custom designs. Instead of having predefined components like Bootstrap and Material UI do, it comes with CSS helper classes and these classes allows you to create custom designs easily.
I'm working on a little side project and decided to use Tailwind CSS although it is a quite bit of an overkill. While there's some learning curve from being different from other CSS frameworks, it gives you whole new development experience once you get the hang of it.
Add to React/TypeScript Project
This is going to be a React + TypeScript project, and with this approach shown below, you don’t need to eject the CRA to use Tailwind.
First, let’s create the project by running:
create-react-app react-ts-tailwind-example —typescript
then
cd react-ts-tailwind-example
Once you are in the root directory, run the following to install dependency package(s):
yarn add tailwindcss
tailwindcss package will add Tailwind to your project and enables its own CLI tool.
Next step is to set up Tailwind within the project so you can actually use it. To do so, let’s first run the following command to create a config file:
npx tailwind init
Upon completion, it should generate tailwind.config.js that looks like this:
// tailwind.config.js
module.exports = {
  purge: [],
  theme: {
    extend: {},
  },
  variants: {},
  plugins: [],
}
This is where you store plugins and theme setting etc. but we are not going to touch it this time.
After that, you need to create src/tailwind.css file and add following:
/* src/tailwind.css */
@tailwind base;
@tailwind components;
@tailwind utilities;
@tailwind base
This line is to inject Tailwind’s base style, which is basically Normalize.css plus some additional styling provided by Tailwind.
@tailwind components
This injects component classes registered by plugins that are found in tailwind.config.js file.
@tailwind utilities
This injects all of utility classes provided by Tailwind CSS. These are also generated based on the config file.
In order to use Tailwind without ejecting from CRA build system, we need to add a script to build Tailwind before the start and build script. For that, let’s open package.json and update the scripts like so:
// package.json
"scripts": {
  "build:tailwind": "tailwindcss build src/tailwind.css -o src/tailwind.output.css",
  "prestart": "npm run build:tailwind",
  "prebuild": "npm run build:tailwind",
  "start": "react-scripts start",
  "build": "react-scripts build",
  "test": "react-scripts test",
  "eject": "react-scripts eject"
},
The build:tailwind script will find src/tailwind.css we created earlier, compile it then save the output as src/tailwind.output.css. Since we added prestart and prebuild, these will run before the existing start and build scripts. It is to ensure output file is generated before the actual start or build happens.
Finally, you can import tailwind.output.css file that is generated by the above script in your src/index.tsx file like this:
// src/index.tsx
import React from 'react'
import ReactDOM from 'react-dom'
import './tailwind.output.css'
import App from './App'

ReactDOM.render(
  <React.StrictMode>
    <App />
  </React.StrictMode>,
  document.getElementById('root')
)
*Also, don’t forget to add this output file to .gitignore, otherwise you’ll be committing a large css file to your repo!
Now your project is empowered by Tailwind CSS, let’s take an example from official docs and add input field with some component classes to make sure it’s actually working:)
// src/App.js
import React from 'react'
const App: React.FC = () => {
return (
<div className="App">
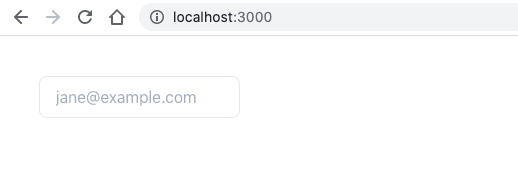
<input className="bg-white focus:outline-none focus:shadow-outline border border-gray-300 rounded-lg py-2 px-4 block appearance-none leading-normal m-10" type="email" placeholder="jane@example.com">
</div>
)
}
export default App
Run yarn start and you should see an input like this on your browser:
There you go! This is a super quick setup and only touched how to set it up in your React project. For learn more on Tailwind, checkout their official site. Hopefully this helps someone who’s looking to use Tailwind in their React project.
Thanks for reading, and please share if you like what you just read!

Top comments (2)
This is really helpful, thanks!
You're welcome! Glad it helped:)