In this tutorial you will learn how to launch Linux EC2 instance. You can use Amazon EC2 to launch virtual servers, configure security and networking, and manage storage. Amazon EC2 enables you to scale up or down to handle changes in requirements or spikes in popularity.
To complete this tutorial you must have an AWS account. To create an AWS account click here and follow the instructions.
Launch an instance
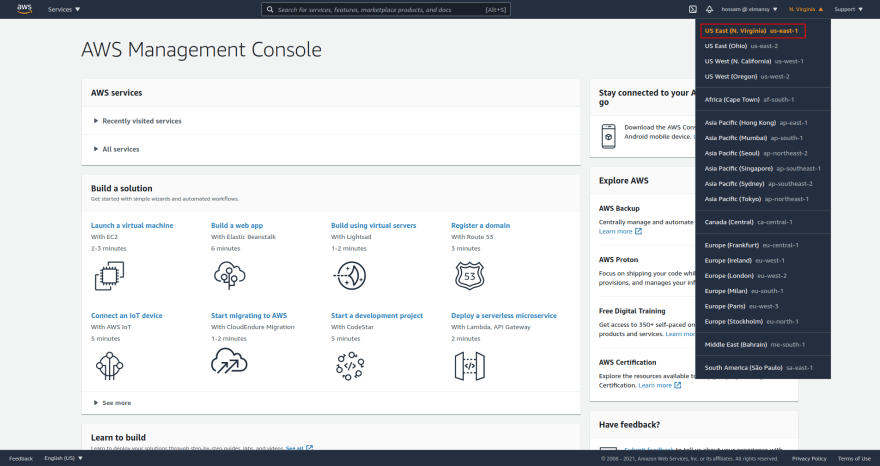
First, Open AWS Management Console and select the region you want to create your instance. I'll use N. Virginia (us-east-1).
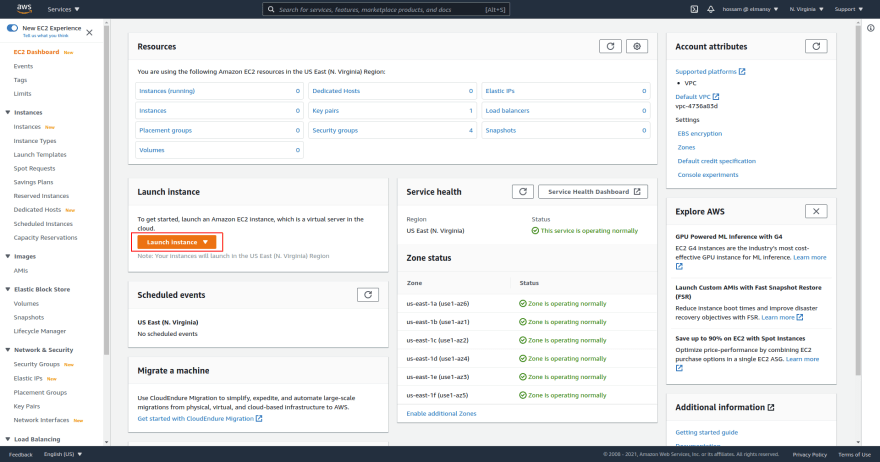
Next, click Services -> EC2 to open Amazon EC2 Console.

Next, choose Launch Instance.
Next, choose an Amazon Machine Image (AMI) which serves as a template for your instance. Select Amazon Linux 2 AMI (HVM). Note that it's marked as Free tier eligible (won't cost money if your account is in the Free tier). Click Select.

Next, choose an Instance Type which means the hardware configurations of your instance. Select t2.micro instance type. Note also it's marked as Free tier eligible. Click Next: Configure Instance Details.

Next, in Configure Instance Details page make sure that Auto-assign Public IP option is Use subnet setting (Enable). When enabled, your instance will have public IPv4 address which is needed to connect to your instance later. If it's Disable, enable it. Click Next: Add Storage.

Next, in Add Storage page you can any additional storage volumes you need. Click Next: Add Tags.
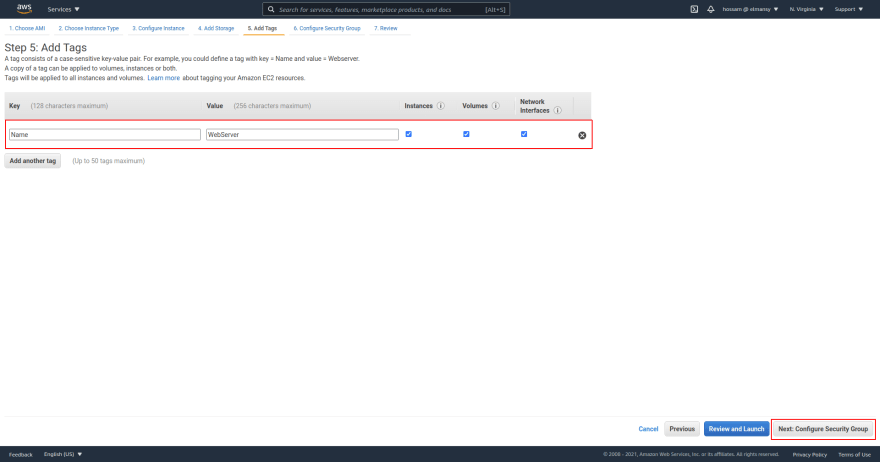
Next, in Add Tags page you can add one tag. Click Add Tag, let Key=Name and Value=WebServer. Click Next: Configure Security Group.
Next, in Configure Security Group page let's create a new security group:
- Select Create a new security group option.
- In Security group name enter WebServer-SG and for Description enter Allows SSH and HTTP.
- You'll notice that a rule with type SSH already added. Click Add Rule and for the new rule type select HTTP.
- For both rules make sure Source is set to Custom with 0.0.0.0/0 to make your instance accessible from the Internet.
This security group allows your instance to receive traffic on port 22 and 80 from any IPv4 address. You many want to restrict source to your IPv4 address, so no one can access it except you.
Click Review and Launch.

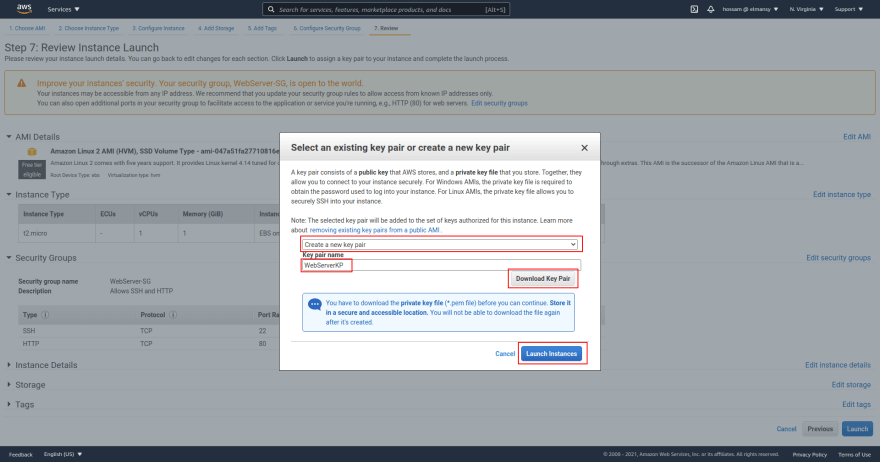
Next, in Review Instance Launch page make sure all your instance settings are correct and click Launch.
When prompted for a key pair, if you have a key pair select Choose an existing key pair. If you don't have a key pair, select Create a new key pair and name it. Let's name it WebServerKP. Click Download Key Pair to download it, then click Launch Instances.
Now your instance is launching. Click View Instances to close this page and return to the console.
On the Instances page, you can view the status of your instance launch. When you launch an instance, its initial state is Pending. After the instance starts, its state changes to Running.
Select your instance, and in the details section you can view your instance attributes like:
- Instance ID
- Instance state
- Instance type
- Public IPv4 address
- Public IPv4 DNS
- etc.

Now that our instance is running, lets connect to it. Write down your instance IPv4 address, as you will need it to connect to the instance.
Connect to your instance
There are several options to connect to the instance and it all depends on the operating system of your local computer. If your local computer operating system is Linux/macOS (like mine) you can use SSH client. If your local computer operating system is Windows you can use PuTTY.
In this tutorial I will use SSH client as I'm using Linux as my local operating system. This SSH client will be already installed by default on most Linux distributions.
First, navigate to Downloads directory where your downloaded keypair WebServerKP.pem resides:
cd ~/Downloads/
You will use this key to connect to your instance. Copy your instance Public IPv4 address and enter the following command:
ssh -i WebServerKP.pem ec2-user@54.84.177.115
You will get a response like the following:
The authenticity of host '54.84.177.115 (54.84.177.115)' can't be established.
ECDSA key fingerprint is SHA256:6mrCwTMUa+2wZwjhMC0lldEmzuYqjk2JrLMoDdeSh6c.
Are you sure you want to continue connecting (yes/no)?
Verify the fingerprint in the security alert, and enter yes.
You will receive the following error message:
Warning: Permanently added '54.84.177.115' (ECDSA) to the list of known hosts.
@@@@@@@@@@@@@@@@@@@@@@@@@@@@@@@@@@@@@@@@@@@@@@@@@@@@@@@@@@@
@         WARNING: UNPROTECTED PRIVATE KEY FILE!          @
@@@@@@@@@@@@@@@@@@@@@@@@@@@@@@@@@@@@@@@@@@@@@@@@@@@@@@@@@@@
Permissions 0664 for 'WebServerKP.pem' are too open.
It is required that your private key files are NOT accessible by others.
This private key will be ignored.
Load key "WebServerKP.pem": bad permissions
ec2-user@54.84.177.115: Permission denied (publickey,gssapi-keyex,gssapi-with-mic).
Which means that the WebServerKP.pem key can be accessed by other users which is not secure. You need to change this file permissions and make it only accessible by you. To change permissions enter the following command:
chmod 400 WebServer.pem
Now connect to your instance:
ssh -i WebServerKP.pem ec2-user@54.84.177.115
With the following response you successfully connected to your instance:
       __|  __|_  )
       _|  (     /   Amazon Linux 2 AMI
      ___|\___|___|

https://aws.amazon.com/amazon-linux-2/
[ec2-user@ip-172-31-85-146 ~]$
Clean up your instance
After you have finished with the instance, you should clean up by terminating the instance. If you forget to terminate your instance it will incur charges if you are not within the AWS Free Tier. If you want to use your instance later you can stop it and start it again later.
To terminate your instance:
- In Instances page, select your instance.
- Choose Instance state -> Terminate instance.
- When prompted click Terminate.

After your instance is terminated, it remains visible on the console for a short while until data on instance store volumes deleted, and then the entry automatically deleted.

Top comments (0)