In this article, you'll get a clear, visual explanation of how the Event Loop works — using analogies, step-by-step examples, and real code.
👉 A fully interactive Event Loop model is available at:
https://hromium.com/javascript-visualized-event-loop
Use it to explore different scenarios, test your assumptions, and truly understand how JavaScript executes code under the hood.
Let’s dive in.
The Visual Model Behind This Explanation
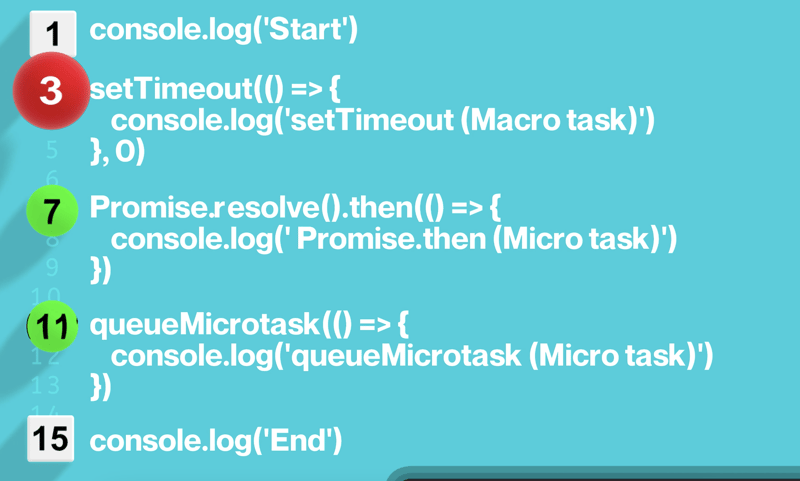
Let’s start with a basic code snippet that I’ll use to walk you through how the Event Loop works step by step:
console.log('Start');

setTimeout(() => {
    console.log('setTimeout (Macro task)');
}, 0);

Promise.resolve().then(() => {
    console.log('Promise.then (Micro task)');
});

queueMicrotask(() => {
    console.log('queueMicrotask (Micro task)');
});

console.log('End');
In this example, we have:
- Synchronous code: lines 1 and 15
- One macrotask: the
setTimeouton line 3 - Two microtasks:
Promise.thenon line 7 andqueueMicrotaskon line 11
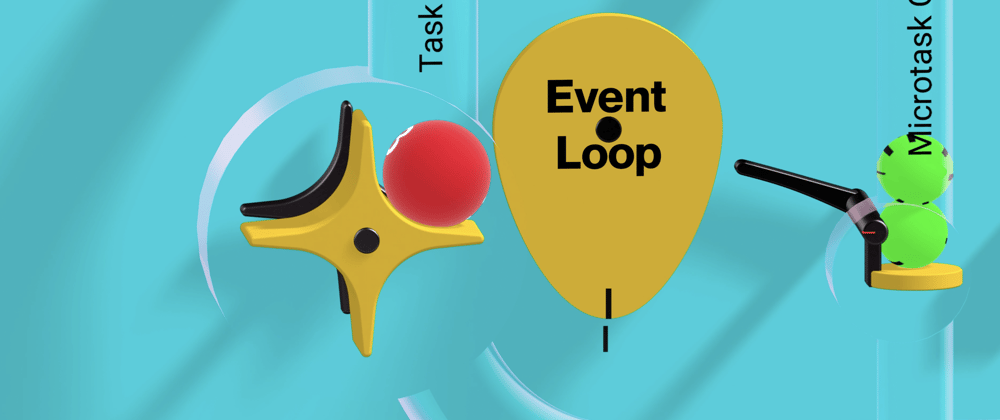
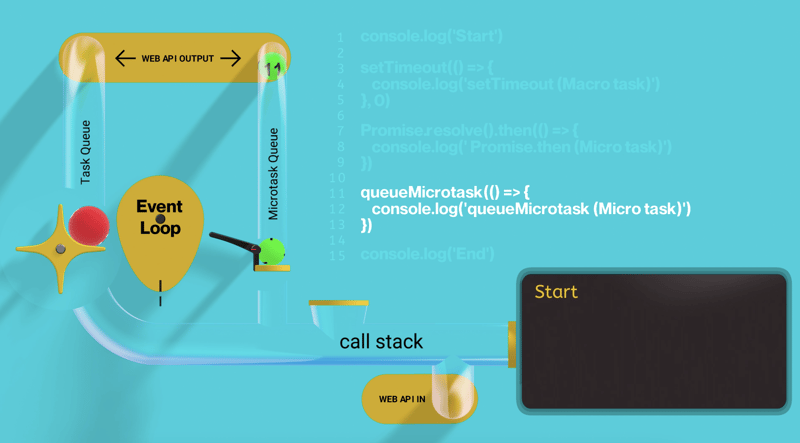
To make this process visual and intuitive, I use a simple representation:
- The macrotask is shown as a large red ball
- The microtasks are two smaller green balls
- The synchronous code appears as white cubes
This setup makes it easy to follow how tasks move through the system — from being scheduled to being executed.
The code is executed in the main thread of the program, moving from top to bottom, line by line.
Every operation is placed into the Call Stack.
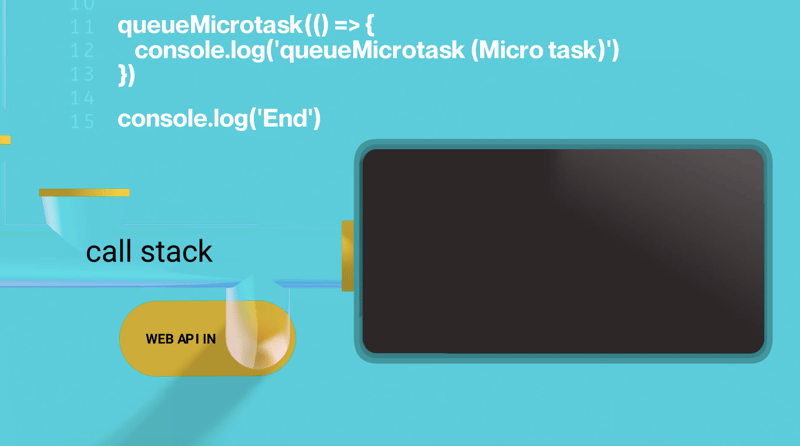
From there, tasks either get passed to the Web API for handling or immediately produce output visible to the user.
Prefer video?
If you find video content easier to follow, this explanation is also available on YouTube.
Tasks that return from the Web API after being processed are placed into separate queues:
- Microtasks go into a queue called the MicroTask Queue
- Macrotasks go into the Task Queue
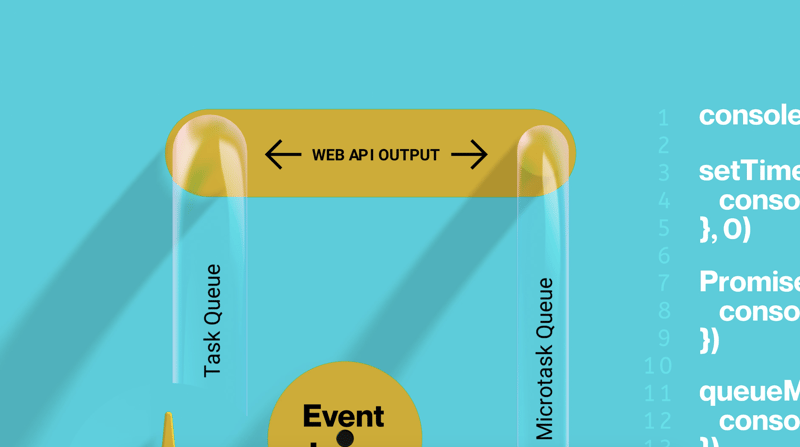
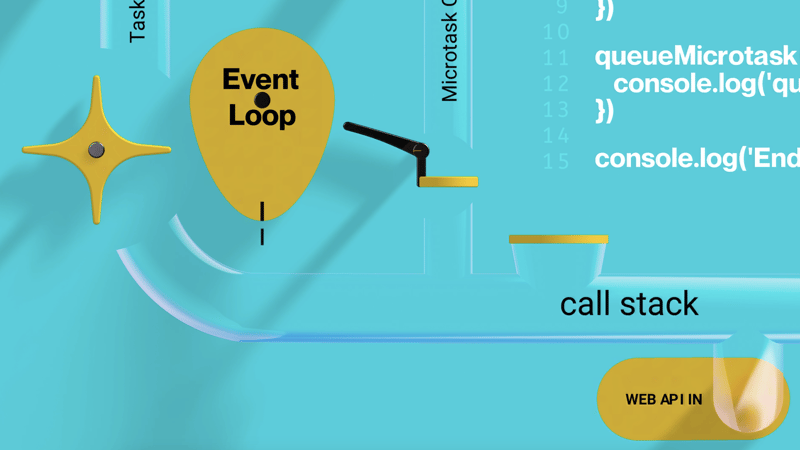
When the Call Stack becomes empty, a mechanism called the Event Loop takes over.
In the visual model, it is represented as a yellow, egg-shaped mechanism.
The Event Loop first opens the MicroTask Queue and pushes all microtasks from it into the Call Stack, one by one, until the queue is empty.
Only after all microtasks have been completed does the Event Loop turn to the Task Queue, allowing one macrotask to enter the Call Stack per cycle.
Explaining the Event Loop in Action
Now it's time to explain how the Event Loop works in JavaScript using the simple example from earlier.
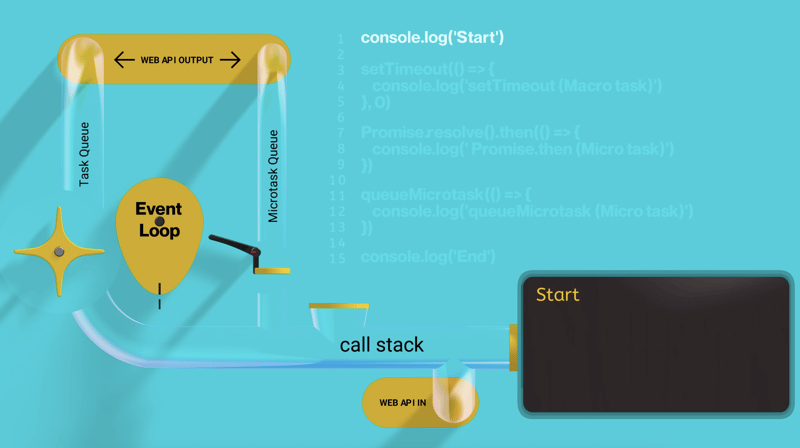
The execution begins with the synchronous code.
The console.log('Start') statement on the first line enters the Call Stack and is executed immediately.
As a result, the message Start appears on the screen.
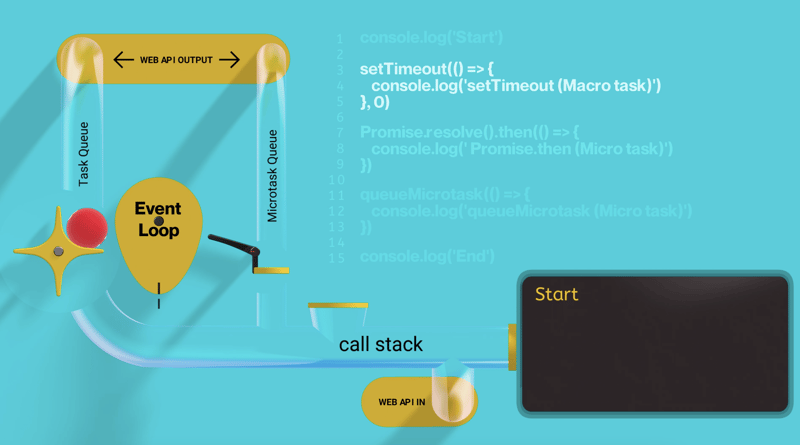
Next, the setTimeout call is encountered on line 3.

Although the delay is set to zero, this function is not executed immediately.
Instead, it is scheduled as a macrotask and sent to the Web API, which is responsible for tracking the timer duration.
Once the timer completes, the macrotask is moved to the Task Queue, where it waits to be picked up by the Event Loop.
After that, two microtasks are scheduled in sequence:
One using Promise.then, and the other using queueMicrotask.
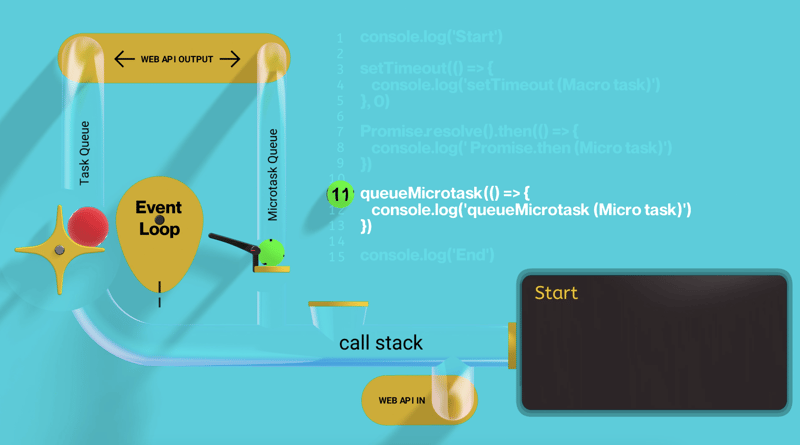
Both of these are also passed through the Web API, and once prepared, they are placed into the MicroTask Queue
After scheduling the asynchronous operations, the synchronous code continues to execute.
The final console.log('End') is run, and we see the message End appear on the screen.
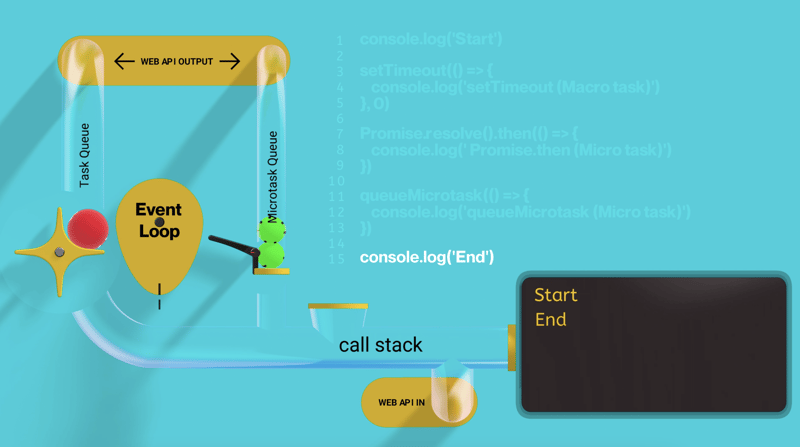
At this point, the Call Stack is empty, and it's time for the Event Loop to take over.
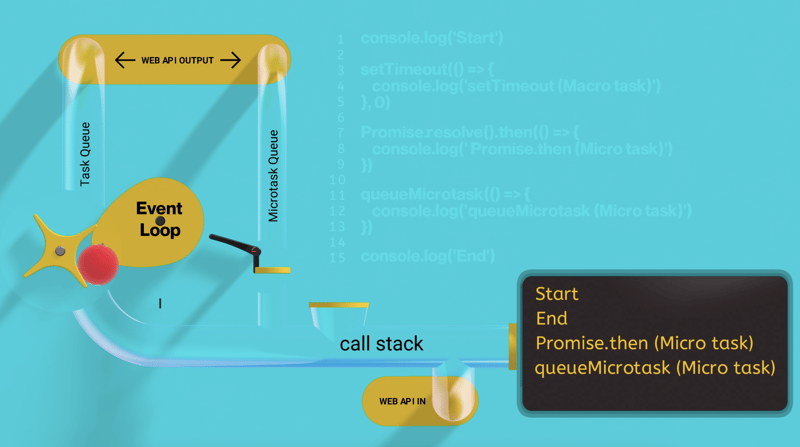
The Event Loop first processes the MicroTask Queue:
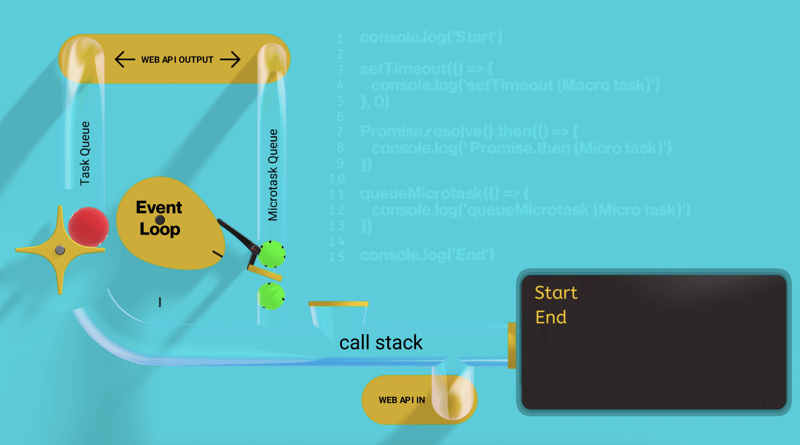
- The
Promise.thenmicrotask is executed, printingPromise.then (Micro task) - Then, the
queueMicrotaskis executed, printingqueueMicrotask (Micro task)
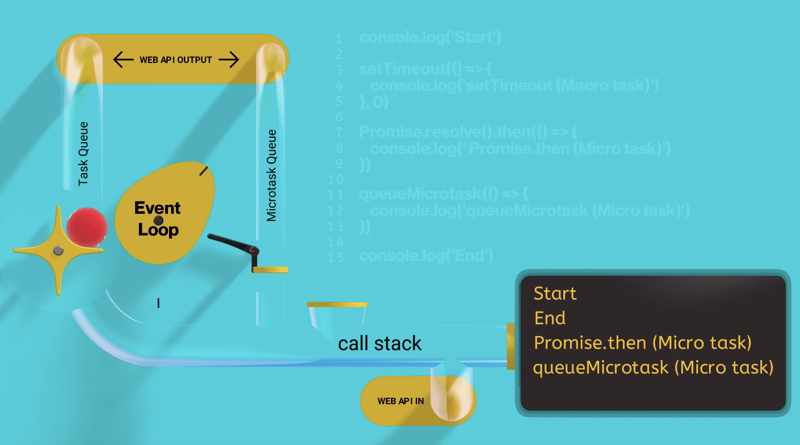
Only after all microtasks have been completed does the Event Loop move to the Task Queue.
There, the previously scheduled setTimeout macrotask is executed, printing setTimeout (Macro task).
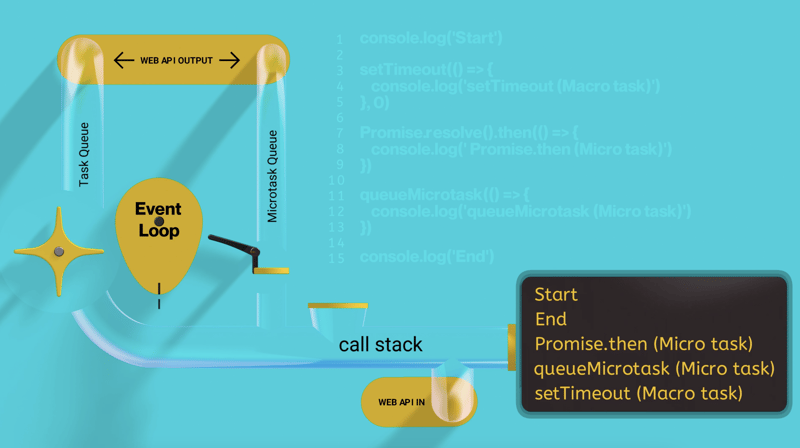
This is how the Event Loop controls the order of execution:
first synchronous code, then microtasks, and only after that, macrotasks.
Now you have a clear understanding of how the Event Loop works in JavaScript — just in case it comes up in an interview.
In the following parts of this series, I’ll be covering topics like:
- How the Web API works behind the scenes
- JavaScript memory management and the HEAP
- Specifics of the Event Loop in Node.js
- And much more — all explained in a simple and accessible way
And don’t forget: the interactive Event Loop model featured in this article is available on the website.
You can experiment with it, test different scenarios, and truly understand how JavaScript handles task execution:
https://hromium.com/javascript-visualized-event-loop

Top comments (0)