
SwiftUI made a surprisingly good first impression. Of course, things get more complicated as soon as you want to build something actually useful. Tables are a fundamental part of many macOS applications. How can we build them in SwiftUI?
Apple pushes the SwiftUI List pretty hard. It's great for iPhone GUIs. It is woefully inadequate for the desktop. Compared to the old AppKit NSTableView it is a children's toy.
You can certainly build tables out of List, using rows of HStack views. My test case was the Draft Rugby Player Stats table. Using draft-sport-swift to source the data, List gave me something approaching serviceability:
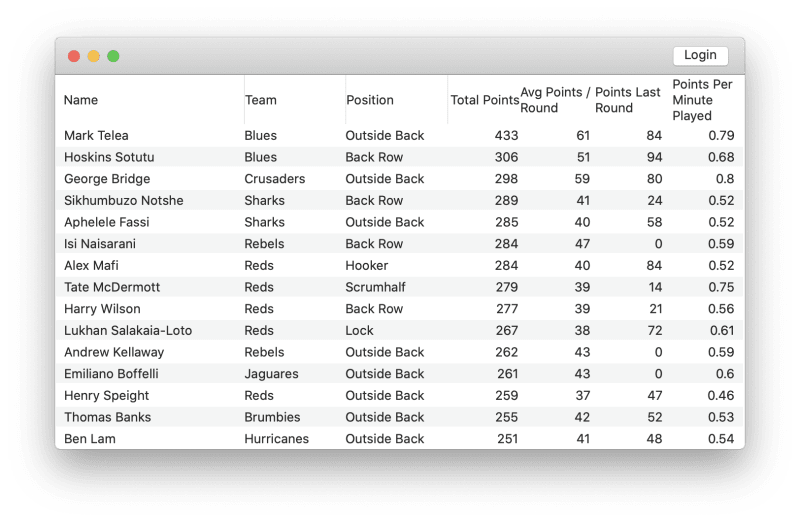
In code, it's not pretty. Lots of manual column-width calculation. Manual row banding. Manual row formulation in a dedicated row view. In the end, it involved writing lots of code to get something that approximated the aesthetic of an NSTableView, but without all the functionality that NSTableView includes.
Creating an NSTableView also involves writing lots of code. However, you get a lot of bang for your buck. Ideally, we could slap an NSTableView straight into our SwiftUI app. Fortunately, we can!
Step 1: Create NSViewController / NSTableView as normal
import Foundation
import AppKit

class PlayerNSTableView: NSTableView {
    // Define your NSTableView subclass as you would in an AppKit app
}

class class PlayerNSTableController: NSViewController {
    // Define your NSViewController subclass as you would in an AppKit app
}
Step 2: Create an NSViewControllerRepresentable wrapper
SwiftUI is all about View implementations. AppKit is all about NSViewController, NSView, the relationships between them, and a bunch of other crap. NSViewControllerRepresentable is the bridge between the AppKit and SwiftUI worlds. It is itself a View conforming protocol, and can be passed around in SwiftUI like any other View struct.
Create a struct conforming to NSViewControllerRepresentable, and add the required protocol stubs. Observe the tangled mess that results:
import Foundation
import AppKit
import SwiftUI
import DraftSport

struct PlayerNSTable: NSViewControllerRepresentable {

    @Binding var players: Array<Player>?

    typealias NSViewControllerType = PlayerNSTableController

    func makeNSViewController(
        context: NSViewControllerRepresentableContext<PlayerNSTable>
    ) -> PlayerNSTableController {
        return PlayerNSTableController()
    }

    func updateNSViewController(
        _ nsViewController: PlayerNSTableController,
        context: NSViewControllerRepresentableContext<PlayerNSTable>
    ) {

        if let players = players {
            nsViewController.refresh(players)
        }

        return

    }

}
There's a lot to unpack here. Never fear, the only bit you really need to care about is the body of makeNSViewController(). Inside the body, you will see return PlayerNSTableController(). That's the key: Initialise the NSViewController subclass you defined in Step 1.
Step 3: Manipulate the wrapped NSViewController from SwiftUI
We're obviously going to want to manipulate the AppKit table data from SwiftUI. In the above NSViewControllerRepresentable implementation, you will notice the line @Binding var players: Array<Player>?. This is a bridge passing data between the SwiftUI and AppKit worlds.
Like any other struct conforming to View, PlayerNSTable may observe changes to its properties and update the GUI in response. The magic sauce is the @Binding decorator. Now, when .players is changed, the .updateNSViewController() method of our NSViewControllerRepresentable is called.
Inside .updateNSViewController() we can do whatever we like. I happen to expose a .refresh(:Array<Player>) method on my PlayerNSTableController, which ultimately calls .reloadData() on the underlying NSTableView. It's up to you how you want to feed new data into your NSViewController / NSTableView pair.
Step 4: Add your wrapped AppKit view to a SwiftUI view
You can now add your NSViewControllerRepresentable implementation to any SwiftUI View. Here's my implementation, PlayerNSTable, being added to an enclosing View:
import SwiftUI
import DraftSport

struct PlayerTable: View {

    @State var players: Array<Player>? = nil

    var body: some View {
        PlayerNSTable(
            players: self.$players
        )
            .frame(alignment: .topLeading)
            .onAppear(perform: retrievePlayers)
    }

    func retrievePlayers() -> Void {
        self.players = nil
        Player.retrieveMany(
            season: Season(publicId: "2020")
        ) { (error, players) in
            guard let players = players else {
                fatalError("No players")
            }
            self.players = players
        }
    }
}
Note that when PlayerNSTable appears, Player data are retrieved via the retrievePlayers() method. As with any other SwiftUI View, changes to @State decorated properties are observed. When Player.retrieveMany() executes its callback closure, the .players property is updated. This update ultimately triggers the updateNSViewController() method we discussed in Step 2.
The end result:
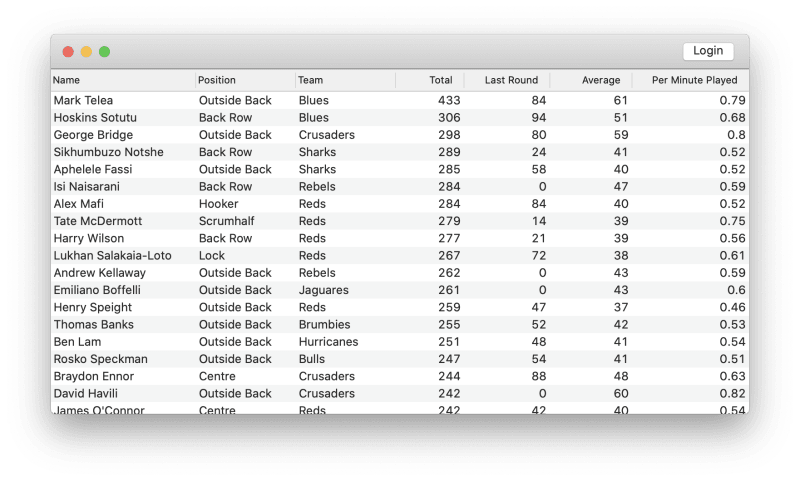
A fully functional NSTableView inside a SwiftUI View hierarchy. Phew! That was intense. If you have any questions, find me @hugh_jeremy on Twitter.

Top comments (11)
I received a follow up question, asking how I added the unified
NSToolbarvisible in the app screenshot. Walkthrough here: dev.to/hugh_jeremy/adding-a-unifie...I wanted to understand how .refresh() method works? Do you need to add the functionality in the class PlayerNSTableController: NSViewController {} or is this an automatic thing?
Also maybe this is irrelevant but if i want to do the same in ios app, i can use table view from uikit. My main worry is how i can make additional functionality on the table for example if i want to highlight one of the rows in the table. How can i accomplish that in swiftui interfacing to appkit or uikit. Do you know?
Hi Hassan! I've never done any work in UIKit, so I can't speak for how similar the UIKit TableView is to the AppKit NSTableView. My impression is that generally UIKit and AppKit classes have only superficial similarities.
As for additional functionality - Honestly, I've found that NSTableView is great for simple tables, but can get fiddly if you try to skew it too far beyond Apple's vision for what constitutes a "table". The key is to use NSView as the basis for your cell views - Get comfortable with drawing custom NSViews, rather than trying to tweak something like an NSButton to suit what you're trying to do.
Overall, I would say the best option is to ditch AppKit and UIKit and work with SwiftUI. It's far easier to create fully custom tables as SwiftUI views, in my opinion. Here's some first impressions I had of SwiftUI: dev.to/hugh_jeremy/swiftui-first-i...
Thanks for the tutorial - but is it really far easier to create a fully custom table view in SwiftUI? How do you handle the column auto sizing and ability to manually resize them?
Hi, thanks for this tutorial about NSTableView in SwiftUI. Would it be possible for you to upload your project that does this successfully? I keep running into errors and crashes on initializing from NSViewControllerRepresentable and makeNSViewController. I am currently getting this when returning from makeNSViewController:
-[NSNib _initWithNibNamed:bundle:options:] could not load the nibName: EntityNSTableViewController in bundle (null).
followed by a EXC_BAD_ACCESS crash when the window is brought to the front.
Hi Mark, sorry for my slow reply! I have been doing some more work with
NSTableViewin SwiftUI recently, so it's possible I could smash something together to upload... I have a few macOS apps in the pipe that I might be able to open source. I'll try to do so soon!I'd also love an example project! I'm learning to build a MacOS app and it's tough to learn aspects of NSTableView concurrently with SwiftUI concepts...
Yeah NSTableView definitely requires a totally different mindset than SwiftUI. I'd recommend building some stuff in AppKit to get used to the "old" way of doing things. It's so common to need to drop back down into AppKit, and NSViewRepresentable becomes very important. Another example is AuthenticationServices - To add a "Sign in with Apple" button you're back in AppKit land writing @objc interface implementations!
This tutorial is a hoax. Even the class
PlayerNSTableViewfound nowhere in anywhere else.Thanks for the write up.
These tips allow us with good existing code to upgrade to the modern world of swift ui.
Hello,
I work with SwiftUI 2 (and I am a beginner) and I don't know how to add the module DraftSport and I don't know what DraftSport is...