
Move fast and break things. Unless you are breaking stuff, you are not moving fast enough. - Mark Zuckerberg
Hope you all doing well, by the end of this post you will have complete knowledge to start with git and also familiar on it,
⚡ Git
It is a version control tool in short this maintains your code history, you can take a real time scenario , Browser is a tool which stores your Browsing history
Git Bash
- we are going to use Git Bash which is a terminal, while installing git enable linux commands to get the full features.
keep reading and you will know everything you need to know...
Folder creation
Create a Newfolder give it a name as you like and open in Git Bash or you can go with Command propmt,

your bash will look something like this

If you are in command prompt make sure your are working in right directory.
Initialize git repository
Initialize git in this folder git init, it will create a empty repository in your local device

File creation
Create a new file and open it with vscode ,it is my opinion you can also do it with atom, sublime, it's completely up to you, you will see master, It is a branch no need to worry about this now, I will explain in a while,
To create a file in command prompt use echo >fileName

It will look similar to this,

Make some changes in the file and don't forget to save it

Clean terminal
sometimes we are the situation to make our bash looks clean, type clear and hit enter. For command prompt use cls and give enter

Check status of commit
To check the status of our commits ,the info of file use git status it will show you the file which is tracked or untracked,
tracked denotes our file is staged and untracked denotes the file is not yet staged, Obviously we didn't commit anything so no commits will appear.

Eye and vision
Now the real part begins, to make our changes as a history there are two steps:
staging the change
commit the change
Stage
To bring our changes to the staging area use git add ., you can replace period simple . with your file name to be staged, generally the period simple includes all the changes in to staging area

Commit
To commit the changes of the staged file use git commit -m "your commit message" and it will show the number of changes and type of changes that are insertion or deletion to the file

This is similar to photo taking scenario in marriage reception, the people who want to take photo should come to stage , after taking photo it will save in the marriage album, changes we need to save as history should be staged first and then commit .
Again we check our status it show you working tree clean ,

Create another file and make changes check the status

stage the changes

Dump area
Type git stash, check the status of your commits again , it shows nothing to commit working tree clean,

Take a realtime scenario, if you are working on some kind of logical code in project and you commit the changes that might have issues, so you decide not to lose the changes but also keep it for future purpose.
We usegit stash, stash is a hidden place where we can store our commits until it really needs.
Incase now you need the commits from stash area now, we need to bring it in staging area again using git stash pop
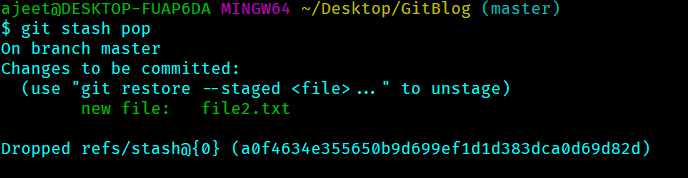
Now we can commit those changes and check status of our commits if you want,

To see all the commits which are recorded as history use git log

so far you are doing great !!!
Host on Github
To add our local folder or a local repository to Github, there are two steps
1.Create a Repository
2.Add local repo to github
Github
To create a new repository on github, repository(repo) is simply a storage area of all our file along with the commits respectively.
Create Repository
For creating a repo you should have an account in github, so signUp and then follow along with me, if you already have an account login to your account , go to repository click new.

Give a name for your repo and click Create repository

and now your screen will appear like this, github show you the steps here we need last two steps , because already we did up to commit,

Add local repo to github
Need to copy HTTPS or SSH link and work on it, word remote denotes you are working with URL, origin is basically your github account.

To push the changes that we made in our local repo to github main repo

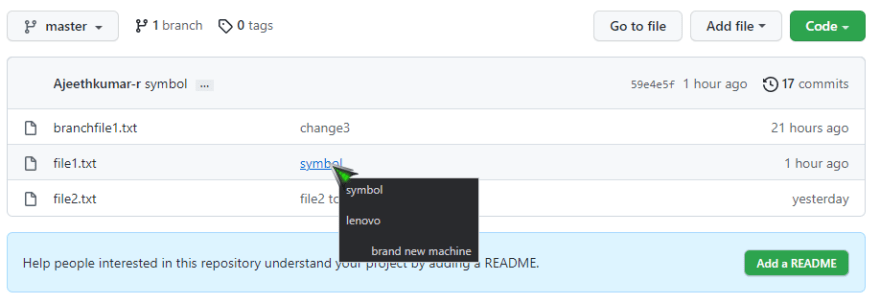
Now go to github tab and refresh the browser and the magic happens, you are able to see the changes that we made in our local repo in main repo

Restore commits
Change something in file1 or file2 and stage the change , now if we want to restore changes we made stage it and check status
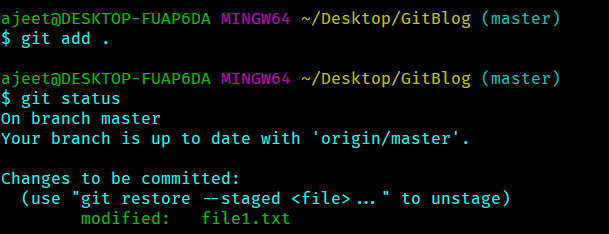
and now use git restore --staged fileName , leave --staged flag to restore local changes too and check status

Remove file
To remove the file from working tree use git rm --cached fileNameand check status

Tip
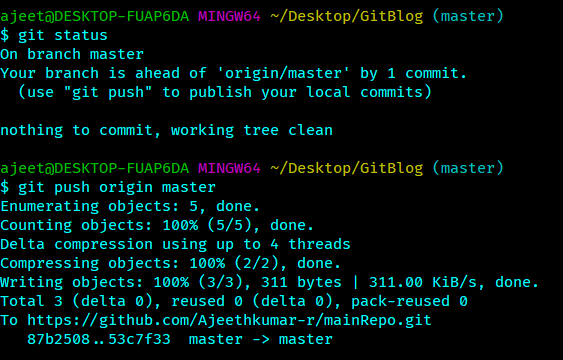
Stage the file, commit it and check status, it shows your branch is ahead of origin/master by 1 commit and inform us to push local commits, whenever these kind of situation happens do as your command line said. I know that's a lot, move forward you need few more concepts to complete.
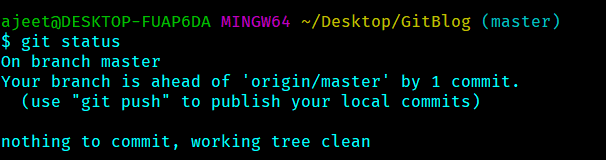
As the status shows we need to push the changes and check status
Hosting on github
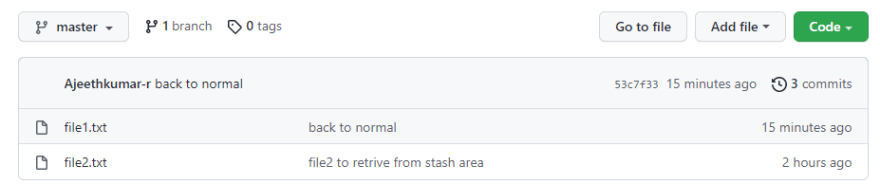
Go to your browser and refresh, you will be amazed, give an applause to yourself. Note the commit back to normal that is pushed from our local branch.
Create another file make some changes, stage that and commit

Commit records
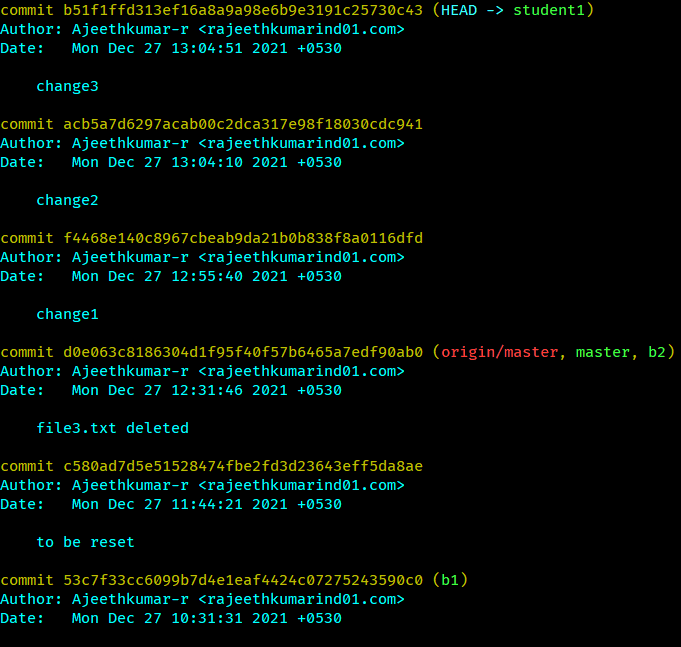
See all the commit messages using git log.

Structure of Commit messages:
Commit messages are align on top of one another, To delete commit messages you need to pick the commitID and paste in git reset commitID, this will delete all the commits above the one which you pick.
Commit messages are like a bread slices

I want this to be clean and understandable , for that delete file3.txt in my case , you may leave it.

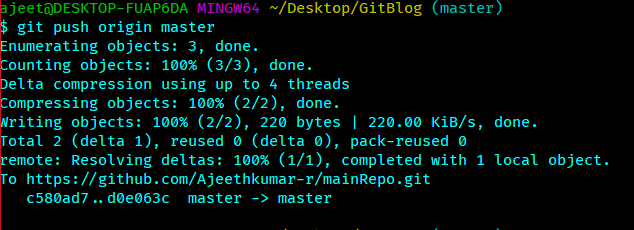
To push our changes to github main repo git push origin master
Pointer
It's time to know HEAD, this is simply a pointer which points to the active branch , you will understand more in a bit.
Branch
Now we are going to work on branches, to create a branch use git branch branchName and checkout this branch by git checkout branchName, after checking out the HEAD is now point to the new branchName, here after the commits we will made is from branchName
Create new branch , checkout then create a file and change something ,stage it and commit

Make some more commits may be two is good to go and git log now
we need to push our change in local branch to github

Newbie-our branch will be on github
Now your github screen automatically shows you Compare & pull request , click on that

Now click on create pull request it will show you

Merge conflict
Here if there is no conflict on your change can simply click on Merge pull request, conflict is popularly known as merge conflict , assume that two persons working on same change and commit it, github doesn't know which change to take in this case we manually make the change on github and then we are allowed
merge pull request

I know we are doing tons of things but it's worth .
Now click confirm merge, there you can delete the branch if it is no longer needed

Go to your code now and refresh the page you can see there will second branch and the file along with it's commit

Hope you feel confidence on yourself .
Rebase- new base
There is a little more to do , for that need some changes in master branch may be three commits are good to go , now git log, In sometimes we need to reduce number of commits as one commit, assume that you are working in login form of your project you will commit each changes and push it, those commits are points to single work so we squash all three to one commit, here we use git rebase, before that we need to pick the commit id , this has same hierarchy as git reset

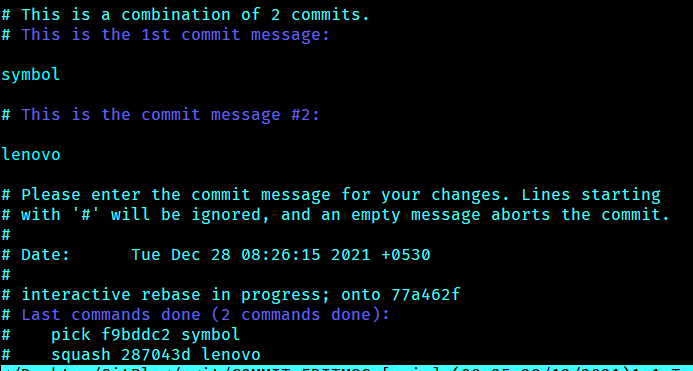
use this command git rebase -i CommitID, i is interactive most of the time we need -i flag, give enter this will show you like this

Squash
you can see that Pick and s ,we don't need to change the first pick it remains same, now if we want to squash the commit we change it to s, at least the commits should have one pick ,the s commits combine with the nearest pick commit , it doesn't matter how many commits to be squashed , you should have one pick which will be above s commit . To know more you can refer , to type in this click i.


By default Vim is the text editor for git, this below lines will help the non vim users,
to escape from vim editor click ESC, colon : and x after that you have screen like this
remove the # which is used to comment the line then type you commit message, after that click ESC , : and x to exit edit mode

we finished rebasing now time to push it to github

here is the Squashed commit

Go to github now you can see the change in commit message
-
git push-push the changes along with commit messages. -
git fetch-fetch the recent commit messages. -
git pull-pull the code with commit messages, it internally operate git fetch .
To know more you can refer git atlassian
Learning never fulfilled untill you practice on your own and share it with other people .
Alright now you can add git skill in profile and be happy for what you have done by reading this post.

Latest comments (1)