
Showing a select box with lot of entries needs some intuition most of the time. User may be lost within the myriad of entries, which could have underlying logical grouping; and it is hard to show these in a plain select box. There are two possible solutions to this:
1. Use two select boxes:
In this solution, first select box provides the logical grouping and populate a secondary select box based on the first select box value. This has several downsides anyway:
- If the entries are stored in a single table in the back end, need to implement complex event handling for select box changes to support update operation in front end. Yes, I know you could ask for the back end developer to maintain two tables: but this introduces additional relationship in database tables and change of existing code (may be in lot of areas). Also consider what if the grouping is just an enumeration in the back end?
- If the form is directly generated from the back end using template tags, there is little control on how the select boxes are rendered (usually a plain select box without any grouping). To make this worse, think of the template logic you need for the grouping.
- Back end may be a REST API where you only get all entries in a single response and no sorting/grouping is done.
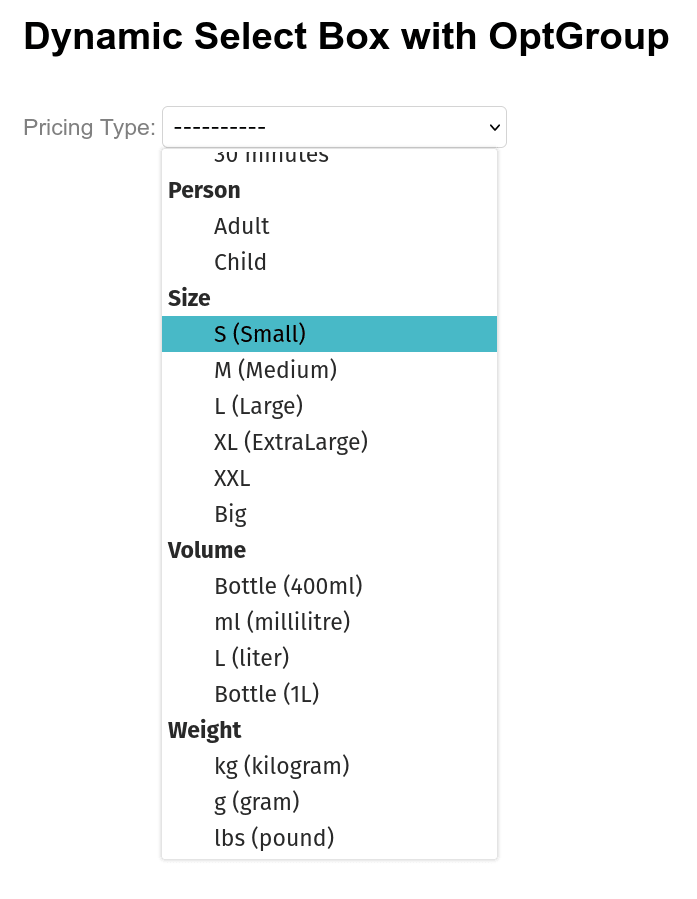
2. Use optgroup for logical grouping:
This is the preferred way of handling our problem within the front end code.
Note: Even if back end does not provide a REST API, it could inject an additional attribute to option tag (logical group) using template tags.
Here, I specifically skip data acquisition part, since this article focus on displaying data. I also assume that data come from a REST API which are widely available nowadays. However, I will not implement real AJAX calls to request data from the back end, but simulate such behavior to make the code more useful to be used in real world scenarios.
Let's do it!
I'll start with a simple HTML template (index.html) linking the CSS (styles.css) and JavaScript (main.js) files. Using CSS styling entirely optional for this practice: I use it to avoid browser's default styling which may be boring to look at.
<!DOCTYPE html>
<html>
<head>
    <meta charset="utf-8">
    <meta name="viewport" content="width=device-width,
        initial-scale=1">
    <title>Dyamic Select Box with OptGroup</title>
    <link rel="stylesheet" type="text/css" href="styles.css">
</head>
<body>
    <div id="content">
        <h1>Dynamic Select Box with OptGroup</h1>
        <br>

        <label for="pricingtype">Pricing Type:</label>
        <select id="pricingtype" name="pricingtype"></select>
    </div>

    <script type="text/javascript" src="main.js"></script>
</body>
</html>
In the index.html create a select box with the id value pricingtype.
Now let's add some CSS to make it look nicer.
body {
    margin: 0;
    font-family: arial;
}

#content {
    width: 60%;
    margin: 0 auto;
}

label {
    font-size: 1.2em;
    color: gray;
}

select {
    width: 30%;
    background-color: white;
    padding: 5px;
    border: 1px solid lightgray;
    border-radius: 5px;
    font-size: 1.2em;
}
Below is the preview of data we use to populate the select box. (JSON is the widely used format to receive data from a web based API. Converting it to a JavaScript object array resemble the following structure.)
const pricingTypes = [
        { id: 1, name: "Bottle (400ml)", category: "VOLUME" },
        { id: 2, name: "Dish", category: "COUNT" },
        { id: 3, name: "Plate", category: "COUNT" },
        { id: 4, name: "Piece", category: "COUNT" },
        { id: 12, name: "Day", category: "DURATION" },
        { id: 16, name: "kg (kilogram)", category: "WEIGHT" },
        { id: 13, name: "hr (Hour)", category: "DURATION" },
        { id: 14, name: "15 minutes", category: "DURATION" },
        { id: 15, name: "30 minutes", category: "DURATION" },
        { id: 19, name: "S (Small)", category: "SIZE" },
        { id: 20, name: "M (Medium)", category: "SIZE" },
        { id: 21, name: "L (Large)", category: "SIZE" },
        { id: 22, name: "XL (Extra Large)", category: "SIZE" },
        { id: 23, name: "XXL", category: "SIZE" },
        { id: 24, name: "Big",category: "SIZE" },
        { id: 17, name: "g (gram)", category: "WEIGHT" },
        { id: 18, name: "lbs (pound)", category: "WEIGHT" },
        { id: 25, name: "ml (milliliter)", category: "VOLUME" },
        { id: 26, name: "L (liter)", category: "VOLUME" },
        { id: 28, name: "Adult", category: "PERSON" },
        { id: 29, name: "Child", category: "PERSON" },
        { id: 5, name: "Item", category: "COUNT" },
        { id: 6, name: "Nos", category: "COUNT" },
        { id: 8, name: "Unit", category: "COUNT" },
        { id: 9, name: "Set", category: "COUNT" },
        { id: 27, name: "Bottle (1L)", category: "VOLUME" },
        { id: 10, name: "Dozen", category: "COUNT" },
        { id: 30, name: "km (kilometer)", category: "DISTANCE" },
        { id: 31, name: "mile", category: "DISTANCE"},
        { id: 11, name: "Each", category: "COUNT"}
    ]
Here, object id is the unique identifier of the entry sent by the back end. See how each entry belongs to a different category and does not maintain any sort order.
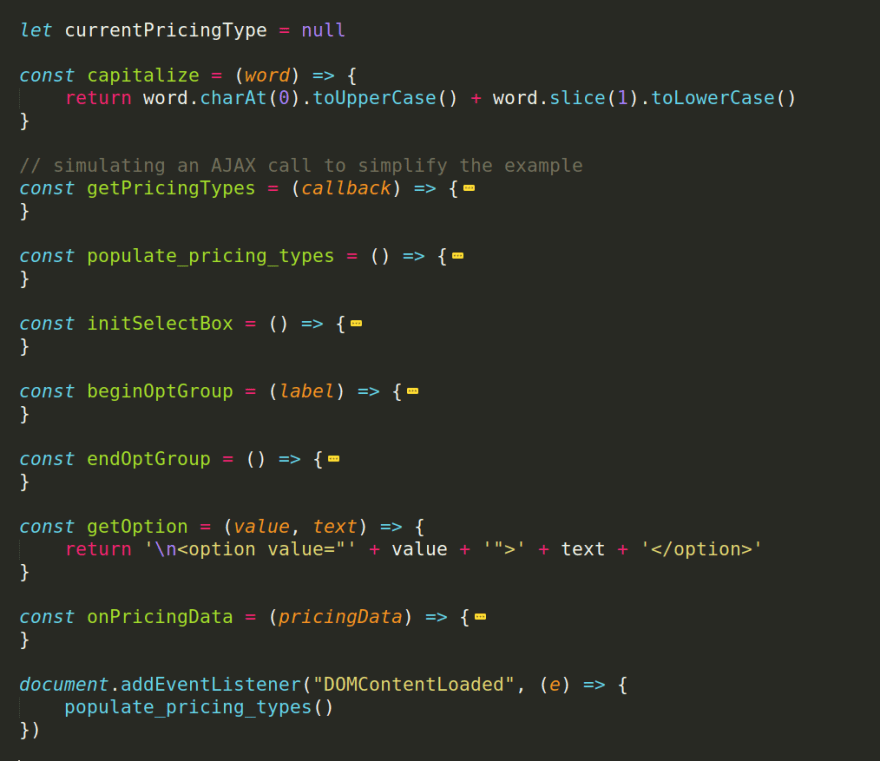
I'll start with writing a small helper function in main.js which will capitalize the first letter of a word. (I could not find such function in vanilla JS.)
Note: Through the entire example, I avoided using any third party JavaScript libraries since it may be difficult to follow up for a developer who haven't use the library. Also, I will use arrow function syntax (() => {}) to write compact code.
const capitalize = (word) => {
    return word.charAt(0).toUpperCase() + word.slice(1).toLowerCase()
}
To support any updates for existing data (in a CRUD operation) a global variable is used to store the initial value of the select box (at page load). It's safe to use a global variable here, since its value assigned only once and not updated anywhere else.
let currentPricingType = null
We need to do a function call to populate the select box if the page has been loaded. Therefore, I use DOMContentLoaded event to trigger the function call.
document.addEventListener("DOMContentLoaded", (e) => {
    populate_pricing_types()
})
The populate_pricing_types function will read the current value of the select box and store it in the global variable. Then, it make an AJAX call by providing a callback function to be invoked when data is ready.
const populate_pricing_types = () => {
    // read current value to keep track of existing data
    // a global variable used since not updated elsewhere
    currentPricingType = document.getElementById('pricingtype').value
    getPricingTypes(onPricingData) // could be an AJAX call
}
Let's look at what's happening within getPricingTypes.
// simulating an AJAX call to simplify the example
const getPricingTypes = (callback) => {
    const pricingTypes = [
        // content is omitted for brevity, look at above sample data
    ]

    callback(pricingTypes)
}
Before going through onPricingData callback function, let me introduce some helper functions that generate strings with HTML tags.
const initSelectBox = () => {
    // clear select box
    document.getElementById('pricingtype').options.length = 0

    // select none if no current price type
    return '<option value=""' + (currentPricingType ? '': 'selected') +
        '>----------</option>'
}

const beginOptGroup = (label) => {
    // add \n to view nicely in source code
    return '\n<optgroup label="' + capitalize(label) + '">'
}

const endOptGroup = () => {
    // add \n to view nicely in source code
    return '\n</optgroup>'
}

const getOption = (value, text) => {
    return '\n<option value="' + value + '">' + text + '</option>'
}
Functions beginOptGroup, endOptGroup and getOption are self explanatory. The initSelectBox clears the select box entirely and check if there was a value at page load. It sets empty option's selected attribute, if no value was there initially.
Now the hard part of populating the select box. Let's examine the onPricingData (callback) function.
const onPricingData = (pricingData) => {
    pricingData.sort((entry1, entry2) => {
        // do a comparison with locale to avoid any encoding issues
        return entry1.category.localeCompare(entry2.category)
    })

    let options = initSelectBox()
    let prevOptGroup = ''
    let hasPrevOptGroup = false

    pricingData.forEach((ele) => {
        if (ele.category != prevOptGroup) { // switching the optgroup
            if (hasPrevOptGroup) {
                options += endOptGroup()
            }

            options += beginOptGroup(ele.category)
            prevOptGroup = ele.category
            hasPrevOptGroup = true
        }

        options += getOption(ele.id, ele.name) // add option
    })

    // second check to end the last optgroup if any
    if (hasPrevOptGroup) {
        options += endOptGroup()
    }

    document.getElementById('pricingtype').innerHTML = options
    document.getElementById('pricingtype').value = currentPricingType
}
Since the returned data is not sorted by category which is essential for grouping, I will sort them by category.
Then the select box will be initialized and start iterating through the sorted array. It checks current category with previous one (prevOptGroup) and make a new optgroup if necessary. The hasPrevOptGroup variable keeps track on if there any previous optgroup element that need to be closed. Within the optgroup, code will populate any option belongs that category.
After iteration, again check if there was any optgroup which needs to closed and set the select box HTML content with the generated string. Finally, set the initially selected value.
Here is the entire arrangement of complete code and the final output.

Oldest comments (0)