Spring Boot is the most used Java framework to create REST API and microservices. It can be used to deploy web or executable web or desktop self-contained apps, where the application and another dependencies are packaged toghether. Springboot allows you do to a lot of functions, see:

Note: to learn about SpringBoot see official site - https://spring.io/quickstart
To create an web api application, with one or more microservices can you use Spring IDE for Eclipse or VSCode and use a wizard to config the technologies above that will be used into your app, see:

You select the technologies and create the project. All technologies will be imported using maven. This is like a visual zpm.
The project created has a class to up the application with all you need inside it (web and application server, and all dependencies, microservice concept).
The complete source code to this project is in the the open exchange project: https://openexchange.intersystems.com/package/springboot-iris-crud.
The first thing to do is config IRIS JDBC Driver and IRIS Hibernate support, to do this, copy the jar files to the resources folder, see:

Open the pom.xml to configure the dependencies to these jar files, see:
<dependency>
            <groupId>com.intersystems</groupId>
            <artifactId>intersystems-jdbc</artifactId>
            <version>3.2.0</version>
            <scope>system</scope>
            <systemPath>${project.basedir}/src/main/resources/intersystems-jdbc-3.2.0.jar</systemPath>
        </dependency>

        <dependency>
            <groupId>org.hibernate</groupId>
            <artifactId>hibernate-iris</artifactId>
            <version>1.0.0</version>
            <scope>system</scope>
            <systemPath>${project.basedir}/src/main/resources/hibernate-iris-1.0.0.jar</systemPath>
        </dependency>
Now you can config your connection with IRIS database into application.properties, see:
spring.datasource.username=_SYSTEM
spring.datasource.url=jdbc:IRIS://iris:1972/USER
spring.datasource.password=SYS
spring.jpa.properties.hibernate.default_schema=dc_Sample
#spring.jpa.hibernate.ddl-auto=update
spring.datasource.driver-class-name=com.intersystems.jdbc.IRISDriver
spring.jpa.properties.hibernate.temp.use_jdbc_metadata_defaults = false
spring.jpa.database-platform=org.hibernate.dialect.InterSystemsIRISDialect
spring.datasource.sql-script-encoding=utf-8
server.tomcat.relaxed-query-chars=|,{,},[,]
spring.jpa.show-sql=false
spring.jpa.properties.hibernate.format_sql=true
Next step in create a Persistent Java Class mapping to a IRIS table, see:
package community.intersystems.springboot.app.model;

import java.io.Serializable;
import java.util.Date;

import javax.persistence.Column;
import javax.persistence.Entity;
import javax.persistence.GeneratedValue;
import javax.persistence.GenerationType;
import javax.persistence.Id;
import javax.persistence.Table;
import javax.persistence.Temporal;
import javax.persistence.TemporalType;

import com.fasterxml.jackson.annotation.JsonFormat;

@Entity
@Table(name = "Product")
public class Product implements Serializable {

    private static final long serialVersionUID = 1L;

    @id
    @GeneratedValue (strategy = GenerationType.IDENTITY)
    private Long id;

    private String name;

    private String description;

    private Double height;

    private Double width;

    private Double weight;

    @Column(name="releasedate")
    @temporal(TemporalType.DATE)
    @JsonFormat(pattern = "dd/MM/yyyy")
    private Date releaseDate;

    public Long getId() {
        return id;
    }

    public void setId(Long id) {
        this.id = id;
    }

    public String getName() {
        return name;
    }

    public void setName(String name) {
        this.name = name;
    }

    public String getDescription() {
        return description;
    }

    public void setDescription(String description) {
        this.description = description;
    }

    public Double getHeight() {
        return height;
    }

    public void setHeight(Double height) {
        this.height = height;
    }

    public Double getWidth() {
        return width;
    }

    public void setWidth(Double width) {
        this.width = width;
    }

    public Double getWeight() {
        return weight;
    }

    public void setWeight(Double weight) {
        this.weight = weight;
    }

    public Date getReleaseDate() {
        return releaseDate;
    }

    public void setReleaseDate(Date releaseDate) {
        this.releaseDate = releaseDate;
    }

}
Last step is create a Repository interface to expose your persistent class as a REST service (in the HATEOAS pattern), with crud operations, you don't need write this only:
package community.intersystems.springboot.app.repository;
import org.springframework.data.jpa.repository.JpaRepository;

import community.intersystems.springboot.app.model.Product;

public interface ProductRepository extends JpaRepository<Product, Long> {

}
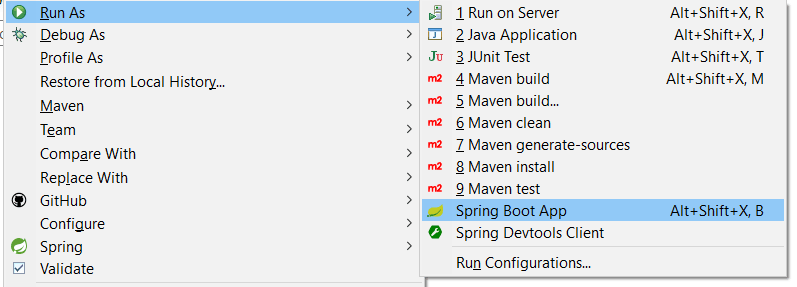
Now, you run your app as a Spring Boot app:
Wait to the internal server up and open localhost:8080. Spring boot will open a API REST HAL Browser to you. See this image record:

See more details in my app sample. I package all together in a Docker project with 2 services: IRIS and SpringBoot.
The HATEOAS pattern is very nice pattern to the api urls, path and navigation, see more details in: https://en.wikipedia.org/wiki/HATEOAS
Enjoy!

Top comments (0)