CONFIGURE APP FOR PRODUCTION
Congratulations! You have successfully developed your MEVN CRUD application, but we need to do some configuration to run it in a production environment.
First, go to your vite.config.js file in your client folder and add the following to defineConfig method:
build: {
    // generate manifest.json in outDir
    manifest: true,
    rollupOptions: {
      // overwrite default .html entry
      input: './src/main.js',
    },
  },
This instructs Vite to generate a Manifest file when building our frontend, with src/main.js serving as the entry point.
We must now update our index.html.ejs to allow us to switch rendering between development and production. ejs template engine makes this task easy to accomplish; it allows us to embed executable Javascript code in our HTML file.
Go to your index.html.ejs file in your views folder and replace the content with the following:
<!DOCTYPE html>
<html lang="en">

<head>
  <meta charset="UTF-8" />
  <link rel="icon" href="/favicon.ico" />
  <meta name="viewport" content="width=device-width, initial-scale=1.0" />
  <title>Vite + MEVN</title>
  <% if (environment==='production' ) { %>
    <link rel="stylesheet" href="<%= manifest['src/main.css'].file %>" />
    <% } %>
</head>

<body>
  <div id="app"></div>

  <% if (environment==='production' ) { %>
    <script type="module" src="<%= manifest['src/main.js'].file %>"></script>
    <% } else { %>
      <script type="module" src="http://localhost:5173/@vite"></script>
      <script type="module" src="http://localhost:5173/src/main.js"></script>
      <% } %>
</body>

</html>
Some JavaScript conditions have been added between <% %> tags that ejs must execute to decide which stylesheets and scripts to execute.
Head over to your server folder and replace the contents of homeRouter.jsfile with the following:
//homeRouter.js
import express from "express";
import path from "path";
import { fileURLToPath } from "url";
import fs from "fs/promises";

const router = express.Router();
const __filename = fileURLToPath(import.meta.url);

const __dirname = path.dirname(__filename);

const environment = process.env.NODE_ENV;

router.get("/*", async (_req, res) => {
  const data = {
    environment,
    manifest: await parseManifest(),
  };

  res.render(
    path.join(__dirname, "../../client/views", "index.html.ejs"),
    data
  );
});

const parseManifest = async () => {
  if (environment !== "production") return {};

  const manifestPath = path.join(
    __dirname,
    "../../client",
    "dist",
    "manifest.json"
  );
  const manifestFile = await fs.readFile(manifestPath);

  return JSON.parse(manifestFile);
};

export default router;
A new path has been created for our home page router to render from the manifest file in production environment.
If you did the optional section in Part 2, you must create a file path for your production assets so they can load in a production environment.
Add the following to your index.js file:
// index.js
---
const distPath = path.join(path.resolve(), "../client/dist"); // production assets file path

---

// Create route
// Assets path based on the environment running
if (process.env.NODE_ENV === "production") {
  app.use("/", express.static(distPath));
} else {
  app.use("/", express.static(publicPath));
  app.use("/src", assetsRouter);
}
---
Your final index.js file should look like this:
// index.js
import express from "express";
import mongoose from "mongoose";
import cors from "cors";
import bodyParser from "body-parser";
import dotenv from "dotenv";
import path from "path";
import TodoListRoutes from "./routes/api/TodoList.js";
import homeRouter from "./routes/homeRouter.js"
import assetsRouter from "./routes/assestsRouter.js";

const app = express();
const publicPath = path.join(path.resolve(), "../client/public"); // public assets file path
const distPath = path.join(path.resolve(), "../client/dist"); // production assets file path

dotenv.config();

app.use(cors()); // to allow cross origin requests
app.use(bodyParser.json()); // to convert the request into JSON
app.use(bodyParser.urlencoded({ extended: true })); // for parsing application/xwww-

// Connect to database
mongoose
  .connect(process.env.MONGO_URI, {
    useNewUrlParser: true,
    useUnifiedTopology: true,
  })
  .then(() => console.log("MongoDB database Connected..."))
  .catch((err) => console.log(err));


// Create route
// Assets path based on the environment running
if (process.env.NODE_ENV === "production") {
  app.use("/", express.static(distPath));
} else {
  app.use("/", express.static(publicPath));
  app.use("/src", assetsRouter);
}
app.use("/api/todoList", TodoListRoutes);
app.use(homeRouter);

app.listen(process.env.PORT, () =>
  console.log(`App is running on http://localhost:${process.env.PORT}`)
);
Lastly, go to to package.json file in your server folder and add the following scripts:
"start": "set NODE_ENV=production&& node index.js --ignore ../client/",
     "build": "npm run build --prefix ../client/"
Run npm run build, then npm start. Your app will run on http://localhost:3000/ in production mode. Hurray! Your app is ready for deployment.
BONUS: HOW TO DEPLOY A NODE.JS APPLICATION ON RENDER
You'll want to see your application live on the internet now that it's ready for deployment. There are a few platforms that provide free Node.js application deployment, but Render is one of the simplest to set up. Render is a unified cloud that allows you to build and host all of your apps and websites while offering free TLS certificates, a global CDN, DDoS protection, private networks, and Git auto deployments.
- Create a new Github repo and push your code to it. Ensure to add your
distfolder to the staging area and gitignore your.envfile. - Sign up or sign in to render dashboard
- Click on
New +on the top right corner and clickWeb Service.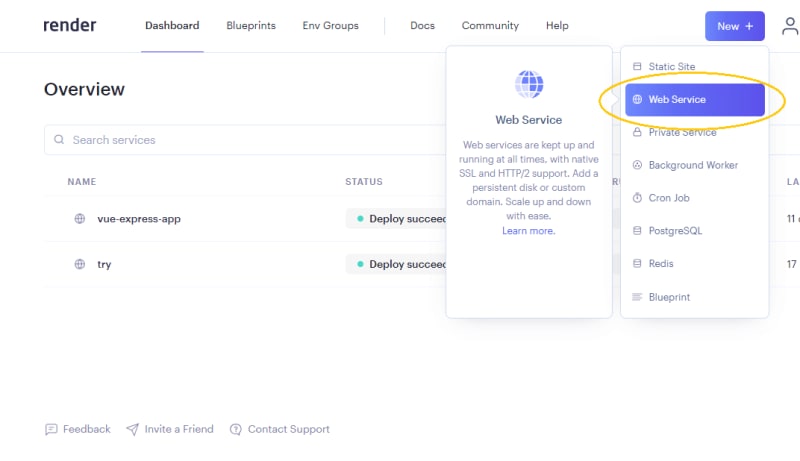
- Under
Github, on the right, click onConfigure account.
- Under
Repository Access, select your repo and click onSave. - Click on the
Connectbutton beside the repository name.
- Configure your deployment details as shown in the image below and click on
Create Web Service.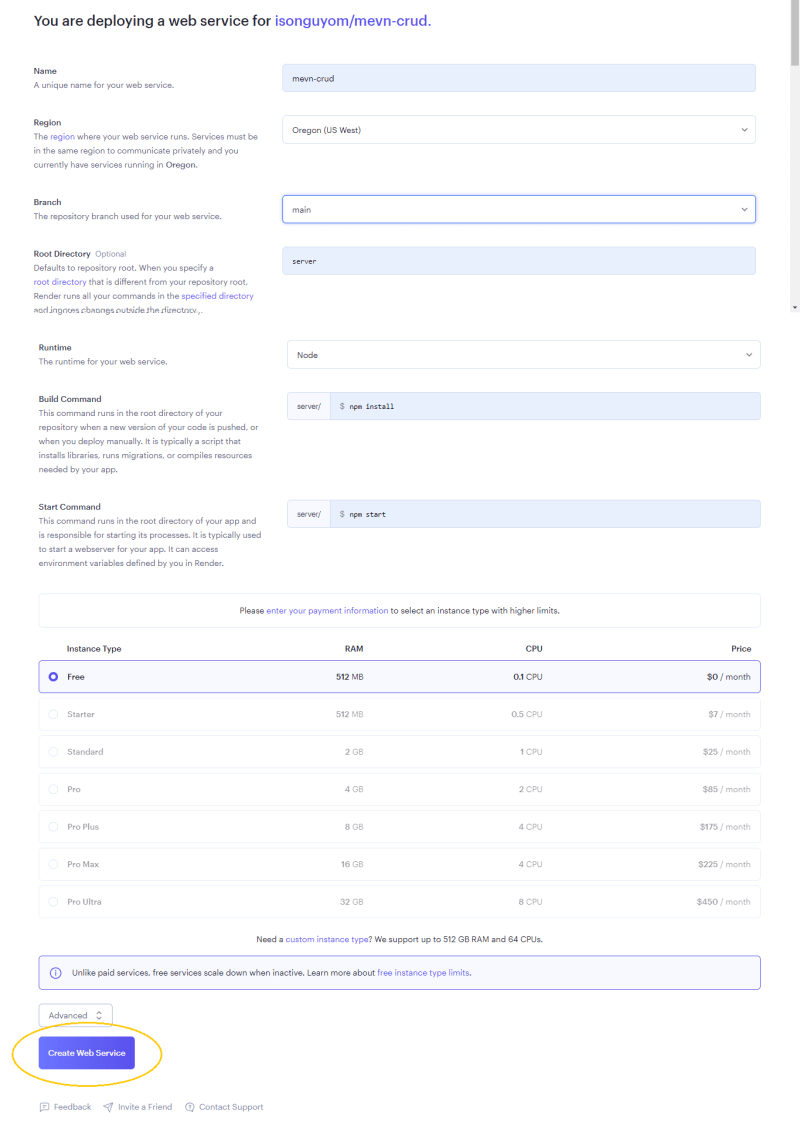
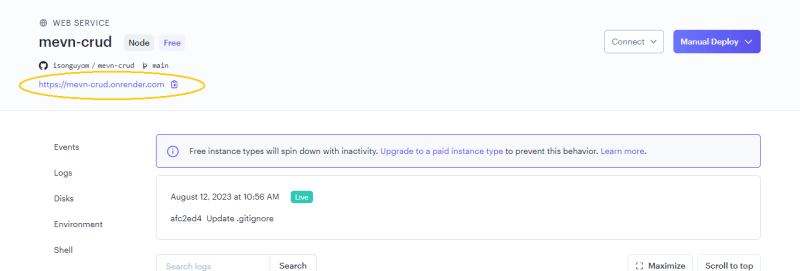
- After deployment, click the link in the top left corner to visit your live website.
Add .env file to render
After publishing your app, your database data will refuse to load. This is because you did not add your .env file to Github to avoid exposing your database details to the public. To add your .env file to render, follow these steps:
Step 1. Navigate to your render dashboard and click on your deployed app name.
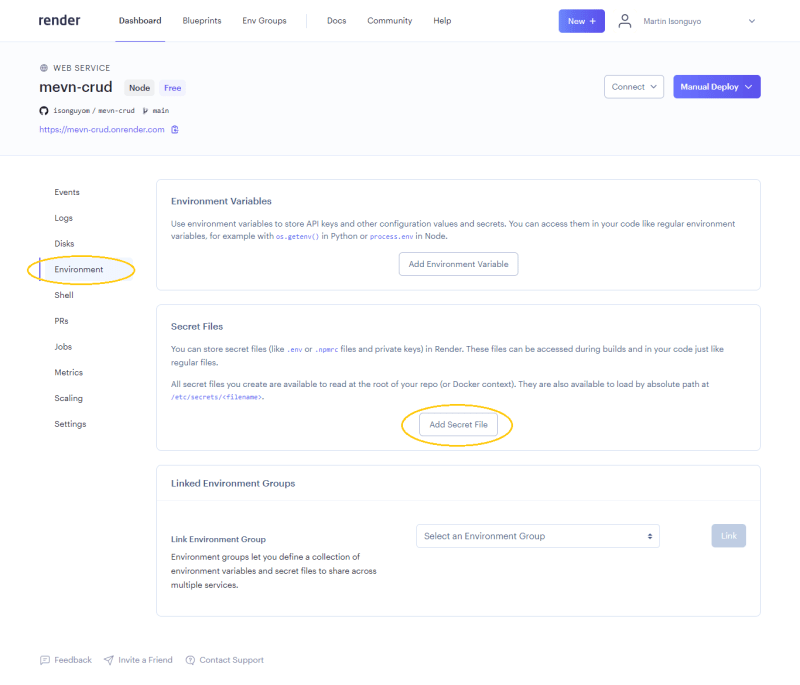
Step 2. Click on Environment on the left menu and scroll to Secret Files. Click on Add Secret File button.
Step 3. Input .env under Filename and click on the Contents input field.
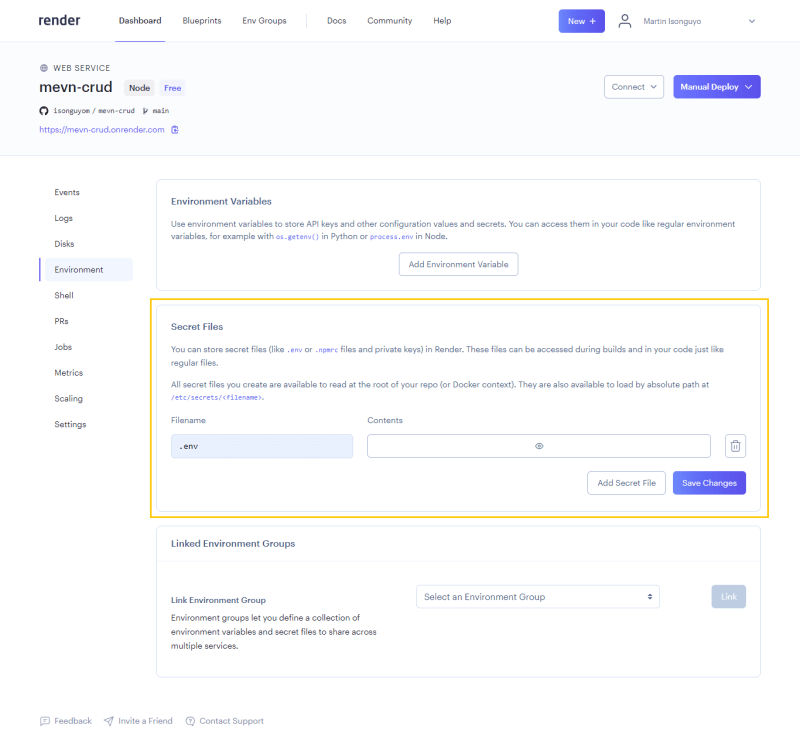
Step 4. In the displayed dialogue box, add your .env file content in the File Contents textarea and click on Done button.

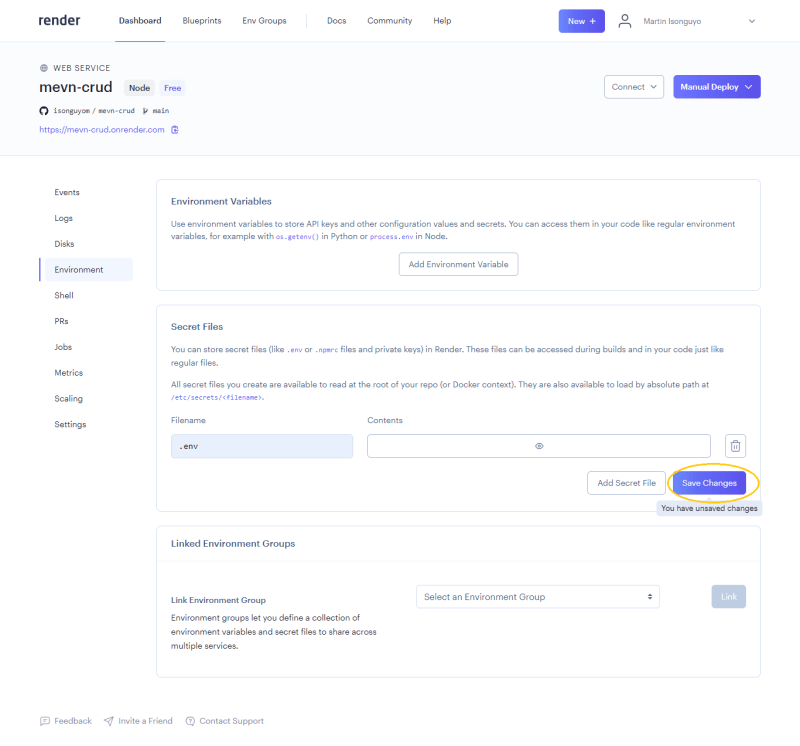
Step 5. Click on Save Changes to complete the process.
CONCLUSION
Full-stack development is the dream of every developer. In this tutorial, we have been able to build a full-stack web application using the MEVN stack. The tutorial is primarily for web developers interested in the MEVN stack, but it is also helpful to any web developer who wants to understand how a full-stack web application works.
The best way to learn any web development stack is by building applications using it. Build as many challenging projects as you can. It will help prepare you for the job market because there are a lot of opportunities for MEVN developers.
If you have any questions or additions, please leave them in the comment section below.

Top comments (0)