
Setting up Vue frontend with Vite
We will use Vite build tool to create our frontend (client). To begin, make sure you're in the root directory mevn-crud and not the server folder.
Execute these commands:
npm create vite@latest client -- --template vue
cd client
npm install
npm run dev
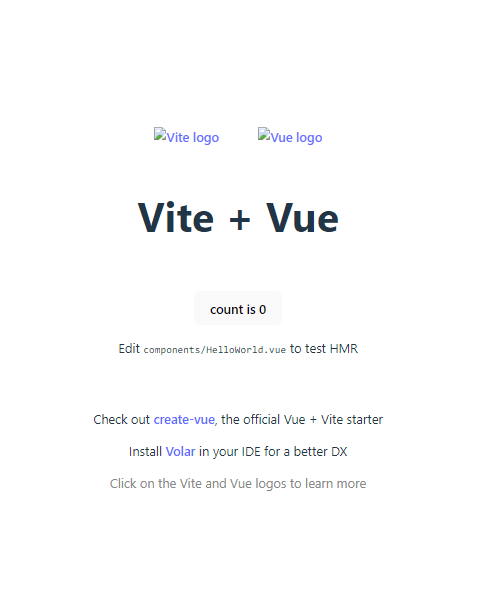
Visit http://localhost:5173/ to see the default interface, which looks like the image below.

Terminate your frontend, go to your server folder, and run npm run dev. It will run the client on http://localhost:5173/ and the server on http://localhost:3000/. We are able to run two commands with the help of concurrently, which we installed at the beginning of the tutorial.
Backend Integration
Now the server and client are running on different ports. We want our applications to interact with each other and for our frontend to be accessible only through the server's port. To be able to run our app in both development and production environments, we will need a template engine. We will use ejs.
Navigate to your client folder and install ejs:
npm install ejs
After installing the ejs template engine, rename index.html to index.html.ejs. Create a views folder in the client directory and move the renamed file into it.
Go to your server folder and also install the ejs engine using the command above.
We will need a router for our home page. Create a new file, homeRouter.js inside routes folder. Copy and paste the following code into your new file:
// homeRouter.js
import express from "express";

const router = express.Router();

router.get("/*", (_req, res) => {
  res.render("../../client/views/index.html.ejs");
});

export default router;
Attach the homeRouter.js file to the app by importing it into index.js file. Add the following to index.js:
---
import homeRouter from "./routes/homeRouter.js";

---

// Create routes
app.use(homeRouter);
---
To finalise our integration, go to index.hmtl.ejs and replace
<script type="module" src="/src/main.js"></script>
with the following:
      <script type="module" src="http://localhost:5173/@vite"></script>
      <script type="module" src="http://localhost:5173/src/main.js"></script>
Run npm run dev in your server folder, then visit http://localhost:3000/ to confirm the application is properly integrated. If everything went fine, your application will look like the image below.
Notice that the Vite and Vue logos refused to load. This is because our server could not access the locations of the images. The next section will show you how to set up routes for your images and other assets. It is an optional section; you can ignore it and go to Building CRUD application frontend section.
Optional: Set up routes for frontend assets
Add the following code to your index.js file:
//index.js
import path from "path";

---

const publicPath = path.join(path.resolve(), "../client/public");

---

// Create routes
app.use("/", express.static(publicPath));
We have successfully loaded our Vite logo, but the Vue logo refuses to load. Our Vue logo is not located in the public directory, so we will need a special route for all assets whose path starts with /src.
Create a file named assetsRouter.js in your routes folder and add the following code:
//assetsRouter.js
import express from "express";

const router = express.Router();

const supportedAssets = ["svg", "png", "jpg", "png", "jpeg", "mp4", "ogv"];

const assetExtensionRegex = () => {
  const formattedExtensionList = supportedAssets.join("|");

  return new RegExp(`/.+\.(${formattedExtensionList})$`);
};

router.get(assetExtensionRegex(), (req, res) => {
  res.redirect(303, `http://localhost:5173/src${req.path}`);
});

export default router;
Attach it to your index.js file:
//index.js
import assetsRouter from "./routes/assestsRouter.js";

---

// Create routes
app.use("/src", assetsRouter);
All images now load successfully.
Building CRUD application frontend
You have come a long way; truly, you deserve the accolades.
We have successfully loaded our frontend on our server, but we need to ensure that our client can actually interact with our server. We will create a simple frontend that will consume our CRUD API.
We will use axios to consume our API, so install axios in your client folder.
npm i axios
Go to your src folder and delete the components folder and everything in it. Replace the contents of your App.vue file with the following:
<template>
  <main>
    <h1 class="title">MEVN CRUD APP</h1>

    <form @submit.prevent="addTodo" method="post">
      <input class="input" v-model="title" type="text" name="name" placeholder="Enter todo" />
      <input class="input" v-model="description" type="text" name="description" placeholder="Enter Description" />
      <button type="submit" class="submit-btn">Add Todo</button>
    </form>
    <div class="todo-wrapper">
      <h2 class="caption">Todo List</h2>
      <div v-if="todos.length < 1">Todo list is empty</div>
      <ul v-else>
        <li class="todo-item" v-for="(todo, i) in todos" :key="todo._id">
          <div class="todo">
            <h3 class="todo-title">{{ todo.title }}</h3>
            <span class="todo-description">{{ todo.description }}</span>
          </div>

          <div class="update-form" id="updateForm">
            <input type="text" name="updateTitle" id="updateTodo" v-model="updateTitle" />
            <br />
            <input type="text" name="updateDescription" id="updateTodo" v-model="updateDescription" />
          </div>
          <div class="todo-btns">
            <button type="button" class="edit-btn" @click="updateTodo($event, todo._id, i, todo)">
              Edit
            </button>
            <button type="button" class="del-btn" @click="delTodo(todo._id, i)">
              Delete
            </button>
          </div>
        </li>
      </ul>
    </div>
  </main>
</template>

<script>
import axios from "axios";

export default {
  name: "App",
  data() {
    return {
      title: "",
      description: "",
      todos: [],
      updateTitle: "",
      updateDescription: "",
    };
  },
  mounted() {
    this.getTodos();
  },
  methods: {
    async getTodos() {
      const res = await axios.get("/api/todoList");
      this.todos = res.data;
    },

    async addTodo() {
      const res = await axios.post("api/todoList/", {
        title: this.title,
        description: this.description,
      });
      this.title = "";
      this.description = "";
    },

    async delTodo(id) {
      await axios.delete(`api/todoList/${id}`);
    },

    async updateTodo(event, id, i, todo) {
      const updateForm = document.getElementsByClassName("update-form");
      const updateFormArray = [...updateForm];
      updateFormArray.forEach(async (el) => {
        if (updateFormArray.indexOf(el) === i) {
          if (!el.classList.contains("active")) {
            el.classList.add("active");
            this.updateTitle = todo.title;
            this.updateDescription = todo.description;
            event.target.innerHTML = "Save";
          } else {
            const res = await axios.put(`api/todoList/${id}`, {
              title: this.updateTitle,
              description: this.updateDescription,
            });
            event.target.innerHTML = "Edit";
            el.classList.remove("active");
            this.updateTitle = "";
            this.updateDescription = "";
          }
        }
      });
    },
  },
  watch: {
    todos() {
      this.getTodos(); // Watch todos list for any change
    },
  },
};
</script>
Then replace your style.css file content with this
*,
*::before,
*::after {
  margin: 0;
  padding: 0;
  box-sizing: border-box;
}

body {
  padding: 40px 5%;
}

main {
  width: 100%;
  max-width: 600px;
  margin: 0 auto;
}

.title {
  text-align: center;
  margin-bottom: 30px;
}

.input {
  padding: 20px;
  display: block;
  width: 100%;
  margin: 0 auto 10px;
}

.submit-btn {
  display: block;
  padding: 20px;
  border: 0;
  background-color: green;
  color: white;
  width: 100%;
  margin: 20px auto 0;
  cursor: pointer;
}

.todo-wrapper {
  margin-top: 50px;
}

.todo-wrapper .caption {
  margin-bottom: 15px;
}

.todo-item {
  width: 100%;
  display: flex;
  justify-content: space-between;
  align-items: center;
  background-color: rgb(207, 236, 207);
  padding: 10px;
}

.todo-item:nth-child(even) {
  background-color: white;
}

.todo-title {
  margin-bottom: 7px;
}

.todo-btns button {
  padding: 10px;
  cursor: pointer;
  border: 0;
}

.edit-btn {
  background-color: green;
  color: white;
  margin-right: 7px;
}

.del-btn {
  background-color: red;
  color: white;
}

.update-form {
  position: absolute;
  display: none;
}

.update-form input {
  padding: 7px;
  border: 0;
}

.update-form.active {
  display: block;
}
Run your app. You should be able to load, create, update, and delete from your frontend if everything went well.
Summary
We have successfully developed our MEVN Crud App. In this part, we were able to set up our Vue frontend with Vite build tool and also integrate it with our backend. Finally, we created the frontend of our application, where we consume the API we created in Part 1.
Part 3 of this series will cover the configuration needed for our application to be production-ready. It also comes with a bonus you won't want to miss.
Github Repository: https://github.com/isonguyom/mevn-crud
Live Demo: https://mevn-crud.onrender.com/
If you have any questions or additions, please leave them in the comment section below.

Top comments (0)