
Cover Photo by Etienne Girardet on Unsplash
Setting up a development workflow can be time consuming and frustrating especially when there is a need to install a lot of tools. But with the advent of containers this became easy, way easy. In this article I'll explain how I set up my dev workflow for Go Apps being my primary working tool.
So in setting up a new project I start out by listing out the tooling I need for maximum productivity along the way. In this guide, I'll build an extremely easy Go api with just two endpoints, one that receives a GET Request to the base endpoint / and returns a welcome message and another one that simply receives a book as json object from a POST Request to the api endpoint /books then saves this book in a MongoDB collection. So to work on this project I need the following tools:
- Golang and the apps dependencies
- Mongo DB as the database
- Mongo Express (optional) for my database admin interface
To start things of, open your terminal or cmd window and navigate to your desired working directory. In my case I have a folder named projects in my home directory where I organize my projects.
-
Clone this repository https://github.com/ItsCosmas/docker-go-dev
git clone https://github.com/ItsCosmas/docker-go-dev -
Navigate to the newly created directory
cd docker-go-dev -
Once Inside the
docker-go-devdirectory, open with your favorite editor. In my case VS Code.
code . Make Sure your directory tree looks like this.

-
Open the
go-appfolder and Look at theDockerfile.
# Pull base image
FROM golang:1.18-alpine

# Install git
RUN apk update && apk add --no-cache git

# Where our files will be in the docker container
WORKDIR /opt/go-app

# Copy the source from the current directory to the working Directory inside the container
# Source also contains go.mod and go.sum which are dependency files
COPY . .

# Get Dependency
RUN go mod download

# Install Air for hot reload
RUN go install github.com/cosmtrek/air@latest

# The ENTRYPOINT defines the command that will be ran when the container starts up
# In this case air command for hot reload go apps on file changes
ENTRYPOINT air
I have well commented the Dockerfile but I will explain a few bits.
A Dockerfile is a text document that contains all the commands a
user could call on the command line to assemble an image.
- We start by pulling the base go image from the docker hub. The alpine tag indicates the alpine version which is bit lightweight and should work well in development, I won't go to much optimization for the moment.
- Then install git which is a dependency to get some packages.
- Then we set the work directory inside the container in my case it is
/opt/go-appthat is where our files will live inside the container. - Then we copy the source from the current directory to the working Directory set above. Our Source Code also contains
go.modandgo.sumwhich are dependency files - After that we get the app service dependencies using
go mod download - We will need Live Reload for our app so we install
airhttps://github.com/cosmtrek/air which is a live reload utility for Go apps. - Finally we pass an
ENTRYPOINTwhich defines the command that will be ran when the container starts up, in our case itsairthe Live reload utility.
That's it for the go-app service now we move a directory up to the docker-compose.yml file.
This is the content of the compose file:
version: '3.7'
services:
    # The Go App
    go-app:
        build: ./go-app
        container_name: go_app
        depends_on:
            - 'mongo'
        environment:
            - PORT=8000
        ports:
            - '8000:8000'
        volumes:
            - './go-app:/opt/go-app:cached'
    # MongoDB
    mongo:
        image: 'mongo:4.4'
        container_name: mongo
        ports:
            - '27017:27017'
        volumes:
            - ./mongodata:/data/db
        restart: always
    # Mongo Express Web-based MongoDB admin interface
    mongo_express:
        image: 'mongo-express:0.54.0'
        container_name: mongo_express
        depends_on:
            - 'mongo'
        ports:
            - '8081:8081'
        restart: always
I'll explain the core parts of this file.
Compose is a tool for defining and running multi-container Docker applications. With Compose, you use a YAML file to configure your application’s services. Then, with a single command, you create and start all the services from your configuration.
To learn more about docker-compose.yml file head over to the official docs at https://docs.docker.com/compose/.
- First we define our version tag for the compose file in our case
3.7as at the time of writing.
go-app service
- Next We will define the services needed for our application. We start with the
go-appservice which we just created above, remember thatDockerfile? - The go-app service uses an image build from the
Dockerfileinside thego-appdirectory. - We give it a custom name in our case
go_app. - Then We indicate that the service is dependent on another service called
mongowhich will be our database service. - Finally We pass in some environment variables for use inside the container. In our case
PORT. - Last We bind the container and the host machine to the exposed port
8000. - Finally we define a volume which maps our source directory to the work directory inside the container, that way changes in our source code from our host machine will reflect inside the container.
Mongo Service
- First we define the image that shall be used in our
mongoservice, in our case an official image with the bionic tag. - Then we give it a custom name
mongowhich is the default, could be anything. - Then We bind the container and the host machine to the exposed port
27017. Then We define a volume which maps a local directory
mongodatato the data directory inside the container, that way we shall have persistent storage even if our container fails.Lastly we add a
restart:alwaysflag to always restart the container if it stops.
Mongo Express (Optional)
A Web-based MongoDB admin interface that will allows to manage our mongo database in the browser.
First We define the image , in our case the official
mongo-expressimage from docker hub.We give it a custom container name
We add a
depends_onflag so that the container only runs ifmongoservice is running.Then We bind the container and the host machine to the exposed port
8081.Lastly we add a
restart:alwaysflag to always restart the container if it stops.
Action
Now that everything is set up, it's time to see our containers in action.To start our containers we run:
docker-compose up
If everything is correct docker will build the containers and you should see this output in your terminal indicating your containers were built and started successfully:

There's obviously more output but I'm focusing on this. Once that's done you can hit the base endpoint http://localhost:8000 to verify its working. You can use a tool like postman https://www.postman.com/ or just curl on your terminal.
Open a new Terminal and input:
curl http://localhost:8000; echo
If your app worked, you should see similar output:
{"message":"Welcome to your App on Docker"}
The GET endpoint actually works.
Now let us test the POST Endpoint. On your terminal enter this command:
curl -d '{
    "name":"My Best Book Ever",
    "pages": 12
}' -H "Content-Type: application/json" -X POST http://localhost:8000/books; echo
If it works you should see this Response:
{"code":200,"msg":"Book Published","data":{"name":"My Best Book Ever","pages":12}}
POST Endpoint on Postman:

If success, you should see this output:

To Check Live Reload, Just Edit a file e.g. The app/app.go :
    // API Home
    r.GET("/", func(c *gin.Context) {
        c.JSON(http.StatusOK, gin.H{
            "message": "Welcome to your App on Docker",
        })
    })
You can change the message to whatever you want and once you save your file you should see a similar output on your terminal:

To check whether the data was saved to Mongo We'll use Mongo-Express:
-
Open http://localhost:8081/ in your browser. You should see the database
books-dband if not just refresh your browser:
-
Click on
books-dband it should redirect to the Database Page as seen below::
-
Click on the Collection you wish, in this case
bookcollection and the records from the collection should be displayed as below:
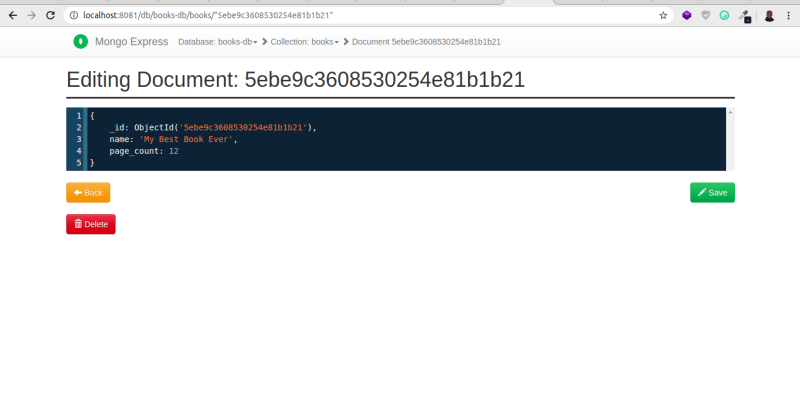
You can also view a Single Document if you wish by just clicking on it and it should redirect to a document page similar to this:
So In this article I have shown you how I set up my local dev environment and workflow for go apps, Mongo and Mongo Express. The process is almost similar for other stacks, the key is to have a standardized dev environment for maximum productivity. By the way shipping to production is very easy with docker you require just a few optimizations and that's all, no OS dependency issues ever.
I have updated the article and the github repository so that this tutorial can be helpful even now as at 2022.
And that's it for the article. PS: Trying to do some regular writing 🙂.

Latest comments (6)
Great article!
Great Article @itscosmas !
Thank you for your response. You are actually the author of the successful go framework iris. I'm humbled. 😀
Thanks Cosmas, nah I am just a software developer like you! It would be nice if you could add some "iris things" inside it (the main app) so I would be able to share such a great article with the Iris community as well! (there are many people that are looking for iris-specific local development workflow)
Awesome, I will add an Iris example. Iris has some really good docs and extensive examples, I will be glad to contribute.
❤️