Getting Started
It is assumed you are already familiar with both React and Redux and looking to add internalization to your application. If you are not, there is a number of boilerplate options out there that can help you get started.
Feel free to check out our implementation of it that we use at Jam3.
Prerequisites
You are highly advised to read the i18next internationalization framework documentation to get an understanding of the main concepts and benefits of using it.
List of required extra dependencies:
- i18next (37kB / 10.5kB)
- react-i18next v.9 (12.4kB / 4.6kB)
- i18next-browser-languagedetector (6kB / 2kB)
- i18next-redux-languagedetector (2.2kB / 790B)
- i18next-chained-backend (2.2kB / 933B)
- i18next-fetch-backend (4.3kB / 1.7kB)
Take a sneak peek at these libraries before we proceed.
👉 Consider the overall additional cost of roughly 20kB (minified and gzipped) added to the production build.
Installation
Run this command in your terminal to install the above modules in one batch:
$ npm i --save i18next react-i18next@9.0.10 i18next-fetch-backend i18next-browser-languagedetector i18next-redux-languagedetector i18next-chained-backend
Configuration
The example we’ll be referring to is bootstrapped with Create React App with added Redux on top.
Here’s what our application structure will look like:
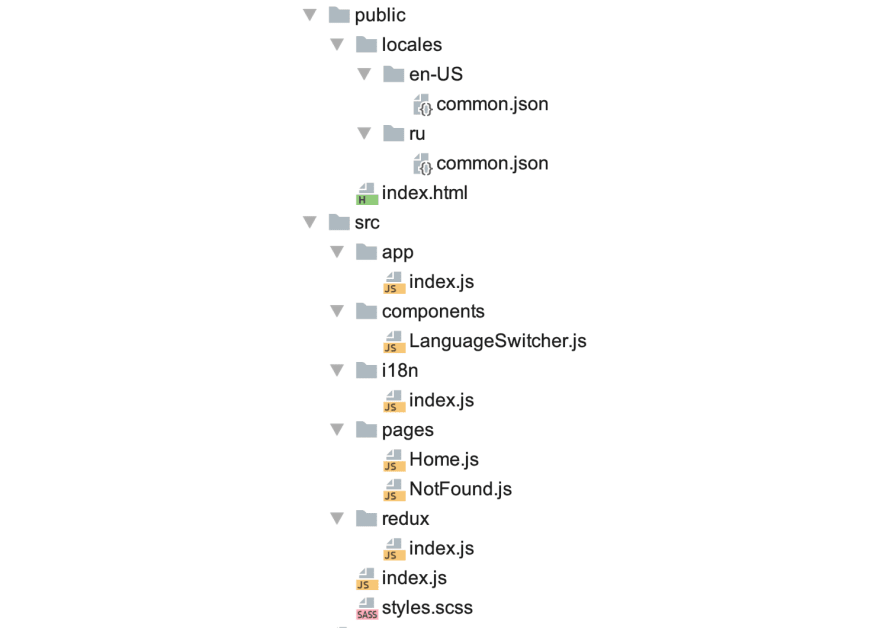
See the CodeSandbox example or check this GitHub repo.
Step 1: Creating translation files
We are going to use English and Russian translations as an example.
Let’s create two JSON files with identical structure and keep them in their respective folders:
/public/locales/en-US/common.json/public/locales/ru/common.jsonThese files will serve as our translation resources that are automatically loaded based on the detected browser language.
Step 2: Creating the i18n config file
Make sure to check the complete list of available i18next config options.
This is our main localization config file:
/src/i18n/index.js- First off, we need to add the
i18next-chained-backendplugin which allows chaining multiple backends. There are several backend types available for different purposes. We are usingfetchto load our translation resources. - Then we are adding
Browser Language Detector(connected with Redux store throughRedux Language Detector) for automatic user language detection in the browser. Read more about the approach. - Next up, we use
reactI18nextModuleto passi18ninstance down toreact-i18next. - Finally, we initialize
i18nextwith basic config options.
Step 3: Adding i18next reducer to the store
Redux Language Detector provides i18nextReducer so you don’t need to implement your own reducers or actions for it — simply include it in your store:
/src/redux/index.js👉 For your convenience, use Redux dev tools in dev environment and make sure you import composeWithDevTools from redux-devtools-extension/developmentOnly.
Step 4: Creating the main app file
There’s nothing specifically related to the internalization in this file.
We simply set the routes for our pages in a standard way.
/src/app/index.jsStep 5: Initializing the app and adding I18nextProvider
The provider is responsible for passing the i18next instance down to withNamespaces HOC or NamespacesConsumer render prop.
/src/index.jsWe initialized our store and i18n config file with the same options to keep both in sync.
Step 6: Using translation keys
We‘ll use withNamespaces HOC that passes the t function as a prop down to the component. We need to specify the namespace(s), and the copy is now accessible via object properties using t function: t(‘homePage.title’).
Note, it is required to prepend the namespace when accessing the copy from multiple namespaces within one component e.g. t('shared:banner.title').
/src/pages/Home.jsAlternatively, we could use NamespacesConsumer component which would also give us access to the t function. We’ll cover it in the next step.
👉 You can test language detection by changing your default browser language. When using Chrome, go to chrome://settings/languages and move the languages up and down in the list.
Step 7 (Bonus part): Creating language switcher
Ok, we’ve implemented language auto-detection and dynamic translation resources loading. Now it’s time to take it up a notch and create a component that allows users switching the language through user interface.
Make sure to include this component in your app.
/src/components/LanguageSwitcher.jsNamespacesConsumer render prop provides access to the i18n instance. Its changeLanguage method can be used to change language globally. This will force the app to re-render and update the site with the translated content.
🎉That’s a wrap!

Top comments (0)