(Heroku and Salesforce - From Idea to App, Part 6)
This is the sixth article documenting what I’ve learned from a series of 12 Trailhead Live video sessions on Modern App Development on Salesforce and Heroku. In these articles, we’re focusing on how to combine Salesforce with Heroku to build an “eCars” app—a sales and service application for a fictitious electric car company (“Pulsar”) that allows users to customize and buy cars, service techs to view live diagnostic info from the car, and more. In case you missed my previous articles, you can find the links to them below.
Modern App Development on Salesforce and Heroku
Jumping into Heroku Development
Data Modeling in Salesforce and Heroku Data Services
Building Front-End App Experiences with Clicks, Not Code
Custom App Experiences with Lightning Web Components
Just as a quick reminder: I’ve been following this Trailhead Live video series to brush up and stay current on the latest app development trends on these platforms that are key for my career and business. I’ll be sharing each step for building the app, what I’ve learned, and my thoughts from each session. These series reviews are both for my own edification as well as for others who might benefit from this content.
The Trailhead Live sessions and schedule can be found here:
https://trailhead.salesforce.com/live
The Trailhead Live sessions I’m writing about can also be found at the links below:
https://trailhead.salesforce.com/live/videos/a2r3k000001n2Jj/modern-app-development-on-salesforce
https://www.youtube.com/playlist?list=PLgIMQe2PKPSK7myo5smEv2ZtHbnn7HyHI
Last Time…
In the last session, we went into detail about considerations and tools related to customizing app experiences, from point-and-click methods all the way to fully custom code. However, we only briefly touched on the featured go-to custom code framework: Lightning Web Components, or LWC.
This time, we’re taking a deeper look into LWC and also covering how to communicate between components in our eCars app using Events and the Lightning Message Service.
Like Normal Web Components… but With More!
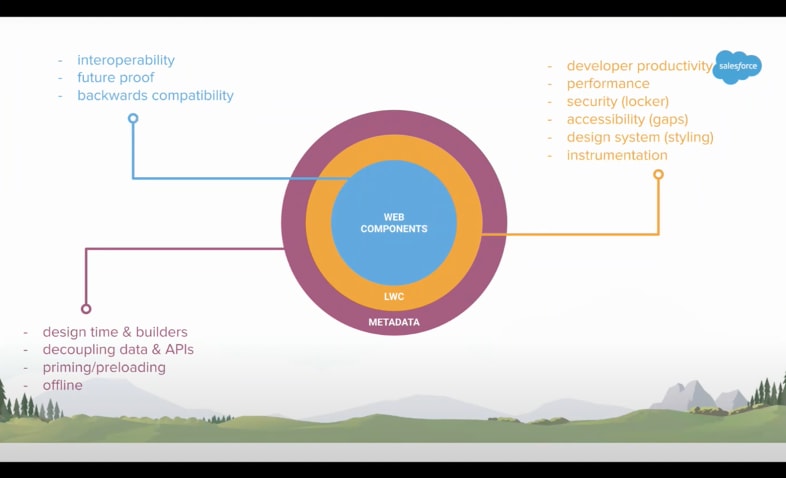
LWC are built on top of regular web components (WC) which almost every web application developer should be familiar with. In a previous article, I commented on how smart it is for Salesforce to move from SFDC-specific frameworks (like Visualforce) to LWC, since this allows most web developers to build on the platform with less of a learning curve. On top of that, web components are modern, interoperable, future-proof, and backwards compatible.
The idea underpinning LWC is the open-source framework that has a compiler and Lightning-specific properties. This provides what Mohith Shrivastava calls “sugar” on top of a web component.
The verbose WC syntax then becomes really simple; we can add styling using the Salesforce Lightning Design System (SLDS) as well as Metadata.
For those of you, like me, who may have come from “Visualforce/APEX land” and find LWC somewhat of a fresh concept, remember this: when you are learning LWC, you are learning the standard web components as well. Two birds, one sweet framework.
Another important tidbit for those of us coming from APEX/Visualforce: JavaScript and thus LWC are CaSe sEnsiTive so if you’re used to APEX code being case insensitive, save yourself a lot of debugging and don’t forget to use camelCase or kebab-case where needed.
Building Out the Enhanced eCars Inventory Gallery
Let’s jump into the first activity, where our goal is to build our custom inventory list experience for the eCars app. In the previous article, we created a prototype using a Salesforce Lightning Design System (SLDS) plug-in for Sketch. We also used standard SLDS base components to arrive at this enhanced layout:
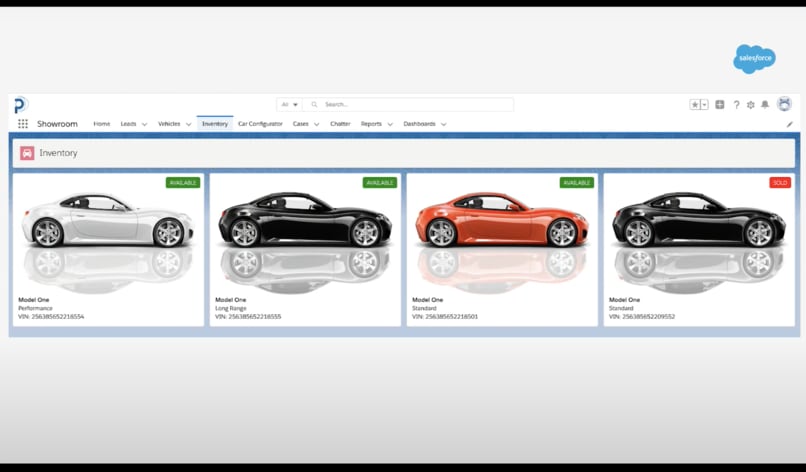
Certainly nicer than a bland list view
We will build in our IDE of choice, Visual Studio Code. You’ll need a scratch org and Salesforce-specific extensions for VS code to get started. If you are just finding this article now and are not yet set up with a Salesforce developer account, dev hub, and scratch orgs, go ahead and jump to the first article of the series to get those things set up. Once that’s done, you’re up and running and ready to develop.
When building LWC, the component-reference documentation is GOAT (greatest of all time). Salesforce has invested a lot in giving you “pre-baked components that have a lot of functionality,” including providing HTML, CSS, and Javascript code out-of-the-box. These are largely the same components you’d find in SLDS, so the design process and the code implementation are going to flow naturally. One of the components we used for the Sketch design is available in the component reference, of course: the Lightning Card.
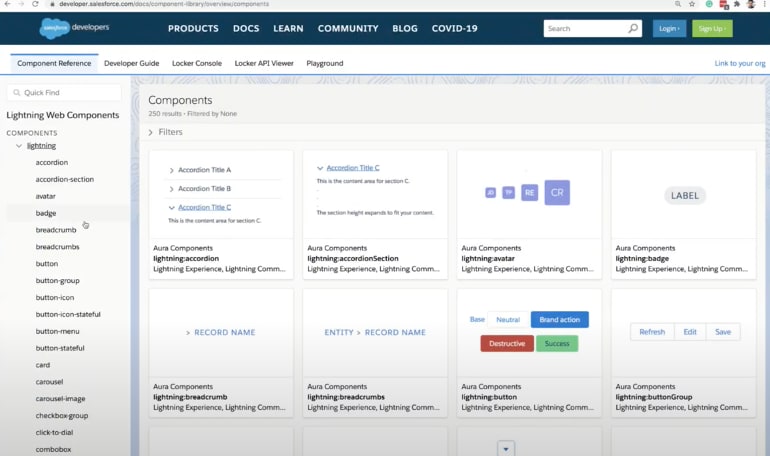
An all-you-can-copy-and-paste component buffet
We can proceed by just pulling in the pre-baked code for the Lightning Card component we want to use. At this point, it’s useful to understand the term “slot.” A “slot” is a placeholder in components where you can add your own component or HTML mark-up. Mohith also reviews badges documentation and pulls in a stand-in image. With a refresh to our local dev server (Code Preview), we can see the beginnings of the inventory card.
We can then expand on this single inventory card component and create iterations of each card that will pass data from the Vehicle__c Salesforce custom object records to this new inventory component. We can bind the data properties from Salesforce data to our component using the @api decorator.
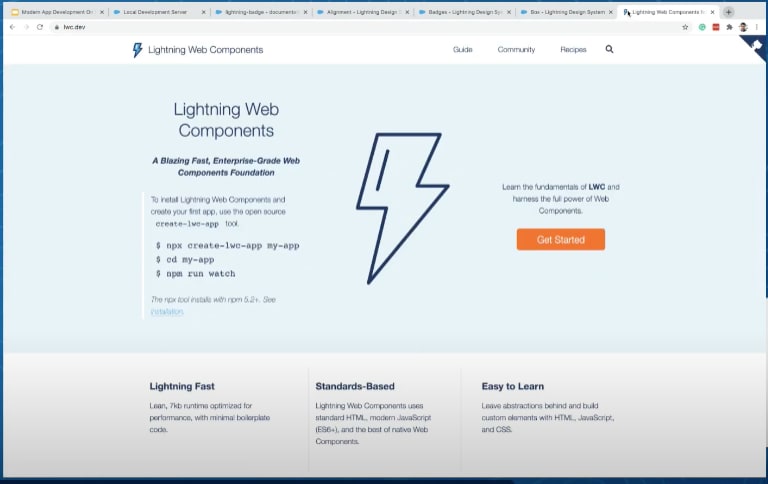
LWC adds a lot of utilities for you to create flow control for apps including repeaters and conditionals. You can check them out at lwc.dev where you’ll learn all the fundamentals like templates, data binding, and development lifecycle.
Design Help for Developers
Developers and designers are usually not the same people, and the skillsets don’t always overlap. As a result, it’s very nice to have libraries and design systems like SLDS and the LWC component reference, since they take care of a lot of the design thinking for us developers. But of course, if you are a developer/designer hybrid unicorn and have the CSS background, you can build onto SLDS with your own designs and create amazing interfaces.
In the documentation, we have a lot at our fingertips. We even have a playground to learn about different ways to size our layouts; we are encouraged to try different options to understand what type of layouts are actually possible. Developers even have the option to build out layouts that are automatically responsive.
I personally love what the SLDS has done: it’s given us utilities so that we don’t have to actually worry about them. For example, if we want to add some padding somewhere, we can look at the classes in the documentation, find the appropriate one, and simply copy-paste the class to our component. Using on-page or in-line CSS should be a rare case and avoided whenever possible.
Back to App Building
Moving forward in the walkthrough, we get our component set up and preview it locally:

Looks like we are almost there!
There are certain properties in Lighting Layouts that we can use to our advantage. In this example, we want multiple rows, which means we get to play with the size element. In VS code, if the LWC extension is installed, hovering over an element shows all its properties. Then we can start typing it in, find what we need, and let the auto-complete save us time.

This will save me lots of Google searches
Events in Lightning Components
We need Events to handle transmitting data in LWC between separate components. That’s because they do not automatically communicate with each other, even if they are organized as parent-child components. (Maybe the child is a broody teenager?) But jokes aside, this is by design and for security reasons. That way, foreign components embedded in the same page cannot “spy” on another component’s data.
The important thing to remember with Events in LWC is that “if you do not have a strategy, you can quickly mess up your architecture without following a consistent design pattern.” The best practice for child-to-parent components is to always use Events. In our eCars inventory gallery, we add a function where clicking one image will mute or “blur” all others on the screen. The blur effect is done in CSS, but handling the event to blur/unblur the appropriate cards requires Events and JavaScript.
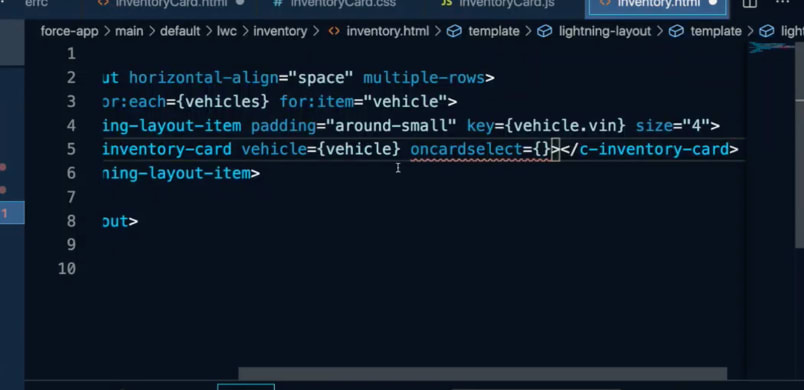
We create a JavaScript event (new CustomEvent = ‘cardselect’) and pass the vehicle’s VIN so we can identify which element is being clicked. We dispatch the Event on clicking the card, but how can we have the card component listen for this? We can go into the HTML element for the inventory-card and add an “oncardselect” property calling a function, our handler.
We can then add our handler to our JavaScript with a map function to return the modified element, followed by the @track decorator to ensure we have reactivity when we are interacting with our app.

_ Lightning cards go blurrrrrr_
Concluding Thoughts
I remember the first time I went through a Visualforce tutorial. I needed to review existing working example code, modify it, break it, and build it back up again. I anticipate I’ll have to do the same with LWC, and also work through some practical exercises to build up experience and confidence with the framework. I would love to hear from those who are familiar with regular web components on how similar this is to them and how quick the transition is from regular WC to LWC. Luckily, I have a backlog of Visualforce pages from Salesforce orgs that I manage—they could use some conversion to Lightning Web Components. I reckon I’ll get plenty of practice with LWC that way! There is also a nice sample app on github from the Developer Advocate Team that actually demonstrates how to do this.
In the next article, we’re going to look at automating back-end processes and logic for our eCars app using Flows and APEX.
If you haven’t already joined the official Chatter group for this series, I certainly recommend you do so. That way, you can get the full value of the experience and also pose questions and start discussions with the group. Oftentimes, there are valuable discussions and additional references available there such as the slides from the presentation and links to other resources and references.
About me: I’m an 11x certified Salesforce professional who’s been running my own Salesforce consultancy for several years. If you’re curious about my backstory on accidentally turning into a developer and even competing on stage on a quiz show at one of the Salesforce conventions, you can read this article I wrote for the Salesforce blog a few years ago.





Top comments (0)