Login Form
<form>
  <h2>Login</h2>
  <label for="username">Username</label>
  <input id="username" type="text" placeholder="spacemanspiff8"    title="enter your username here">
  <label for="password">Password</label>
  <input id="password" type="password" placeholder="******">
  <button type="submit">Login</button>
</form>
This may be review for some of you, but it’s a good opportunity to go over the basics on something we all use about 30 times a day — a login form. First of all, we have an h2 tag at the top to give our users a solid idea of the purpose of the form. Next we have labels for each input, attaching their “for” attributes to the corresponding “id” for each input. For JSX users in React, use “htmlFor” instead of “for”. Standard HTML elements and their attributes have a lot of accessibility built in. Once you link the label to the input, years of others’ hard work will do the rest.
Many developers wish to omit labels for fear of sacrificing minimalist design principles, however I strongly encourage you to use them in your forms. If you truly detest the look of labels, you can check out this article to learn how to visually hide them without losing functionality.
Lastly — our submit button. To be fully compliant and reliable, these buttons should take the “type” value of “submit”. That’s easy enough.
Survey Time
<form>
  <h2>Tell us about you</h2>
  <fieldset>
    <legend>Preferred Drink</legend>
    <p>
      <input type="radio" name="drink" id="drink_1" value="coffee">
      <label for="drink_1">Coffee</label>
    </p>
    <p>
      <input type="radio" name="drink" id="drink_2" value="tea">
      <label for="drink_2">Tea</label>
    </p>
  </fieldset>
  <fieldset>
    <legend>Preferred Animal</legend>
    <p>
      <input type="radio" name="animal" id="animal_1" value="cats">
      <label for="animal_1">Cats</label>
    </p>
    <p>
      <input type="radio" name="animal" id="animal_2" value="dogs">
      <label for="animal_2">Dogs</label>
    </p>
    <p>
      <input type="radio" name="animal" id="animal_3" value="both">
      <label for="animal_3">I like both cats and dogs</label>
    </p>
  </fieldset>
</form>
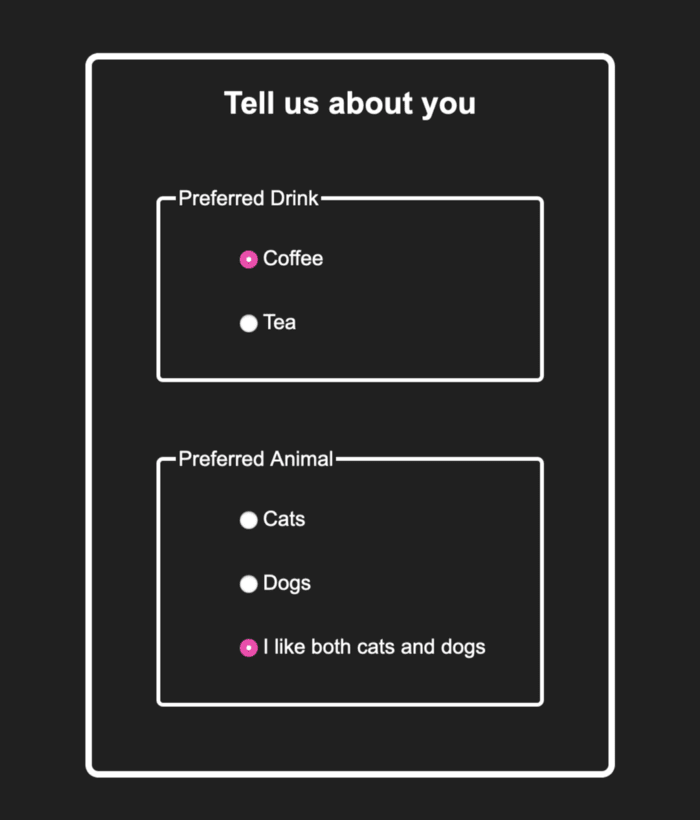
Here is where the real fun starts. I love the the look of fieldset tags, but they’re so much more than simply how they look. In the code above, you’ll notice we have two sets of fieldset tags. Each one has nested radio buttons inside, as fieldset elements are an ideal way to create groups of widgets that share the same purpose. The legend tag gives a title to each group of inputs and some assistive technologies will even include the legend when speaking each input option. For example, when reading the first fieldset above, a screen reader will say: “Preferred drink: coffee” for the first input and “Preferred drink: tea” for the second.
You might also notice each widget, or option, is wrapped in a p tag. Adding HTML elements that aren’t specific to forms will not disrupt assistive technologies, provided you use them correctly. In the example above, the p tags keep our widgets orderly. Then, default CSS will place each p tag on its own line. Pretty nice.
Labels can also be used to activate their corresponding widget, so that users can click on the text as well as the input, giving them way more surface area to make the correct selection. This is especially helpful for users on mobile devices, those who are visually impaired, or who people who have ginormous thumbs.
Taking a step back, let us remember, accessibility is only a part of inclusive design. We want our final product to make sense to users, and make sense to all users. It is best practice not to assume that a user has the same skills, abilities, or knowledge that you do.
Checklist
- Input elements have a corresponding label element
- Submit buttons have a “type” of “submit”
- Input elements used as radio buttons are nested inside of fieldset tag
- Fieldset elements have a corresponding label element
This tutorial should get you started with building accessible forms, and I encourage you to check out the more comprehensive resources below.
If you would like access to this code, feel free to grab it from my github
https://developer.mozilla.org/en-US/docs/Learn/Forms/How_to_structure_a_web_form


Top comments (0)