
or how to open your project to the world
Hello and welcome to the second part of the “Open Source” journey. For those of you who haven’t read the first part or wonder what is the planned content for the next parts:
Table of content
Starting a project
Spreading the word (WIP)
Getting collaborators (WIP)
Issues and PRs (WIP)
Automation (WIP)
Versions management (WIP)
Recap
In the previous part we’ve discussed what is Open Source and why anyone would bother with that. In this part we’re going to get more practical and we’ll discuss how one actually starts an open source project.
So you’re in scenario #1, you have a solution for a specific problem and you’re eager to share it with the world. Let’s emphasize it again:
- It’s not about your ego
- You’re not hoping to benefit from it
- You truly want to help others with the same problem
If you answered yes to all of these then here is a quick checklist for you to make sure you’re doing the right thing:
- Make sure that open source is the right format. If it’s something small that you want to share with the world then a small blog post might be just enough.
- Double check that a similar project doesn’t exist already. Maybe your solution makes a perfect PR for an established open source project.
Be prepared for what’s coming
As I mentioned, owning an open source project carries a lot of difficulties.
One difficulty that stands out is that it requires a lot of your time. Everything that you do for your open source requires time, whether it’s writing code, managing issues, updating dependencies, talking to people, answering questions and etc. Every minute that you invest into your open source is a minute that you could have but didn’t invest in your family, your hobby, your health and what not.
The only thing that you can do about it is delegation.
When (or should I say “if”) you have enough collaborators you can outsource part of your responsibilities to the people you trust.
Code separation
So here we go, you have a solution for your specific problem and you think others can benefit from that. It is still integrated within your code base and you probably don’t want to make the whole code base an open source (unless you do).
First you have to separate this code from the rest of your code base.
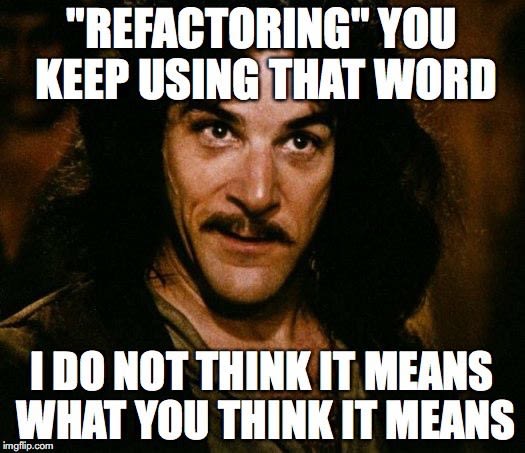
Start with refactoring
…which will eventually cause all the code that is going to be opened to reside in a separate directory.
Make it generic
Make sure that the code in the new directory is generic and is not bound to your specific problem, make an abstraction layer if needed.
As an example I started angular-builders with a very specific need (coming from one of my other open source projects) of adding custom loader for native modules to Angular build.
I could have created native-module-builder which would serve solely this very purpose. However, I realized that at a relatively low cost I can create a more generic solution that would solve similar (but not the same!) problems.
This is how custom-webpack builder was born.
Keep it simple
Generic is great but be careful not to get too excited about that.
Premature optimization and over-generalization are two very well known problems in software engineering. You should find this sweet spot where your solution solves problems other than yours but not all the problems in the world.
If you build a scale where the solution for your specific problem is 1 and a solution for all the world problems is 100 then you should start with 2.
Your generic code should be able to solve a a few more problems than your specific code.
Eat your own dog food
Keep using this generic code in your code base at every step — doing so makes sure you eliminate the unnecessary parts and leave only what’s needed. It also ensures that the code you’re going to open is working properly.
Remember, you are the very first user of your open source project.
Don’t get sued
If you’re extracting the code from your company code base consult with your superiors and if needed with the legal department. Make sure that they support your initiative and that the code you’re going to open is not subject to the IP (intellectual property) of your company. This will also help you to decide which open source license is more suitable for your project.
When everything is working, the code is separated and is generic enough, you have all the approvals (if needed) - it is time to open it to the world.

Opening the project to the world
Once your open source code is separated and generalized it’s time to disconnect it completely from your code base.
Going public
First, you have to open the source code of your project (at the end of the day that what makes it an Open Source Project!).
There are different options for hosting source code online but we’ll go with the default — Github.
- Create a new repo on Github
- Clone the repository
- Move the sources from the directory you previously created (don’t remove the directory yet).
- Commit & push — voila it’s now an open source project.
Or is it?
![]()
Creating a package
Your project is publicly available, but no one is using it (including you, since you’re using a copy of this code within your larger code base), and no one is aware of its existence.
Furthermore the only format in which your project is publicly available on the web is the source code, and the only way to consume it is copy-pasting the code into ones code base. Not a very convenient way, don’t you think?
In order to properly distribute your project you have to:
- Create a package out of the source code
- Make this package available on one of the public package registries (depends on your ecosystem, for example, for Java it might be Maven Central Repository, in the case of JavaScript it might be Npm Package Registry and etc.)
This is when you add a build chain to your new shiny repository, define project name etc.
I’m not going to break down the whole process because it is very dependent on your ecosystem, set of tools and language you are using.
You might be an all around person to whom defining a new project as well as adding a build chain and publishing the package is a piece of cake.
If this is the case — good for you!
You also might be a person that is used to only write code but never faced all these definitions, configurations, artifacts and stuff like that. It might be a whole new world to you.
Well, time to learn. Not going to be quick, I promise you that.
In any case
When you’re done with filling all the missing puzzle pieces in your head, you’ve learned everything about the relevant package registry and your package is actually published, then and only then can you truly consider your project open source.
At this point you can actually tell people: “Hey, I already have a solution to your problem, just add this package to your project and use it!”
Sanity check
Before your project goes viral you better make sure it works.
A sanity check for your package would be actually removing the generic directory from your larger code base and use the publicly available package instead.
After all, you’re the very first user of your open source project.
Further development
When you start using the package in your code base the development flow is likely to change: previously the now-open-source-code has been a part of your code base; you could consume the changes right away but now it’s as much of an external package as any other 3rd party package used in your code.
Thus, when you develop a new feature in your shiny new open source project you’ll have to publish it first in order to be able to consume it in your larger code base. However you cannot publish it if you aren’t positive it works, because once published it might affect other users.
So here are a few things you can do in order to avoid publishing broken versions:
- Cover your code with tests, both unit tests and end-to-end tests. I don’t think I have to convince you how important the tests are.
- Package and install the new version of the package locally, into your larger code base. Once verified that everything works as expected you may publish it.
- Publish a beta version which is available only for those who explicitly want it rather than to the whole world.
For example in npm package registry there are dist tags that can be used for this purpose.
The default tag is
latestand when you runnpm install mypackageit effectively runsnpm install mypackage@latest. When you publish a new version under another tag, for instancebeta, one will have to explicitly install from this tag in order to get the latest version:npm install mypackage@beta.
Wrapping it up
Unlike the previous part, which was completely theoretical, this part actually requires some work from you. Depending on your experience and learning abilities it might take you a few days or even weeks to complete this mandatory step. And we didn’t even start yet.
This is why it is my duty to ask you again:
Are you really prepared to give a decent amount of your precious time to the community?
Thanks for reading, make sure you follow me here or on Twitter if you don’t want to miss the next part in which we’re going to talk about Documentation.

Latest comments (0)