Table of Contents
Models
We can describe models as representations of real-world data or objects. For example a blog post. If we are to build a model around a blog post, we could have a title, the date of publishing, maybe a cover image, definitely the body of the post. Let us work with this and see how we can model these bits of information.
As you might have thought, since we are talking about the blog, we would be working inside the blog app now. And since we are dealing with creating models, we would be working with the models.py file.
However, before creating the model, let us edit our settings.py file to prepare our Django project to accept media files, in this case, the cover image. Move over to settings.py file, and at the bottom add:
123. MEDIA_ROOT = os.path.join(BASE_DIR, 'media/')
124.
125. MEDIA_URL = '/media/'
MEDIA_ROOT is set to a folder named 'media' inside the base directory of the project. While the MEDIA_URL is what URL would be used to access media files.
Creating Models
Models are similar to objects. Well, they are actually objects and creating them looks like this:
1.  from django.db import models
...
...
4.  class Blog(models.Model):
You can read more about Django models here.
You can also give it another name asides Blog, but since we are dealing with the blog app, this name is reasonable.
In our model we need:
- A field for post Title
- A field for Date
- A field for Cover image
- A field for post Content
The Django site gives us quite a lot of fields that we can use in our objects. Searching through the site, we find some we might need.
- CharField for the title
- DateTimeField for the dateeverytime
- ImageField for the cover image
- TextField for the post
Let us create our model and see how it looks:
4. class Blog(models.Model):
5.     title = models.CharField(max_length=50)
6.     raw_date = models.DateTimeField()
7.     cover = models.ImageField(upload_to='images/')
8.     content = models.TextField()
The title is set to models.CharField, and the max_length attribute is set to 50 characters. The max_length attribute is a required argument for the CharField.
The DateTimeField and the DateField fields require no positional argument. However, it could take some optional argument, such as auto_now which sets it to the current date and time every time the model is updated. You can find others here.
Also to format the date in a more presentable format we could use strftime. To do that we would be adding a function to our object.
10.     def date(self):
11.         return self.upload_date.strftime('%b %d, %Y')
As explained on the site, this formating method %b %d, %Y,would give a result like Jun 12, 2019 or Nov 13, 2019.
The next field is the TextField which is used for the content. We use a TextField and not a CharField because TextField is designed for long text content. If yoy remember, we said CharField requires a max_length attribute. This attribute isn't required by a TextField.
Your models.py, at this point, should look like:
1.  from django.db import models
2.
3.
4.  # Create your models here.
5.  class Blog(models.Model):
6.      title = models.CharField(max_length=50)
7.      raw_date = models.DateTimeField()
8.      cover = models.ImageField(upload_to='images/')
9.      content = models.TextField()
10.
11.      def date(self):
12.          return self.raw_date.strftime('%b %d %Y')
Registering Models

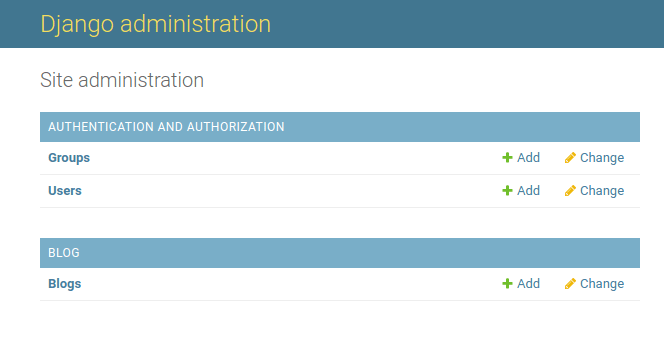
To register a model we have created is to make it 'show up' in the admin site so we can add content and edit content. To register a model we open the admin.py file inside our blog app and add a few lines.
1. from django.contrib import admin
2. from .models import Blog
3. # Register your models here.
4. admin.site.register(Blog)
This registers the model named Blog, on the admin site.

However, if you try clicking on the Blog section, you get an Operational error.
The exception value is 'no such table blog_blog'. This might tell you that it's a database problem. Remembering something we learned in an earlier section about databases, we need to migrate the changes we have made to the models.py file. Almost all changes to models.py would require migrations before moving on. To do this, open your terminal, makemigrations and then migrate.
/awesome-project$ python manage.py makemigrations
and then:
/awesome-project$ python manage.py migrate
Note: A migrations folder is automatically created inside the blog directory. Never delete this folder as it could cause serious issues for your app and database. Speaking from experience 😵. It's fixable though, just in case you're curious. 😉
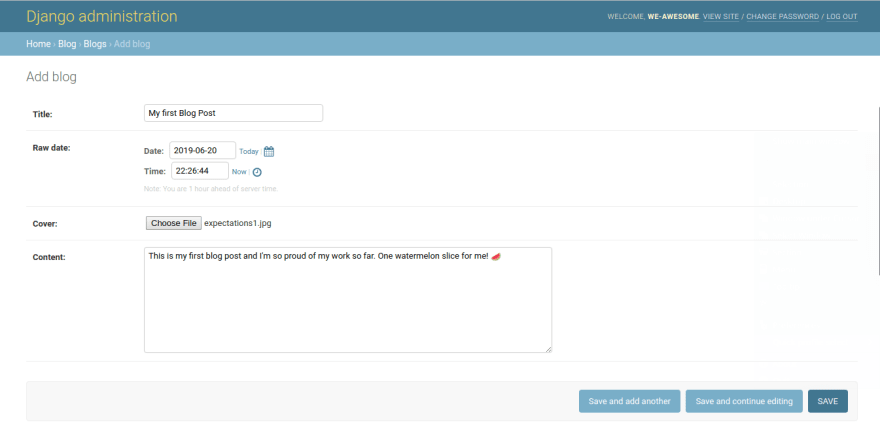
Loading the admin site and checking the Blog opens a page that shows we have 0 Blog posts. Click on the add button to add a post.

Saving the new post, we see it named a "Blog object (1)". We don't want this. To adjust this we another function:
14.     def __str__(self):
15.         return self.title
This change doesn't require migrations. If you attempt to migrate, it says 'No changes detected'.
If you check the blog app in the admin site now, you would see that 'Blog object (1)' has changed to the title of the blog post.
We can leave this page as it is, but to make it easier we could do a bit of customization. Open your admin.py file and edit it to look similar to this:
1.  from django.contrib import admin
2.  from .models import Blog
3.  # Register your models here.
4.
5.
6.  class BlogAdmin(admin.ModelAdmin):
7.      list_display = ('title', 'date', 'cover')
8.      search_fields = ['title', 'content']
9.
10.
11.  admin.site.register(Blog, BlogAdmin)
Refreshing the blog app, we see a new look.

One last thing we would do is add a slug field. To do this, we first add a new field to our model:
5.  class Blog(models.Model):
6.      title = models.CharField(max_length=50)
7.      raw_date = models.DateTimeField()
8.      cover = models.ImageField(upload_to='images/')
9.      content = models.TextField()
10      slug = models.SlugField()
You could set a max_length attribute for the SlugField or not. If you don't set it, Django used 50 by default. The next thing we would do is set the slug as a prepopulated field. This would automatically set the slug based on one or more other fields. We want our slug to depend on the title so in admin.py we add a new line to the class:
1.  from django.contrib import admin
2.  from .models import Blog
3.  # Register your models here.
4.
5.
6.  class BlogAdmin(admin.ModelAdmin):
7.      list_display = ('title', 'date', 'cover', 'slug')
8.      search_fields = ['title', 'content']
9.      prepopulated_fields = {'slug': ('title',)}
10.
11.
12. admin.site.register(Blog, BlogAdmin)
Line 8 set the slug as a 'prepopulated' field that depends on the title. We also added slug to the list display to see what our slug is. If you attempt to makemigrations now (due to adding a new field), Django would give you 2 options, either provide a one-off default for already existing rows or quit and set a default in models.py. This is why it is better to completely build our model before adding objects to the database.
To move forward from this issue, we can quit and set a default in the models.py.
10. slug = models.SlugField(default='random-text')
Make the migrations again, migrate, then go to the already existing blog post, tweak the name a bit(you could add a space and remove it 😉)Just to trick the system to automatically set the name. Once done, save and check that everything works. When you're done, you can remove the default attribute in the SlugField, makemigrations and migrate again (It won't make much sense if multiple blog posts have the same slug🤷🏾♂️🤷🏾♀️).
You can read more about customizing the Django ModelAdmin here. In the next article, we would be seeing how we can add blog posts from the site, without going into the admin site.
Project can be found here
There would be no articles over the weekend. Play around with what you've learned and use it to create something nice. Enjoy your weekend
Until then, 🍊🍎🍍


Oldest comments (0)