What Is It?
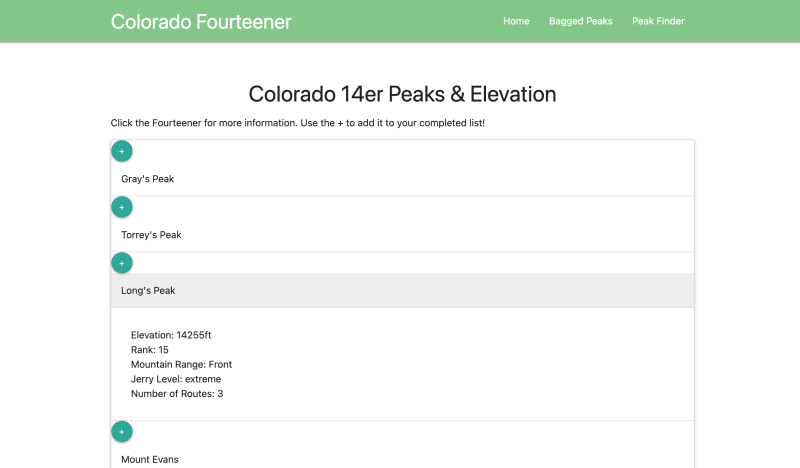
For my Phase I project, I built a website inspired by the peaks in Colorado above 14,000ft. As a native Coloradan, I have hiked a handful of Colorado's 14,000ft peaks (14ers) so I understand how hiking them all becomes a bucket list item for hikers.
The website was built as a way to track how many of the peaks have been hiked or "bagged" and reference the complete list of existing 14ers in CO. Basing my website around a topic I was interested in was a key factor in keeping me motivated through the process.

The Code
1. The API
I had access to a public API containing data on Colorado peaks. I used this data to populate the list of available peaks. I fetched the data from the API as soon as the home page was rendered so that the page wouldn't be waiting on a server request when rendering the data.
const APIFetch = () => {
    fetch(" ")
    .then(function(response) {
        return response.json();
    })
    .then(function(data){
        console.log('data', data);
    })
}
2. Building Navigation
The navigation bar was the only portion of the website built into the HTML file, because it would be displayed at all times. The other "page" elements within the nav bar were built and appended with JavaScript to avoid redirects.
Each section of the nav bar had a click eventListener attached to render the new page.
const homeLinkEvent = () => {
    homeLink().addEventListener('click', renderHome)
3. Button Click Events
The click events were originally built outside of the functions that build out each page, but this quickly became an issue. The data from the fetch and page render was outside of the scope of the button so I ended up writing those eventListeners and callback functions within each page load function.
Examples in my code include the renderGoal() and renderList() functions in index.js.
Takeaways
1. Materialize CSS Pros and Cons
Materialize CSS was a tool I found to quickly add a consistently formatted style to a page without having to write it all from scratch.
I used this to add most of the style to the website, including the navigation bar, the collapsible information panel, and the button styling effect.
<!-- Compiled and minified CSS -->
     <link rel="stylesheet" href="https://cdnjs.cloudflare.com/ajax/libs/materialize/1.0.0/css/materialize.min.css">
     <link rel="stylesheet" href="./style.css">
     <script src="https://code.jquery.com/jquery-3.6.0.min.js" integrity="sha256-/xUj+3OJU5yExlq6GSYGSHk7tPXikynS7ogEvDej/m4=" crossorigin="anonymous"></script>

<!-- Compiled and minified JavaScript -->
     <script src="https://cdnjs.cloudflare.com/ajax/libs/materialize/1.0.0/js/materialize.min.js"></script>
Using this method of styling became an issue when I needed to write some of my own formatting. My CSS formatting was overwriting Materialize formatting. I had to give my styling unique labels to differentiate between the two.
.leftJ {
    width: 25%;
  }
It's harder to tweak this type of formatting, for example, moving the button near the 14er without it opening the collapsible menu.
Overall, Materialize was perfect for what I needed, but I would recommend going all or nothing when it comes to using it to avoid overwriting the formatting.
2. Node Getters
Building "node getters" was a tip I learned from the project build videos. This was a way to minimize some the repetition in my code by assigning an HTML element to a JS variable.
For example I would frequently use this mainDiv variable to reset the main page and append new elements to it every time the nav bar was clicked.
const mainDiv = () => document.getElementById('main');
3. Loops
A final note on this project was a takeaway about looping through arrays. I wanted to make sure that a peak could only be added to the completed list a single time. This required me to have my button callback function loop through my array of completed items to check for a duplicate. I originally tried with this code:
for(let peak = 0; peak < goalList.length; peak++){
    let mtnName = div.innerText;
    if (goalList[peak] === mtnName){
        alert("You've already added this peak to your list!");
    }
    else {
        goalList.push(div.innerText);
    }
}
I was never getting an alert and nothing was being appended to my completed array but I also wasn't getting errors from the console. The loop was never being run because my goalList.length was never getting above zero. I tried many variations of this version before eventually getting stuck inside a loop.
This issue was resolved by assigning a boolean value to a variable. The loop was able to recognize the peak name as either already in the array or not in the array and then the append happens after the for loop.
const addToGoals = () => {
    let alreadyHere = false;
    for(let peak = 0; peak < goalList.length; peak++) {
        let mtnName = div.innerText;
        if (goalList[peak] === mtnName){
            alreadyHere = true;
            alert("You've already added this peak to your list!");
        }
    }
    if (alreadyHere === false) {
        goalList.push(div.innerText);
    }
Final Thoughts
There are so many resources online for learning little tricks as you go. For instance I had to look up how to enter a new line in a string. \n
At the beginning this project was daunting, but as I worked through each step all the material I've learned clicked into place.

Top comments (0)