Every mobile application has a splash screen and an app icon, and together they provide the first impression. An app icon is displayed in various places, such as on an app store, on the device's app drawer, etc., whereas a splash screen is shown during the app startup. Adding a splash screen or an app icon to a React Native app can be an agile process.
In this tutorial, let's learn how to use an awesome package called react-native-bootsplash to display a splash screen when an app starts and then learn the process of adding app icons in a React Native app.
Prerequisites
To follow this tutorial, please make sure you have the following tools and utilities installed on your local development environment and have access to the services mentioned below:
-
Node.js version
12.x.xor above installed - Have access to one package manager such as npm or yarn or npx
- react-native-cli installed, or use npx
Note, the example app is created using React Native version 0.65.x.
Complete source code for this example is at this GitHub repo
Setup a React Native app
As an example for this tutorial, we will use a React Native project with two screens and React Navigation integrated.
To create a new React Native project and install the react-navigation dependencies, run the following command from the terminal window:
npx react-native init myAwesomeApp

# after the project directory is created
# navigate inside the directory
# and install the following dependencies

yarn add @react-navigation/native @react-navigation/native-stack react-native-safe-area-context react-native-screens
Inside src/ directory, create a new directory called navigation/ with a new file named RootNavigator.js. Add the following code to use the stack navigation pattern inside this file:
import * as React from 'react';
import {NavigationContainer} from '@react-navigation/native';
import {createNativeStackNavigator} from '@react-navigation/native-stack';

import HomeScreen from '../screens/HomeScreen';
import DetailScreen from '../screens/DetailScreen';

const Stack = createNativeStackNavigator();

const RootNavigator = () => {
  return (
    <NavigationContainer>
      <Stack.Navigator screenOptions={{headerShown: false}}>
        <Stack.Screen name="Home" component={HomeScreen} />
        <Stack.Screen name="Details" component={DetailScreen} />
      </Stack.Navigator>
    </NavigationContainer>
  );
};

export default RootNavigator;
Modify the App.js file:
import React from 'react';

import RootNavigator from './src/navigation/RootNavigator';

const App = () => {
  return <RootNavigator />;
};

export default App;
Now, let’s create two new screens. Start by creating a new directory called src/screens/ and inside it, add the first file with the name HomeScreen.js and with the following code snippet:
import React from 'react';
import {View, Text, StyleSheet, Pressable} from 'react-native';

const HomeScreen = ({navigation}) => {
  return (
    <View style={styles.screenContainer}>
      <Text style={styles.title}>Home Screen</Text>
      <Pressable
        style={styles.buttonStyle}
        onPress={() => navigation.navigate('Details')}>
        <Text style={styles.buttonTextStyle}>Go To Detail Screen</Text>
      </Pressable>
    </View>
  );
};

const styles = StyleSheet.create({
  screenContainer: {
    flex: 1,
    justifyContent: 'center',
    alignItems: 'center',
    backgroundColor: '#fff',
  },
  title: {
    fontSize: 32,
  },
  buttonStyle: {
    height: 54,
    width: '80%',
    marginTop: 32,
    borderRadius: 8,
    alignItems: 'center',
    justifyContent: 'center',
    backgroundColor: '#2EE59D',
    shadowRadius: 5,
    shadowOpacity: 0.7,
    shadowColor: 'rgba(46, 229, 157, 0.5)',
    shadowOffset: {
      width: 0,
      height: 3,
    },
  },
  buttonTextStyle: {
    color: '#fdfdfd',
    fontWeight: '700',
  },
});

export default HomeScreen;
Now, add the second screen component file, DetailScreen.js, and the following code snippet:
import React from 'react';
import {View, Text, StyleSheet, Pressable} from 'react-native';

const DetailScreen = ({navigation}) => {
  return (
    <View style={styles.screenContainer}>
      <Text style={styles.title}>Detail Screen</Text>
      <Pressable
        style={styles.buttonStyle}
        onPress={() => navigation.navigate('Home')}>
        <Text style={styles.buttonTextStyle}>Go To Home Screen</Text>
      </Pressable>
    </View>
  );
};

const styles = StyleSheet.create({
  screenContainer: {
    flex: 1,
    justifyContent: 'center',
    alignItems: 'center',
    backgroundColor: '#fff',
  },
  title: {
    fontSize: 32,
  },
  buttonStyle: {
    height: 54,
    width: '80%',
    marginTop: 32,
    borderRadius: 8,
    alignItems: 'center',
    justifyContent: 'center',
    backgroundColor: '#2EE59D',
    shadowRadius: 5,
    shadowOpacity: 0.7,
    shadowColor: 'rgba(46, 229, 157, 0.5)',
    shadowOffset: {
      width: 0,
      height: 3,
    },
  },
  buttonTextStyle: {
    color: '#fdfdfd',
    fontWeight: '700',
  },
});

export default DetailScreen;
With the boilerplate setup done, now let’s build the apps for iOS and Android.
For iOS, run the following command:
npx react-native run-ios
For Android, run the following command:
npx react-native run-android
Here is what the example app looks like in its current form. Notice that the splash screen and the app icon are defaults that come with React Native.
We are picking an icon from Flaticon.com for the example app.
After creating the original app icon, save it inside the directory src/assets/ and name the file original_icon. (Note: you can name the original icon file as per your requirement).

Tip: Make sure your initial app logo is 1024x1024px.
Installing react-native-bootsplash
The initial step is to install the react-native-bootsplash package and then generate assets using it.
Open the terminal window and execute the following command to install the package:
yarn add react-native-bootsplash

# or if using npm
npm install react-native-bootsplash
Next, for iOS, execute the command to install pods.
npx pod-install ios
Tip: If you use a React Native version lower than 0.60, please follow the instructions here to link the package manually.
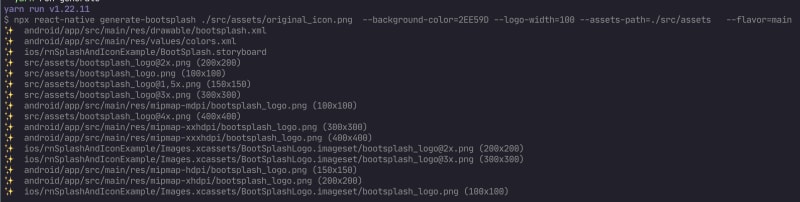
Next, add the following script in the package.json file under the "scripts" section:
"scripts": {
  "generate": "npx react-native generate-bootsplash ./src/assets/original_icon.png --background-color=2EE59D   --logo-width=100 --assets-path=./src/assets --flavor=main"
}
Here is each option described:
-
generate-bootsplashis the command to generate the assets. -
./src/assets/original_icon.pngis the path to the original icon file. The path may vary depending on where you save the file in your React Native project. -
--background-color=hexadecimal_valueis a color value in hexadecimal format. The color here is used as the background color of the splash screen. -
--logo-width=100is the width of the logo. This is a default value provided by the package -
assets-pathis the path to the assets directory. -
flavoris an Android only option. Let's pass the valuemainhere to target the default version of the Android app. You can learn more about Build Variants on Android here.
This will generate assets in the path specified for the option assets-path, a storyboard called BootSplash.storyboard file inside the ios/app-name directory, as well as generate assets for the Android app inside different sub-directories of the android/app/src/main/res folder.
Android requires five different sizes for different screen pixel densities. Icons for lower resolution are created automatically from the baseline (mdpi). Refer to the table below for more information on pixel densities:
| Resolution | Density | Pixel units |
|---|---|---|
| mdpi (Baseline) | 160 dpi | 1× |
| hdpi | 240 dpi | 1.5× |
| xhdpi | 320 dpi | 2× |
| xxhdpi | 480 dpi | 3× |
| xxxhdpi | 640 dpi | 4× |
Adding splash screen on iOS
Start by opening the file ios/app-name.xcodeproj in Xcode.

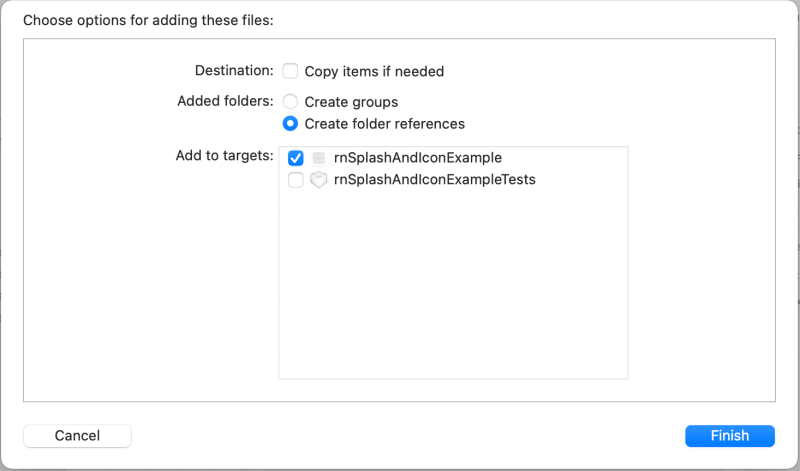
Then, drag the file BootSplash.storyboard under the Project directory in the Xcode file manager on the left side of the Xcode from the path ios/app-name/ directory.

After dragging it, Xcode will prompt the following to create a folder reference. First, make sure that under the Add to targets option, the app-name is selected. Then click the Finish button.
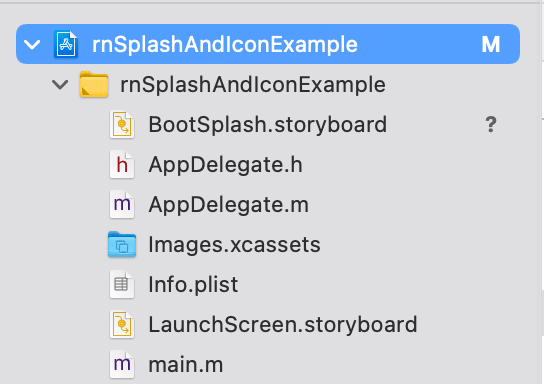
The BootSplash.storyboard file will now be represented in the file manager as shown below:
Click on the BootSplash.storyboard file to verify that the background color was added when generating assets.

Select the Xcode project from the file manager and select BootSplash from the dropdown menu next to Launch Screen File.

Now, open the ios/app-name/AppDelegate.m file and add the import to the following header reference:
#import "AppDelegate.h"

#import <React/RCTBridge.h>
#import <React/RCTBundleURLProvider.h>
#import <React/RCTRootView.h>

#import "RNBootSplash.h" // <- add this
In the same file, add the following line to initialize the BootSplash.
@implementation AppDelegate

- (BOOL)application:(UIApplication *)application didFinishLaunchingWithOptions:(NSDictionary *)launchOptions
{
  // ... other statements
   [RNBootSplash initWithStoryboard:@"BootSplash" rootView:rootView];
  return YES;
}
Adding splash screen on Android
Start by modifying the android/app/src/main/java/com/app-name/MainActivity.java file.
package com.rnsplashandiconexample;

import com.facebook.react.ReactActivity;

// ----- Add the following imports --------
import android.os.Bundle;
import com.zoontek.rnbootsplash.RNBootSplash;

public class MainActivity extends ReactActivity {

  /**
   * Returns the name of the main component registered from JavaScript. This is used to schedule
   * rendering of the component.
   */
  @Override
  protected String getMainComponentName() {
    return "rnSplashAndIconExample";
  }

  // ----- Add the following --------
  @Override
    protected void onCreate(Bundle savedInstanceState) {
    super.onCreate(savedInstanceState);
    RNBootSplash.init(R.drawable.bootsplash, MainActivity.this);
  }
}
Then, modify the android/app/src/main/res/values/styles.xml file:
<resources>

    <style name="AppTheme" parent="Theme.AppCompat.DayNight.NoActionBar">
        <item name="android:textColor">#000000</item>
    </style>

    <!-- Add the following lines (BootTheme should inherit from AppTheme) -->
    <style name="BootTheme" parent="AppTheme">
      <!-- set the generated bootsplash.xml drawable as activity background -->
      <item name="android:background">@drawable/bootsplash</item>
    </style>

</resources>
Next, modify the android/app/src/main/AndroidManifest.xml file by removing the original <intent-filter> tag and its contents. Replace it by adding android:exported="true" and create a new activity element to use the theme created in the previous step.
<activity
        android:name=".MainActivity"
        android:label="@string/app_name"
        android:configChanges="keyboard|keyboardHidden|orientation|screenSize|uiMode"
        android:launchMode="singleTask"
        android:windowSoftInputMode="adjustResize"
        android:exported="true">  <!--- Add this -->
</activity>

<!-- Then, add the following lines -->
<activity
      android:name="com.zoontek.rnbootsplash.RNBootSplashActivity"
      android:theme="@style/BootTheme"
      android:launchMode="singleTask">
      <intent-filter>
        <action android:name="android.intent.action.MAIN" />
        <category android:name="android.intent.category.LAUNCHER" />
      </intent-filter>
</activity>
Control how to display a splash screen when the navigator is mounted
You can control the behavior of the splash screen to display until all the children of the React Navigation's NavigationContainer are mounted for the first time. This can be done by using a prop on the NavigationContainer called onReady.
Modify the RootNavigator.js file by importing the react-native-bootsplash and adding the prop onReady.
// after other import statements
import RNBootSplash from 'react-native-bootsplash';

const RootNavigator = () => {
  return (
    <NavigationContainer onReady={() => RNBootSplash.hide()}>
      {/* Rest remains same */}
    </NavigationContainer>
  );
};
Testing the splash screen configuration
The last step to see the splash screen in action is to run the build command for both iOS and Android.
Open the terminal window and run the command to build the app for iOS and Android:
# for iOS
npx react-native run-ios

# for Android
npx react-native run-android
Here is the output after this step:

Adding app icon to iOS app
To generate assets for different iOS devices, I am using a free app icon generator called appicon.co.
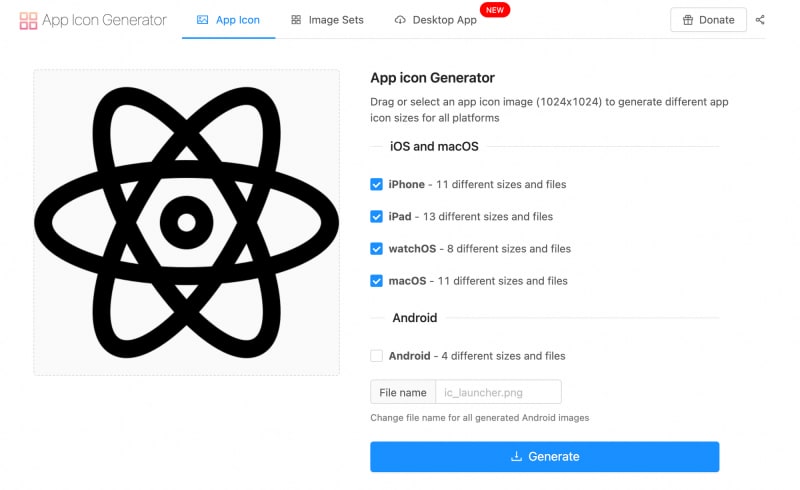
After generating all the image assets, you will be able to download them in a zip file.
Uploading an app icon for iOS follows the same process as using native iOS development. Open the file ios/app-name.xcodeproj in Xcode. Select the Image.xcassets from the file manager. Then select the AppIcon.
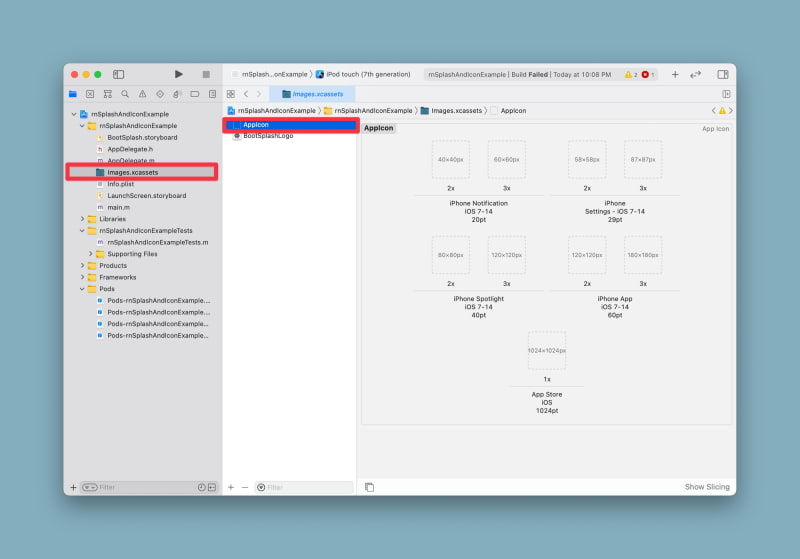
Drag and drop all the required image assets after downloading and unzipping them from appicon.co. Place the images as per the necessary pixel densities. After you are done, here is how the Xcode might look like:

Open a terminal window and run the command to build an app for iOS:
npx react-native run-ios
After the rebuild, the app icon will display.

Adding app icon to Android app
The leverage react-native-bootsplash package generates all the app icons for Android and stores them in the multiple sub-directories under the android/app/src/main/res directory.

The simple way here is to replace the default values for the properties android:icon and android:roundIcon in the android/app/src/main/AndroidManifest.xml file to point to the bootsplash_logo file name.
 <application
      android:name=".MainApplication"
      android:label="@string/app_name"
      // modify the two lines below
      android:icon="@mipmap/bootsplash_logo"
      android:roundIcon="@mipmap/bootsplash_logo"
      // ----------------------------
      android:allowBackup="false"
      android:theme="@style/AppTheme">
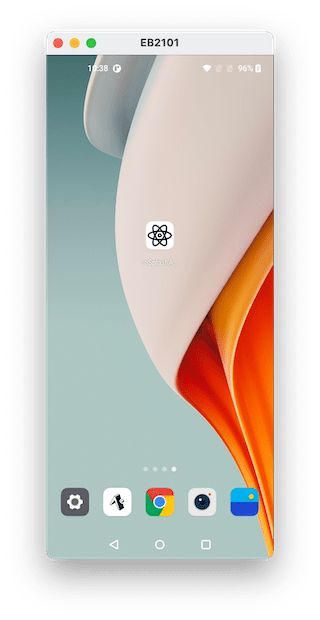
After this modification, rebuild the Android app using the following command from a terminal window:
npx react-native run-android
After the rebuild, the app icon will display.
Conclusion
Once you get the hang of this process, it doesn't take much time. Those are all the necessary steps to add a splash screen and an app icon to a React Native app.
For more advanced usage of react-native-bootsplash please check its official documentation here on GitHub. There are some advanced strategies explained there, including animating the splash screen.
Finally, don't forget to pay special attention if you're developing commercial React Native apps that contain sensitive logic. You can protect them against code theft, tampering, and reverse engineering by following our guide.
The complete source code for this example is at this GitHub repo

Top comments (0)